📑 Table of Contents ▶
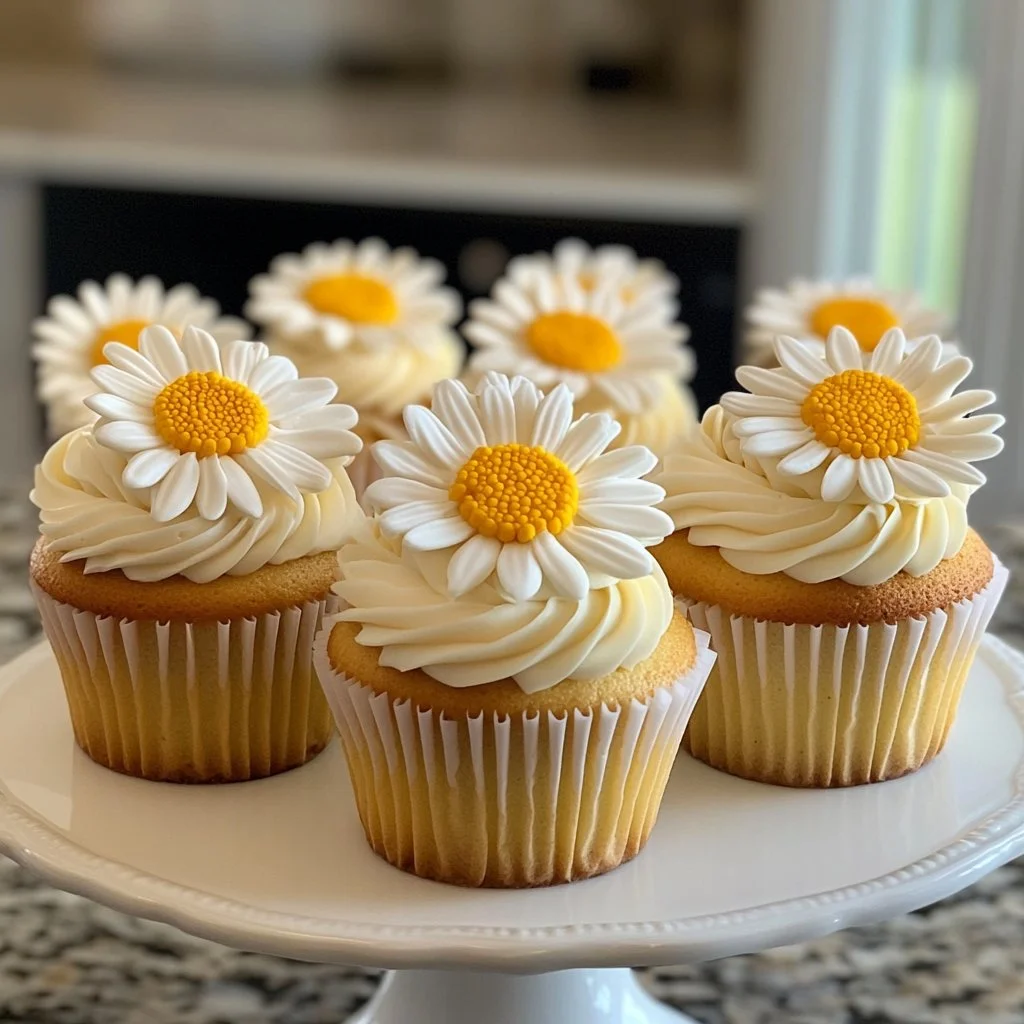
Super Cute Daisy Cupcakes
Creating lovely treats that bring smiles to faces transforms an ordinary day into something special. Making Super Cute Daisy Cupcakes represents the fun of baking and the joy of sharing delightful desserts with loved ones. Cupcakes have a unique charm, and with a touch of imagination, they can become whimsical edible art.
Growing up, I often found myself in the kitchen experimenting with different flavors and techniques. Those early days of baking sparked a passion inside me. As I mixed and matched ingredients, I discovered the thrill of creating delicious treats that family and friends adored. Every cupcake became an opportunity to express creativity and share joy.
These Daisy Cupcakes embody that spirit. They not only taste fantastic but also look delightful with their flower-like decorations. It’s rewarding to serve these cheerful creations at gatherings or celebrations, making moments memorable and uplifting. The process is simple enough for beginners yet offers a wonderful chance for more experienced bakers to play with flavors and designs.
Let’s dive into the fun of making Super Cute Daisy Cupcakes that will brighten any occasion.
Part 1 — Super Cute Daisy Cupcakes
Fundamentals
Before diving into the baking process, understanding the fundamentals of cupcake creation is essential. Super Cute Daisy Cupcakes start with a delightful base made from buttermilk, soft unsalted butter, and sugar. These key ingredients lend a rich flavor that serves as the perfect canvas for delicious cream cheese frosting and vibrant decorations.
In a typical cupcake recipe, achieving the right balance of sweetness and moisture is crucial. Using a combination of granulated sugar and buttermilk ensures that cupcakes remain moist and tender. Additionally, eggs not only provide structure but also enrich the flavor, creating a foundation that holds up beautifully to frosting and decoration.
Always remember to gather all your ingredients before you start baking. This preparation sets you up for success and allows the baking process to flow smoothly. Knowing how each ingredient contributes to the overall cupcake will lead to fantastic results.
Preparation/setup
Start by preheating your oven to 180°C (350°F). Preparing the baking environment ensures even baking. Line your cupcake tray with colorful cupcake liners to bring extra cheer to your daisy cupcakes. This step adds a whimsical touch before even reaching the frosting stage.
Next, mix your dry ingredients. In a bowl, combine all-purpose flour, corn starch, baking powder, baking soda, and a pinch of salt. This step allows the leavening agents to distribute evenly, ensuring that each cupcake rises nicely in the oven.
In a separate large mixing bowl, cream together the soft unsalted butter and sugar until light and fluffy. This process introduces air into the mixture, creating a lighter texture for your cupcakes. Implementing the right technique while creaming will yield the perfect base for your delightful daisy cupcakes.
Ingredients
To craft these lovable treats, you will need the following ingredients:
- 140 ml Buttermilk
- 120 g Soft unsalted butter
- 150 g Granulated sugar
- 2 Eggs
- 1 tbsp Vanilla extract
- 160 g All-purpose flour
- 20 g Corn starch
- 1 tsp Baking powder
- ½ tsp Baking soda
- 1 pinch Salt
- 160 g Cream cheese (room temperature for one hour)
- 100 g Soft unsalted butter
- 300 g Icing sugar
- 1 tsp Vanilla extract
- Yellow and orange food coloring
Directions
- Mix the wet ingredients: Gradually add the eggs and vanilla extract to the butter mixture, mixing thoroughly after each addition.
- Combine dry ingredients with wet: Gradually include the dry mixture and buttermilk into the creamed butter and eggs. Alternate between adding the flour mixture and buttermilk to maintain an even texture.
- Spoon into cases: Fill each cupcake liner about two-thirds full with batter, ensuring equal distribution among all the liners.
- Bake: Place the tray in the preheated oven and bake for about 18-20 minutes or until a toothpick inserted into the center of a cupcake comes out clean.
- Cooling time: Once baked, allow the cupcakes to cool in the tray for about 10 minutes. Transfer them onto a wire rack to cool completely.
Next, you’ll prepare the delightful cream cheese frosting.
- Beat the cream cheese: In a mixing bowl, beat the cream cheese and soft unsalted butter until smooth.
- Add icing sugar and vanilla: Gradually mix in the icing sugar and a teaspoon of vanilla extract until well blended.
- Color the frosting: Divide the frosting into two parts and color with yellow and orange food coloring to create a vibrant palette.
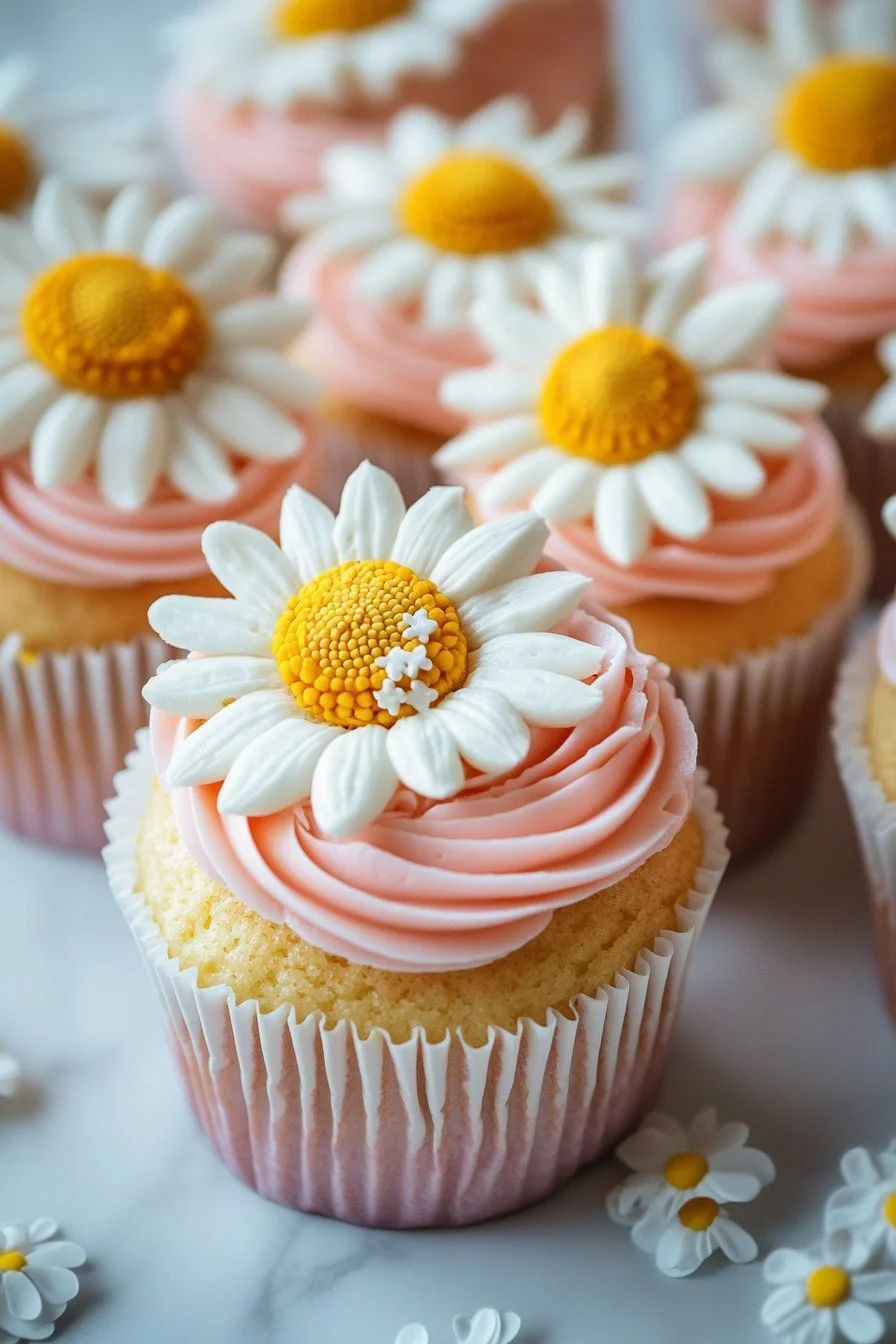
- Decorate: Use a piping bag fitted with a flower tip to create daisy designs on each cupcake. Pipe yellow petals around a small mound of orange frosting in the center.
Part 2 — Crafting the Perfect Daisy Cupcakes
Technique
While the ingredients create the flavor, technique brings your Super Cute Daisy Cupcakes to life. Proper mixing, baking, and decorating techniques elevate the final presentation and taste. Focus on achieving a smooth batter by mixing until just combined; overmixing can lead to dense cupcakes.
When decorating your cupcakes, use a steady hand and consistent pressure when piping. Starting from the center, swirl the frosting outward to form the petals. Adjust the pressure as needed to keep the petals even and define. Practice on a plate before piping directly onto your cupcakes if necessary.
Tips/tricks
- Room temperature ingredients: Ensure your eggs and butter are at room temperature for easier blending, resulting in a smooth batter.
- Don’t open the oven too early: Resist the urge to check on your cupcakes during the first 15 minutes of baking. Opening the oven door can affect their rising.
- Use a kitchen scale: Weighing your ingredients provides precision, ensuring more consistent results across batches.
- Piping mastery: Consider practicing your piping technique on parchment paper to gain confidence before attempting the decoration on the actual cupcakes.
Part 3 — Perfecting Results
Perfecting results
To achieve the perfect Super Cute Daisy Cupcakes, attention to detail in every step matters. Pay close attention to your oven temperature, as different ovens can yield varying results. Use an oven thermometer if necessary to ensure accuracy.
Once baked, allow your cupcakes to cool completely before frosting. Adding frosting to warm cupcakes can cause it to melt, ruining your decoration.
Experiment with decorating techniques; creating different petal shapes or adding sprinkles can personalize each cupcake. This invites creativity into your baking process.
Troubleshooting/variations
- Cupcakes sinking: If your cupcakes sink, check your leavening agents. If they’re expired or not mixed properly, they can fail to provide lift.
- Dry texture: Overbaking even by a few minutes can lead to dry cupcakes. Keep an eye on the clock as baking times can vary.
- Frosting not holding shape: If your frosting is too runny, refrigerate it for a few minutes to firm up before piping.
Consider flavor variations, such as adding lemon zest or almond extract to the batter for a unique twist. Create a chocolate version by swapping a portion of the flour for cocoa powder, enhancing their appeal.
Part 4 — Presentation and Serving
Serving/presentation
Daisy Cupcakes stand out through their charming presentation. Arrange them on a decorative plate or cake stand for captivating visuals. Garnishing with edible glitter or sprinkles can add a whimsical touch that’s sure to impress.
When serving, a simple coffee or tea pairs nicely with these sweet treats. Their light and fresh flavors complement warm beverages beautifully, making them an ideal afternoon snack or dessert.
Pairings/storage
Keep Super Cute Daisy Cupcakes fresh by storing them in an airtight container at room temperature for up to three days. If you’re hoping to enjoy them longer, refrigerating them will help, though this may change the texture of the frosting.
If you plan to frost the cupcakes later, freeze the un-frosted cupcakes for up to three months. Allow them to thaw and decorate as needed for a delightful treat anytime.
Making these fun Super Cute Daisy Cupcakes invites joy into your baking experience. Each step allows you to express creativity while sharing smiles and deliciousness with others. Measuring accurately, maintaining technique, and enhancing presentation ensure that your baking endeavors delight everyone. This scrumptious treat will surely bring happiness to any occasion!
Print
Super Cute Daisy Cupcakes
- Prep Time: 15 minutes
- Cook Time: 20 minutes
- Total Time: 35 minutes
- Yield: 12 servings
- Category: Dessert
- Method: Baking
- Cuisine: American
- Diet: Vegetarian
Description
Delightful cupcakes decorated like daisies with a rich cream cheese frosting, perfect for celebrations or gatherings.
Ingredients
- 140 ml Buttermilk
- 120 g Soft unsalted butter
- 150 g Granulated sugar
- 2 Eggs
- 1 tbsp Vanilla extract
- 160 g All-purpose flour
- 20 g Corn starch
- 1 tsp Baking powder
- ½ tsp Baking soda
- 1 pinch Salt
- 160 g Cream cheese (room temperature)
- 100 g Soft unsalted butter
- 300 g Icing sugar
- 1 tsp Vanilla extract
- Yellow and orange food coloring
Instructions
- Preheat your oven to 180°C (350°F) and line a cupcake tray with liners.
- In a bowl, combine the all-purpose flour, corn starch, baking powder, baking soda, and salt.
- Cream together the soft unsalted butter and granulated sugar until light and fluffy.
- Gradually add the eggs and vanilla extract to the creamed butter mixture, mixing thoroughly.
- Alternately add the dry mixture and buttermilk to the creamed mixture, maintaining an even texture.
- Fill each cupcake liner about two-thirds full with batter.
- Bake for about 18-20 minutes or until a toothpick comes out clean.
- Allow the cupcakes to cool in the tray for 10 minutes, then transfer to a wire rack.
- For the frosting, beat the cream cheese and soft unsalted butter until smooth.
- Gradually mix in the icing sugar and vanilla until well blended.
- Color the frosting into two parts with yellow and orange food coloring.
- Using a piping bag fitted with a flower tip, decorate each cupcake with daisy designs.
Notes
Ensure room temperature ingredients for better blending. Avoid opening the oven door too early to prevent sinking.
