📑 Table of Contents ▶
How to Make Cakesicles
A special moment often calls for a delightful treat. Recall those summer days with friends, sharing laughter and sweet bites of cake. The joy that cakes bring can turn any gathering into a memorable experience. That’s where the idea of cakesicles comes in—they capture the essence of fun-filled moments.
Cakesicles combine the goodness of cake and frosting, coated in a rich chocolate shell. This fun treat makes a perfect dessert for parties, celebrations, or just a cozy night in. What’s remarkable is how customizable they are. With just a few ingredients, you can create a sweet masterpiece that reflects your unique taste.
Making cakesicles isn’t just about the final product; it’s also about enjoying the process. You’ll find yourself caught up in the excitement of layering flavors, dipping in chocolate, and decorating with sprinkles. Allow your creativity to shine while crafting these delightful treats.
Part 1 — Understanding Cakesicles
Fundamentals
Cakesicles are a playful twist on cake pops, offering a unique shape and presentation. They consist of a cake filling enveloped in a smooth chocolate casing. The end result is not only delicious but visually appealing. Your guests will be excited to bite into these sweet treats!
To create perfect cakesicles, focus on achieving the right balance between cake and frosting. This combination ensures your cakesicles hold their form while providing a decadent taste. Choose your favorite cake flavor, whether it’s classic vanilla or rich chocolate; the possibilities are endless.
Preparation/Setup
To get started, gather your ingredients and setup your workspace. Clear a counter or table and have all the ingredients within reach: your room-temperature cake, frosting, candy melts, and optional sprinkles.
Prepare a baking sheet by lining it with parchment paper. This will serve as your cooling station. Decide on the molds you’ll use; silicone molds are perfect for cakesicles, ensuring easy removal.
Ingredients
For this delightful recipe, you need just a few basic ingredients:
- 1 (9 x 13 inch) prepared cake (room temperature)
- ½ cup frosting (up to ¼ cup more if necessary)
- 24 oz candy melts or melting chocolate (2 bags)
- Additional candy melts for decorating (optional)
- Sprinkles for decoration (optional)
Directions
-
Cake Filling: Begin by crumbling the prepared cake into a large bowl. Aim for small, even crumbs; this ensures better mixing with frosting. Gradually mix in the frosting until you achieve a dough-like consistency. You want it moist enough to hold together but not too wet.
-
Molding: Take a small amount of the cake mixture and press it firmly into your cakesicle mold. Ensure it fills the mold adequately and packs down well. The more compact it is, the better it will hold together once you dip it in chocolate.
-
Chill: Place the filled molds in the refrigerator for at least 30 minutes. This step allows the filling to firm up, making it easier to dip in chocolate.
-
Dipping Method: Melt your candy melts or melting chocolate according to the package instructions. Once melted, carefully dip each cakesicle into the chocolate. Rotate to coat it fully and allow excess chocolate to drip off.
-
Spreading and Filling Method: Alternatively, you can use a spoon to spread melted chocolate over the cakesicle. Ensure the chocolate coats all surfaces evenly.
-
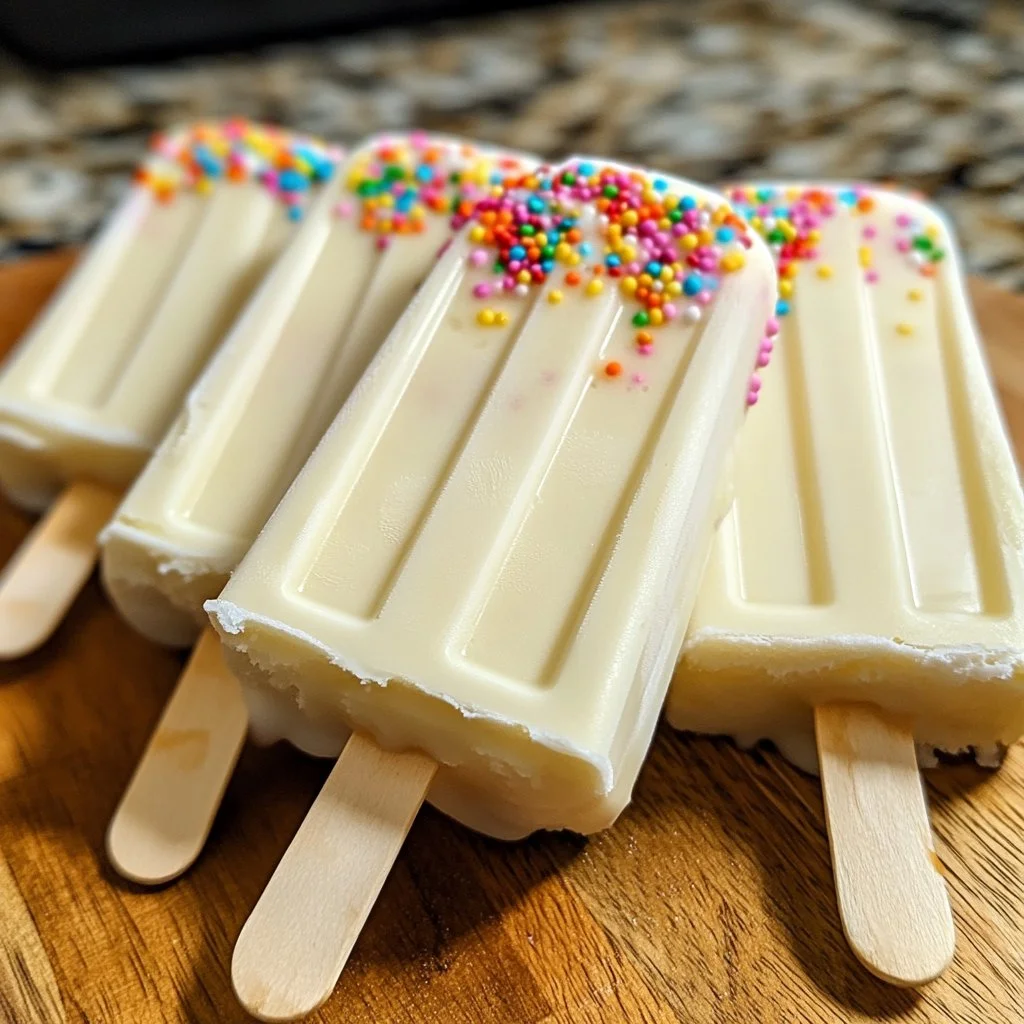
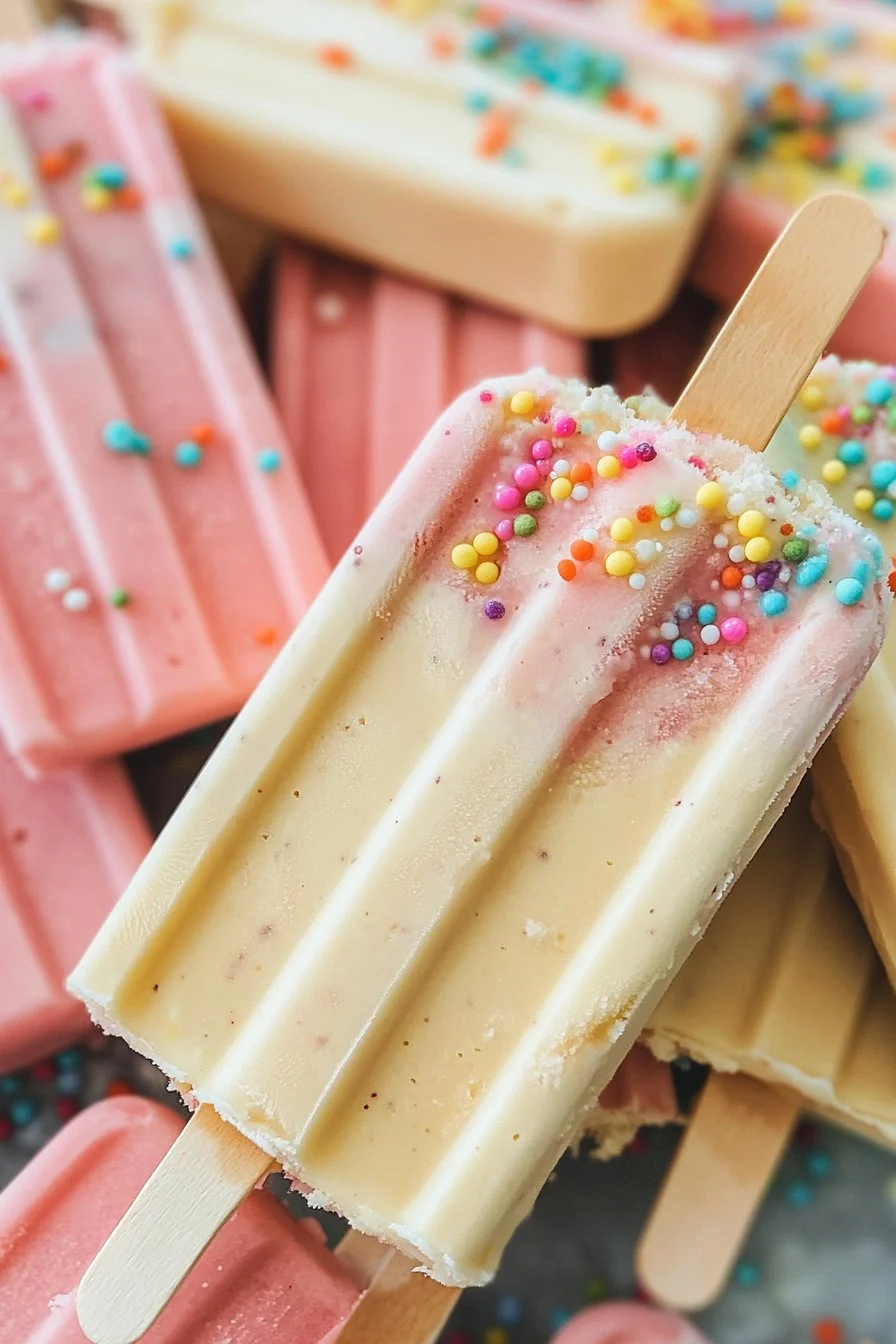
Decorate: If desired, add sprinkles or decorative toppings while the chocolate is still wet.
-
Final Chill: Return the coated cakesicles to the refrigerator to set for another 30 minutes. Once set, you can remove them from the molds and serve.
Part 2 — Techniques for Perfect Cakesicles
Technique
The key to mastering cakesicles lies in your technique. Start with a solid base of cake that isn’t too dry. The moisture from the frosting will add flavor and texture. Ensure the mixture holds its shape when pressed into the molds.
When it comes to dipping, don’t rush. Allow the chocolate to coat each cakesicle thoroughly. This creates a beautiful shell that not only enhances flavor but also provides a pleasing aesthetic.
Tips/Tricks
To enhance your cakesicles further, consider these tips:
- Use a combination of different cake flavors for variety.
- Experiment with colored candy melts to make your cakesicles festive.
- For a smoother finish, melt your chocolate at a lower temperature to avoid scorching.
- If your chocolate thickens, adding a teaspoon of vegetable oil can help restore a smooth consistency.
Part 3 — Perfecting Your Cakesicles
Perfecting Results
Achieving the perfect cakesicle involves a few adjustments. If your cakesicles seem too soft, add a bit more frosting. If they feel too dense, consider using slightly less frosting next time.
Experiment with the thickness of your chocolate coating. A thinner layer adds a delicate touch, while a thicker layer intensifies the chocolate flavor.
Troubleshooting/Variations
If your cakesicles don’t come out of the mold easily, it could be because they weren’t chilled enough. Ensure they spend adequate time in the refrigerator to solidify.
Feel free to get creative with flavors. You can add sprinkles or crushed candies to the filling for added texture. Seasonal themes can also be fun—think peppermint during the holidays or fruity flavors for summer.
Part 4 — Serving and Presentation
Serving/Presentation
Present your cakesicles on a decorative platter for an eye-catching display. Mixing different colors and sprinkles creates a delightful visual treat. You can also use cake pops stands or upright containers to showcase them elegantly.
Pairings/Storage
Cakesicles pair beautifully with a variety of beverages. Consider serving them alongside milk, hot chocolate, or even fruity drinks. Store your cakesicles in an airtight container in the refrigerator. They maintain their freshness for up to a week, although they rarely last that long!
In summation, making cakesicles is an enjoyable process that invites creativity and fun. With this guide, you can whip up a batch of these delightful treats that will surely impress your friends and family. Your kitchen will transform into a magical space filled with laughter and cake! Enjoy every bite!
Print
Cakesicles
- Prep Time: 15 minutes
- Cook Time: 30 minutes
- Total Time: 45 minutes
- Yield: 12 servings
- Category: Dessert
- Method: Chilling and Dipping
- Cuisine: American
- Diet: Vegetarian
Description
Delightful cakesicles combining cake, frosting, and chocolate for a festive treat perfect for any occasion.
Ingredients
- 1 (9 x 13 inch) prepared cake (room temperature)
- ½ cup frosting (up to ¼ cup more if necessary)
- 24 oz candy melts or melting chocolate (2 bags)
- Additional candy melts for decorating (optional)
- Sprinkles for decoration (optional)
Instructions
- Crumble the prepared cake into a large bowl until it forms small, even crumbs.
- Gradually mix in the frosting until a dough-like consistency is achieved.
- Press a small amount of the mixture firmly into the cakesicle mold.
- Chill the filled molds in the refrigerator for at least 30 minutes to firm up.
- Melt the candy melts according to package instructions.
- Dip each cakesicle in the melted chocolate, allowing excess to drip off.
- Alternatively, spread melted chocolate over each cakesicle using a spoon.
- Add sprinkles or decorative toppings while chocolate is still wet.
- Return to the refrigerator to set for another 30 minutes before serving.
Notes
Experiment with different cake flavors and colored candy melts for a fun twist. Ensure your cakesicles are completely chilled before removing from the molds.
