📑 Table of Contents ▶
Oreo Cake Pops
Baking has always played a significant role in my life, especially when it involves recipes that ignite joy. Oreo cake pops perfectly embody this. The first time I made them, I watched as my family gathered around the kitchen. There was a contagious excitement as we dipped the cake pops into the melted chocolate, sprinkling colorful toppings on top.
Oreo cake pops take the beloved cookie to an entirely new level. They combine the rich, creamy flavor of Oreos with the whimsical fun of cake pops. As we rolled the cake mixture into bite-sized balls, laughter filled the room. This simple recipe transformed an ordinary baking day into a cherished memory.
Working with such a famous treat made the experience even more magical. These cake pops don’t require fancy equipment or rare ingredients. Just a few staples, a touch of creativity, and a dash of enthusiasm transform the kitchen into a pastry paradise. Oreo cake pops unite flavors we love and create an indulgent dessert perfect for any gathering.
The joy of making Oreo cake pops lies in their versatility. Everyone loves a delightful treat, and these little bites pack a punch of flavor. As you dive into this recipe, you’ll discover how accessible and enjoyable baking can be. Let’s bring the fun back to the kitchen with Oreo cake pops!
The Art of Oreo Cake Pops
Fundamentals
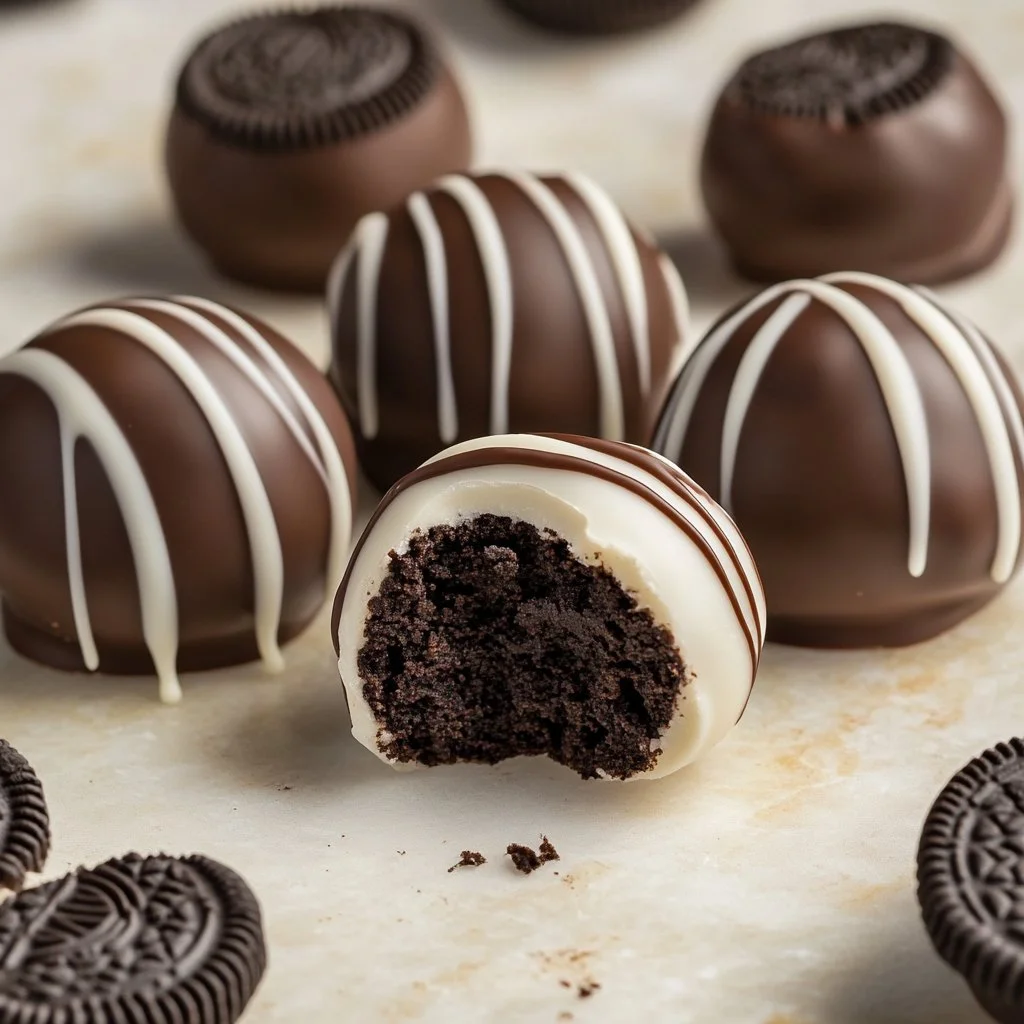
Oreo cake pops are a harmonious blend of simplicity and delight. At their core, they consist of crushed Oreos and cream cheese, rolled into delightful spheres and coated in chocolate. Understanding these fundamentals sets the foundation for crafting mouth-watering treats.
The magic begins with the classic Oreo cookie. Their unique flavor profile adds depth and richness to each pop. Fusing the crushed cookies with cream cheese creates a moist cake-like texture, perfect for forming into balls. The combination of these ingredients takes advantage of their inherent flavors, invoking nostalgia and comfort.
A few essential tools aid in this fun baking adventure. You need a mixing bowl, a baking sheet, and parchment paper. These items make the preparation easy and enjoyable, allowing you to focus on the fun of creating the pops. Gathering your tools and ingredients in advance streamlines the entire baking process, making it more satisfying.
Preparation/Setup
Preparation plays a crucial role in successfully making Oreo cake pops. Start by gathering all the ingredients. You will need Oreo cookies, cream cheese, chocolate for coating, and optional toppings like sprinkles or crushed cookies for decoration. Having everything at hand keeps the process smooth and efficient.
Begin by preheating the oven if you plan to warm your chocolate. While it heats, crush the Oreo cookies into fine crumbs. This creates the base for the cake pops. Use a food processor for a quick method, or place the cookies in a zip-top bag and crush them with a rolling pin if you prefer a more hands-on approach.
Mix the crushed Oreos with softened cream cheese until fully combined. The texture should be moldable yet firm enough to hold its shape when rolled. Once the mixture reaches the perfect consistency, scoop it using a tablespoon. Roll the scooped mixture into small balls and place them on a parchment-lined baking sheet. Refrigerate for about 30 minutes to firm them up before dipping.
Ingredients
To fabricate these delightful treats, gather the following ingredients:
- 1 package of Oreo cookies
- 8 oz cream cheese, softened
- 12 oz chocolate chips (milk or dark)
- Optional: sprinkles, crushed Oreos, or other toppings for decoration
These four elements come together to create an irresistible bite. The Oreos form the base, while the cream cheese adds moisture and richness. The chocolate coating creates a beautiful finish and adds an added layer of flavor.
Directions
- Start by crushing the Oreo cookies into fine crumbs. You can use a food processor or a rolling pin and a zip-top bag for this.
- In a mixing bowl, combine the crushed Oreos with softened cream cheese. Mix until fully incorporated, and the texture is moldable.
- Scoop out tablespoon-sized portions of the mixture and roll them into balls. Place each ball on a parchment-lined baking sheet.
- Refrigerate the cake pops for about 30 minutes. This step ensures they hold their shape during dipping.
- While the balls chill, melt the chocolate chips in a microwave or double boiler until smooth.
- Remove the chilled cake balls from the fridge. Dip the end of a stick in melted chocolate, then insert it into each ball.
- After inserting the sticks, dip each cake pop into the melted chocolate until fully coated. Let the excess chocolate drip off.
- Decorate the cake pops with optional toppings before the chocolate sets. Place them in a styrofoam block or a cup to allow them to stand upright while the chocolate hardens.
- Refrigerate again for about 15-20 minutes to ensure the chocolate is completely set.
Mastering Oreo Cake Pops
Technique
Perfecting the technique is key to ensuring your Oreo cake pops turn out delectable. Handling melted chocolate requires care. If you overheat the chocolate, it may seize, which affects its ability to coat the pops smoothly. Always melt it in short intervals, stirring in between, to maintain a creamy consistency.
Rolling the cake balls is another essential step. Aim for uniform sizes, so they all cook evenly. Using a small cookie scoop helps to achieve consistency and makes the process quicker. Ensure your hands are clean and slightly moistened when rolling to avoid sticking.
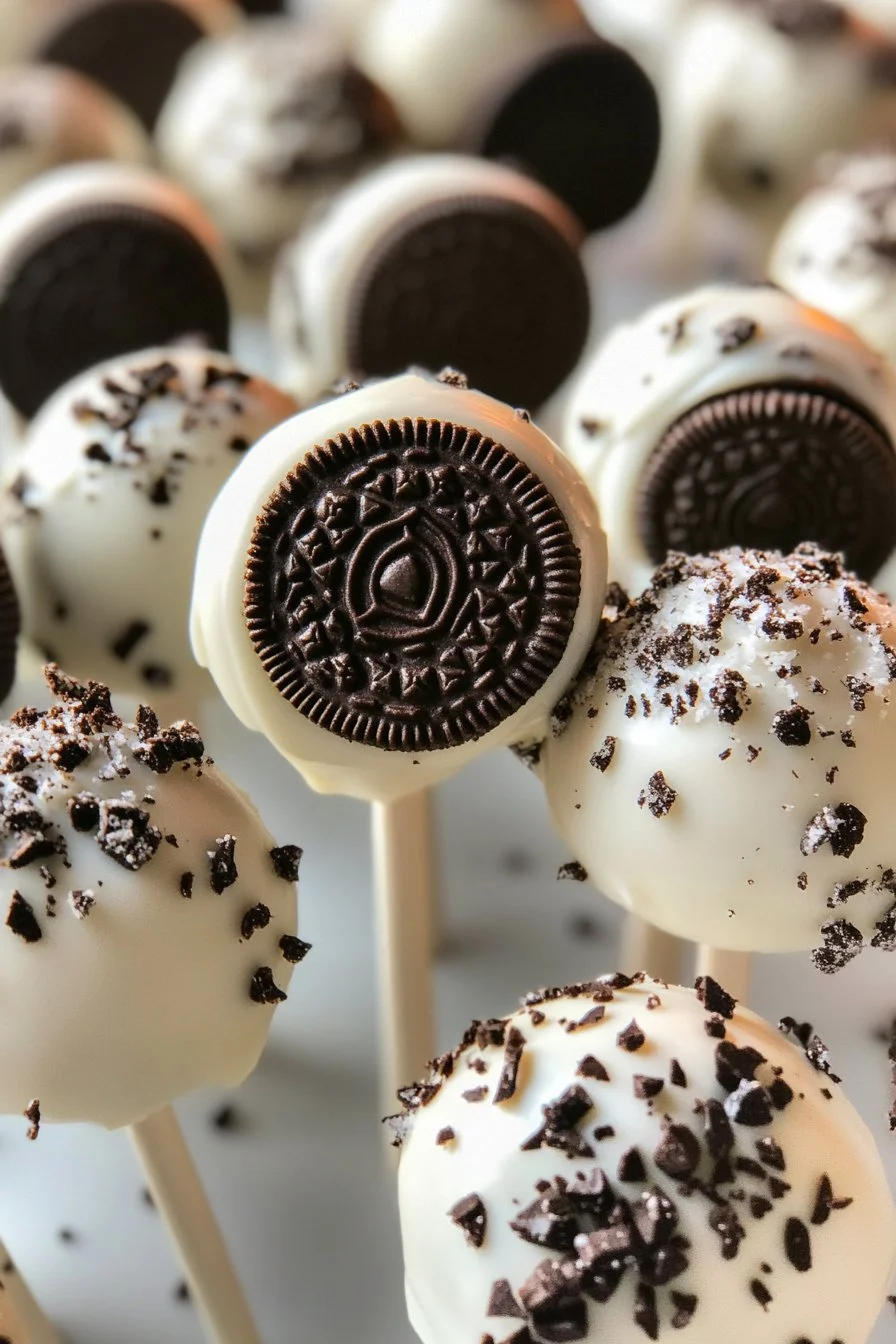
Once dipped, the decoration stage sparks creativity. Consider using colored sprinkles, crushed nuts, or drizzles of contrasting chocolate. Let your imagination guide your toppings to make your cake pops visually striking.
Tips/Tricks
A few useful tips can enhance your Oreo cake pop experience:
- Adjust the cream cheese: If the mixture feels too moist, add more crushed Oreo cookies to balance the moisture.
- Keep everything cold: Keeping your cake balls and melted chocolate cool helps avoid any mess while dipping.
- Try different chocolates: Experimenting with various chocolate types can offer new flavor profiles for your cake pops.
- Ensure even coating: A good way to coat the pops evenly is to hold them by the stick and dip them fully in the melted chocolate.
These small adjustments can elevate your final product, making them even more delicious and visually appealing.
Elevating Your Oreo Cake Pops
Perfecting Results
Success with Oreo cake pops comes from practice and refinement. Adjusting baking times and chilling periods promotes the best texture. If your cake pops are too soft, allowing them to chill longer ensures they maintain their shape during decoration.
Experiment with baking techniques if you’re feeling adventurous. For instance, you might consider utilizing flavored chocolate melts. This innovative idea provides endless opportunities to explore exciting flavors like mint, strawberry, or even peanut butter.
Pay attention to the size of your cake pops. If they are too large, they may struggle to set, while overly small pops may get lost in the rich flavors. Aiming for a consistent tablespoon-sized ball manages both shape and texture effectively.
Troubleshooting/Variations
Troubleshooting common issues ensures a smooth baking experience. If your chocolate won’t adhere to the cake pops, the chilling may not have been adequate. Keep the cake pops cold while you’re coating them to ensure a good bond with the chocolate.
If your pops crack after cooling, consider adjusting the chocolate’s temperature. Too hot or too cold may lead to texture abnormalities. Rest assured, any imperfections can become your delicious signature if you choose to embrace them.
Variations keep the excitement alive. Try swapping out Oreos for other chocolate cookies or adding flavor extracts like peppermint or vanilla for a twist. You can even mix in mini chocolate chips or nuts for added texture and flavor diversity.
Styling and Storing Oreo Cake Pops
Serving/Presentation
Presentation plays a vital role in serving your Oreo cake pops. Arrange them on a beautiful platter or display them in a decorative mug for friends and family to admire. Consider standing them upright in a block of foam, creating an eye-catching centerpiece for parties.
Using sticks to serve the cake pops adds a playful touch, enhancing the overall appearance. Dipping the ends of the sticks into chocolate before insertion not only secures the cake pops but also adds a delicate finishing touch.
Feel free to get creative with your presentation. Coordinate colors based on the occasion, such as festive themes for holidays or bright hues for birthday parties. These little details engage your guests and create an inviting atmosphere.
Pairings/Storage
Oreo cake pops pair beautifully with many treats. Consider serving them alongside a variety of sweets like brownies, cookies, or an assortment of chocolates. They make an excellent addition to dessert platters at gatherings.
For storage, keep these delectable cake pops in an airtight container in the refrigerator. They’ll maintain freshness for about a week, although they rarely last that long! Allow them to reach room temperature before serving for the best flavor experience.
By following these simple strategies, your Oreo cake pops can remain delightful for days. The fun of making these treats will linger long after they disappear.
Conclusion
Crafting Oreo cake pops brings joy and unforgettable memories into the kitchen. These delightful treats celebrate the cherished flavors of Oreos while offering a creative outlet for both novice and experienced bakers. The easy preparation process invites everyone to partake in the fun, celebrating the magic of shared culinary moments. With a little practice and the right techniques, you can master the art of Oreo cake pops and impress family and friends alike.
Print
Oreo Cake Pops
- Prep Time: 15 minutes
- Cook Time: 30 minutes
- Total Time: 45 minutes
- Yield: 20 servings
- Category: Dessert
- Method: Baking
- Cuisine: American
- Diet: Vegetarian
Description
Delicious Oreo cake pops combine the rich flavor of Oreos with cream cheese, rolled into bite-sized balls and coated in chocolate for a fun, indulgent treat.
Ingredients
- 1 package of Oreo cookies
- 8 oz cream cheese, softened
- 12 oz chocolate chips (milk or dark)
- Optional: sprinkles, crushed Oreos, or other toppings for decoration
Instructions
- Crush the Oreo cookies into fine crumbs using a food processor or rolling pin.
- In a mixing bowl, combine the crushed Oreos with softened cream cheese until fully incorporated.
- Scoop out tablespoon-sized portions of the mixture and roll them into balls.
- Place each ball on a parchment-lined baking sheet.
- Refrigerate the cake pops for about 30 minutes.
- While the balls chill, melt the chocolate chips in a microwave or double boiler until smooth.
- Remove the chilled cake balls from the fridge and dip the end of a stick in melted chocolate, then insert it into each ball.
- Dip each cake pop into the melted chocolate until fully coated and let the excess chocolate drip off.
- Decorate the cake pops with optional toppings before the chocolate sets.
- Place them upright in a styrofoam block or a cup while the chocolate hardens.
- Refrigerate again for about 15-20 minutes to ensure the chocolate is completely set.
Notes
For a fun twist, try different types of chocolate for coating and various toppings for decoration.
