📑 Table of Contents ▶
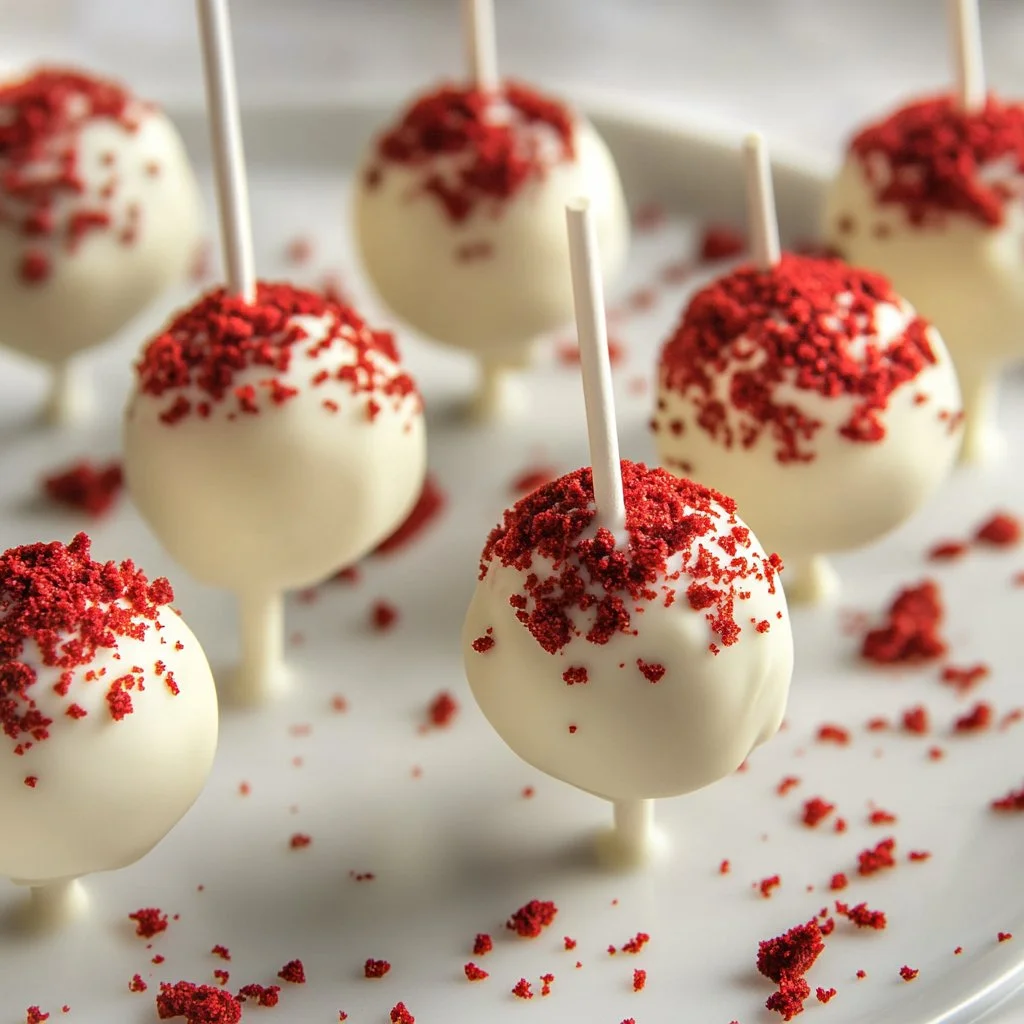
Juicy Red Velvet Cake Pops
Red velvet cake pops bring a delightful twist to traditional desserts. These bite-sized treats capture the classic flavors of red velvet in a fun and shareable form. The memory of indulging in rich, velvety cake coated in chocolate inspires the creation of these delicious cake pops.
The magic starts with a simple box of red velvet cake mix. Vivid colors and rich flavor evoke feelings of warmth and joy, making every bite a celebration. With moisture-rich textures and creamy frosting swirled in between, these cake pops effortlessly charm any crowd. Memories of gatherings filled with laughter, smiles, and indulgent desserts come flooding back when tasting these indulgent sweets.
Embracing the essence of celebration, juicy red velvet cake pops remind us that desserts should be fun, vibrant, and above all, delectable. They encourage creativity and fun in the kitchen, while also allowing time spent with friends and family to linger sweetly and joyfully.
Why You’ll Love These Juicy Red Velvet Cake Pops
Fundamentals
To make juicy red velvet cake pops, understanding the fundamentals is key. The process may seem complex, but breaking it down into manageable steps simplifies everything. Start with a passion for baking and a love for cake pops!
The first step lies in the cake itself. Mixing the red velvet cake mix with eggs, vegetable oil, and water creates a batter filled with flavor and color. Baking the cake until fully cooked gives it the perfect fluffy texture. Letting it cool completely sets the stage for the exciting part: transforming it into cake pops.
Crumbling the cooled cake and blending it with cream cheese frosting using powdered sugar creates a recognizable flavor profile. These steps are essential in preparing the pops, making the experience enjoyable.
Preparation/setup
Preparation sets the stage for success. Begin by preheating your oven according to the cake mix instructions; achieving the right baking temperature is crucial for optimal results.
While the oven warms up, gather all the ingredients: red velvet cake mix, eggs, vegetable oil, water, softened cream cheese, powdered sugar, vanilla extract, chocolate coating or candy melts, cake pop sticks, and sprinkles. Having everything within reach means you can smoothly transition from mixing to baking.
After mixing the cake batter, pour it into a prepared pan and pop it in the oven. While the cake bakes, there’s time to appreciate the rich aroma filling the kitchen. The anticipation builds, as everyone wonders about the colorful, delightful treats that will emerge in no time.
Ingredients
For juicy red velvet cake pops, the right balance of ingredients leads to success. You’ll need:
- 1 box red velvet cake mix
- 3 large eggs
- 1 cup vegetable oil
- 1 cup water
- 8 oz cream cheese, softened
- 1 cup powdered sugar
- 1 tsp vanilla extract
- 12 oz chocolate coating or candy melts
- Cake pop sticks
- Optional: Sprinkles for decoration
These ingredients unite to form an unforgettable dessert. The softness of the cake links seamlessly with the smooth cream cheese mixture, while the rich chocolate provides a sweet enveloping touch. This harmony makes each bite soft and satisfying.
Directions
Creating juicy red velvet cake pops is as fun as it is delicious. Follow these steps to make your delightful treats:
- Preheat your oven according to cake mix instructions.
- Prepare the red velvet cake mix as per the package directions (mix cake mix, eggs, oil, and water).
- Bake the cake for the recommended time. Allow it to cool completely.
- Once cooled, crumble the cake into a large bowl.
- In another bowl, mix the softened cream cheese, powdered sugar, and vanilla extract until smooth.
- Combine the cream cheese mixture with the crumbled cake and mix until well combined.
- Scoop out small portions and roll them into balls. Place on a baking sheet and chill in the refrigerator for about 30 minutes.
- Melt the chocolate coating or candy melts according to package instructions.
- Dip the end of each cake pop stick into the melted chocolate and insert it into a cake pop ball.
- Then dip the entire cake pop into the melted chocolate and let excess drip off.
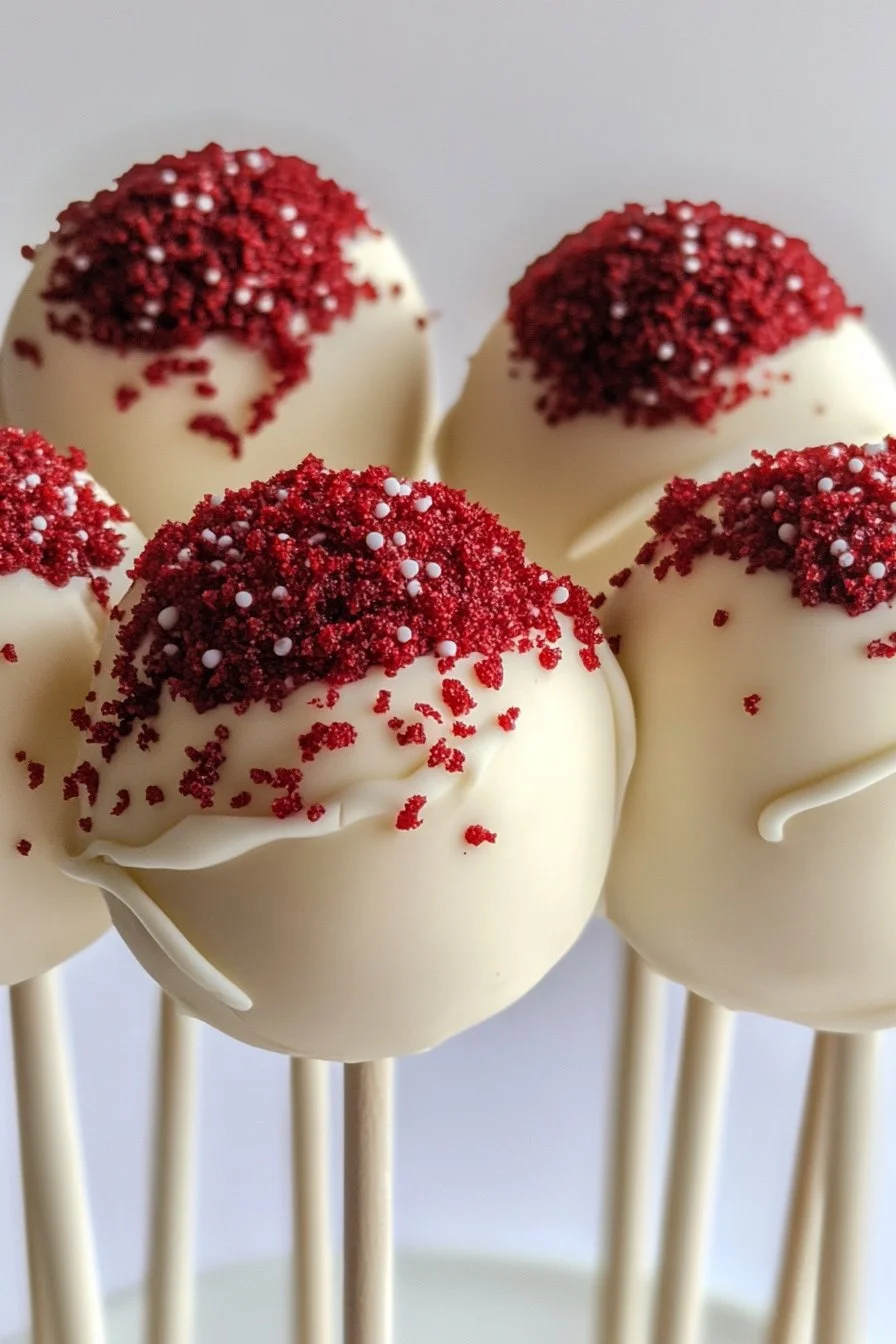
- Place on a baking sheet and sprinkle with sprinkles if desired.
- Allow to set completely before serving.
Elevating Your Cake Pop Experience
Technique
Creating the perfect red velvet cake pops requires some technique. Patience and attention to detail make all the difference. Focus on the right crumbling texture. Aim for a fine crumble so that every bite incorporates the rich flavors evenly.
Employ a gentle hand when mixing the cake and cream cheese. Overworking the mixture may lead to dry pops. Mixing should ensure everything combines while maintaining moisture.
Getting the chocolate coating right is another technique to master. Start with a good quality coating or candy melts. Melt them gently to avoid scorching. Allow the melted chocolate to thicken slightly before dipping the cake pops for an even and smooth finish.
Tips/Tricks
A few tips and tricks can elevate your red velvet cake pop-making experience. Always chill your cake balls before dipping them in chocolate. This helps maintain shape during the chocolate dipping process.
Experimenting with flavor can also add a personal touch. Consider adding a hint of almond extract for an alluring twist or opting for flavored melts instead of chocolate. Sprinkles make for enjoyable decorations, adding personality and fun.
If you have leftover chocolate, consider drizzling it on top for an eye-catching effect. Alternatively, let the pops sit a little longer in the refrigerator after coating to allow an extra layer of firmness.
Perfecting the Results
Perfecting Results
To ensure your juicy red velvet cake pops turn out perfectly, keep an eye on the baking time. Follow the package guidelines but remember that oven temperatures vary. Knowing when to check for doneness can make all the difference in texture.
Ensuring the cake cools completely before crumbling is crucial. Warm cake can create a mushy mixture, affecting the final product.
If the mixture feels too dry while rolling into balls, try adding a touch more cream cheese or frosting. This addition can enhance the texture and moistness, ensuring every pop is delightful.
Troubleshooting/Variations
Facing challenges while making cake pops? Don’t fret; here are some common troubleshooting tips. If cake pops fall off the sticks, there’s likely too much moisture. Ensure the cake is well-cooled and the mixture isn’t overly wet.
If your chocolate isn’t adhering well, consider re-melting and adding a little coconut oil. This adjustment can help achieve a smoother coating.
For variations, switch up the cake mix flavor! Try chocolate or lemon cake mixes for different flavor experiences. This can create a fun twist on the classic red velvet with minimal extra effort.
Serving and Storing Your Cake Pops
Serving/Presentation
Serving your cake pops can turn into a creative endeavor. Placing cake pops in a vibrant foam block offers an appealing display. Arranging them at different heights is visually exciting and can become a centerpiece at gatherings.
Consider pairing against colorful plates or decorative trays, heightening their visual charm. Presenting cake pops on skewers adds a rustic touch. These delightful desserts practically call for a photo session!
Pairings/Storage
While these juicy red velvet cake pops make an impressive table centerpiece, they also store well. Keep them in an airtight container in the refrigerator for up to a week. This ensures they stay fresh and delicious.
For serving, feel free to pair your cake pops with beverages like coffee or milk. These options complement the richness of the cake beautifully, accentuating each luscious bite.
For party settings, offering a blend of flavors can cater to various preferences. Mix in other types of cake pops or bite-sized treats to create a dessert platter that invites everyone to indulge.
Red velvet cake pops embody joyful moments, excellent creativity, and delightful flavors. They combine rich history with contemporary fun—a true treat for any occasion.
Print
Juicy Red Velvet Cake Pops
- Prep Time: 15 minutes
- Cook Time: 30 minutes
- Total Time: 45 minutes
- Yield: 20 cake pops
- Category: Dessert
- Method: Baking
- Cuisine: American
- Diet: Vegetarian
Description
Delicious bite-sized red velvet cake pops coated in chocolate, perfect for celebrations.
Ingredients
- 1 box red velvet cake mix
- 3 large eggs
- 1 cup vegetable oil
- 1 cup water
- 8 oz cream cheese, softened
- 1 cup powdered sugar
- 1 tsp vanilla extract
- 12 oz chocolate coating or candy melts
- Cake pop sticks
- Optional: Sprinkles for decoration
Instructions
- Preheat your oven according to cake mix instructions.
- Prepare the red velvet cake mix as per the package directions (mix cake mix, eggs, oil, and water).
- Bake the cake for the recommended time. Allow it to cool completely.
- Once cooled, crumble the cake into a large bowl.
- In another bowl, mix the softened cream cheese, powdered sugar, and vanilla extract until smooth.
- Combine the cream cheese mixture with the crumbled cake and mix until well combined.
- Scoop out small portions and roll them into balls. Place on a baking sheet and chill in the refrigerator for about 30 minutes.
- Melt the chocolate coating or candy melts according to package instructions.
- Dip the end of each cake pop stick into the melted chocolate and insert it into a cake pop ball.
- Then dip the entire cake pop into the melted chocolate and let excess drip off.
- Place on a baking sheet and sprinkle with sprinkles if desired.
- Allow to set completely before serving.
Notes
Chill cake balls before dipping to maintain shape during the chocolate coating process.
