
📑 Table of Contents ▶
- Easy Tonkotsu Ramen At Home
- Crafting Easy Tonkotsu Ramen At Home
- Fundamentals
- Preparation/setup
- Mastering the Art of Homemade Ramen
- Technique
- Tips/tricks
- Achieving Perfection in Ramen Crafting
- Perfecting results
- Troubleshooting/variations
- Serving and Enjoying Your Ramen Creation
- Serving/presentation
- Pairings/storage
- Conclusion
- FAQs – Easy Tonkotsu Ramen At Home
I’m Laloti Karla, and my journey with food has always revolved around creating memories and connections through simple, flavorful dishes. From the vibrant heart of my childhood kitchen, filled with the aromas of simmering broths, I learned that great cooking doesn’t require complexity. It’s about passion and a love for the ingredients. This love inspired me to create Yumoti.com—a space for food lovers seeking Easy Tonkotsu Ramen At Home and other delightful recipes.
Growing up, the kitchen was my playground. My grandmother’s effortless ability to transform basic ingredients into extraordinary meals taught me the magic of cooking. It was in her kitchen that I realized the language of love is often spoken through food. This simple, heartfelt approach is the foundation of Yumoti, where I share my passion for Easy Tonkotsu Ramen At Home and other soulful dishes.
At Yumoti, I aim to make cooking a joyful, less daunting experience. Whether you’re crafting a bowl of Easy Tonkotsu Ramen At Home or exploring other recipes, my goal is to help you find joy and confidence in every dish you create. Let’s dive into the art of making a comforting bowl of ramen, a dish that captures the essence of warmth and togetherness.

Easy Tonkotsu Ramen At Home
Description
Learn how to easily make delicious Tonkotsu Ramen at home with this step-by-step recipe. Enjoy authentic flavors in the comfort of your own kitchen!
Ingredients
- 3½ lb (1.6 kg) beef leg bones (roughly 6 pieces; or use 4.5 lb (2 kg) beef backbones)
- 1.3 lb (600 g) beef hock with skin (or use 1 beef foot/trotter)
- 2 QT (1.9 L) water
- 1 head garlic (3 oz, 85 g)
- 1 knob ginger (1 inch, 2.5 cm; skin on)
- 2 cups (480 ml) water
- 1 piece kombu (dried kelp) (6 x 6 inches, 15 x 15 cm per piece)
- 2 dried shiitake mushrooms (0.6 oz, 16 g)
- 5 iriko/niboshi (boiled and dried anchovies) (0.3 oz, 8 g; head and intestine removed)
- 2 Tbsp (30 ml) sake
- 2 Tbsp (30 ml) mirin
- 4 Tbsp (60 ml) soy sauce
- 2 Tbsp (30 ml) water
- 1 piece kombu (dried kelp) (2.5 x 2.5 inches, 6 x 6 cm per piece)
- 25 g Diamond Crystal kosher salt (about 3 Tbsp, to taste; please weigh your salt; add more salt rather than tare so the soup won’t get darker)
- 1 onion (medium)
- 2 green onions/scallions
- 1 cup (240 ml) katsuobushi (dried bonito flakes)
- 4 servings fresh ramen noodles (use fresh noodles, dry ramen noodles, or GF ramen noodles; I used frozen ramen this time)
- 2 green onions/scallions (chopped)
- 4 Ramen Eggs (Ajitsuke Tamago) (optional; cut in half; prepare them in advance using my Ramen Eggs recipe)
- 8 slices Homemade Chashu (Japanese Braised Beef Belly) (optional, or make Chicken Chashu)
- menma (seasoned bamboo shoots) (optional; store bought or make my Quick Menma Recipe)
- dried wood ear mushrooms (optional; rehydrated and thinly sliced)
- 1 Tbsp (15 ml) pickled red ginger (beni shoga or kizami beni shoga) (optional)
Instructions
- Assemble all ingredients needed for the broth.
- Clean the beef leg bones and beef hock under running water.
- Immerse the bones and hock in a large bowl of water for 15 minutes, replacing the water several times to clear out the blood. If using beef backbones, remove any white spinal tissue to avoid strong odors. Use chopsticks to handle the bones safely.
- Meanwhile, peel away the outer layers of the garlic head, leaving it whole, and cut off the root end. Halve the garlic head to expose the cloves.
- Thinly slice the ginger, leaving the skin on.
- Place the bones, hock, sliced ginger, halved garlic, and water in a pressure cooker or Instant Pot.
- Ensure the water does not exceed the maximum fill line. If needed, remove some water and keep it aside to be added later. Secure the lid, set the steam release handle to Sealing, and choose the Pressure Cooking mode for 60 minutes on High pressure. Press Start. It will take about 40 minutes to reach full pressure. Use the remaining 100 minutes to prepare the other ingredients.
- If not using a pressure cooker, use a large stock pot, add extra water, and simmer uncovered for 3-4 hours, covering partially to minimize evaporation. Simmering longer will draw more flavor from the bones.
- Gather the ingredients for the dashi stock.
- Combine kombu, dried shiitake mushrooms, and dried anchovies in water in a medium bowl and leave at room temperature to extract the umami flavors.
- Prepare the tare ingredients.
- Mix sake, mirin, soy sauce, and water in a small pot.
- Add kombu and heat until almost boiling, then reduce to low and simmer for 3-4 minutes before turning off the heat.
- Stir in the kosher salt until dissolved, allowing the tare to cool to room temperature. Avoid boiling or reheating after adding salt to prevent crystallization.
- Prepare the hidden seasonings. Their subtle flavors enhance the broth.
- Cut the onion in half and the green onions in half crosswise, setting them aside until the broth finishes pressure cooking.
- Once the pressure cooking ends, carefully release the pressure using a long spatula to avoid burns, and lightly cover the valve with a paper towel to reduce splatter.
- Open the lid cautiously. Use the Sauté mode on the Instant Pot or high heat on a stove for a regular pressure cooker or stock pot. Transfer the soup to a larger pot if needed to prevent splashing. Skim off any impurities floating on the surface using a fine-mesh skimmer, being careful to retain as much fat and marrow as possible.
- Add the onion and green onions to the broth.
- Mix in rice vinegar and sake. Remove the shiitake mushrooms and anchovies from the dashi and add them to the broth, keeping the dashi liquid for later.
- Stir in the katsuobushi to the broth, mixing well.
- Keep the broth at a rolling boil on Sauté mode. Continue skimming as needed.
- Maintain high heat to fully extract flavors. Stir or use a splatter guard to manage splashing. Once the soup reduces slightly after 30 minutes, add the reserved dashi liquid without the kombu.
- Adjust the Instant Pot to Sauté mode for another 30 minutes, stirring to emulsify the broth.
- After an hour of boiling, turn off the Sauté mode or heat. Remove the large bones with tongs, placing them in a strainer over a clean pot to drain the broth, then discard the bones.
- Use tongs to remove other solids, pressing them in the strainer to extract liquid before discarding.
- Strain the broth from the pressure cooker in small amounts, pressing solids with a spatula, until finished.
- Your tonkotsu broth is now ready. Reheat if serving immediately or store for later use.
- To store, cool the broth quickly and transfer to an airtight container, refrigerating for up to 3 days or freezing for a month. Be cautious in warm weather to prevent spoilage.
- Boil a large pot of water for the ramen noodles. Heat the broth, keeping it covered for serving.
- Prepare ramen bowls by warming them with hot water, then add tare to each bowl before serving.
- Cook the ramen noodles according to package instructions to your preferred texture.
- Just before the noodles finish cooking, pour the hot broth into the bowls.
- Drain the noodles and distribute them into the bowls, arranging them neatly.
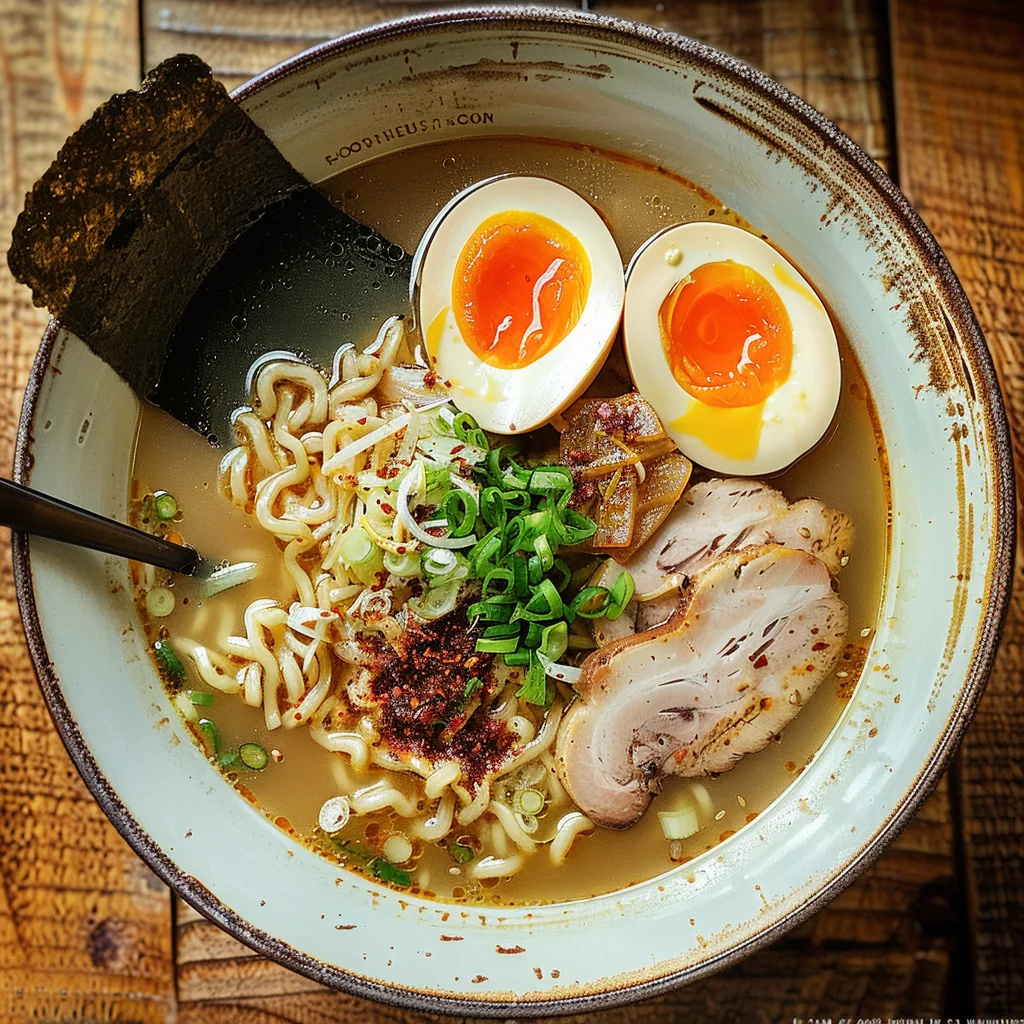
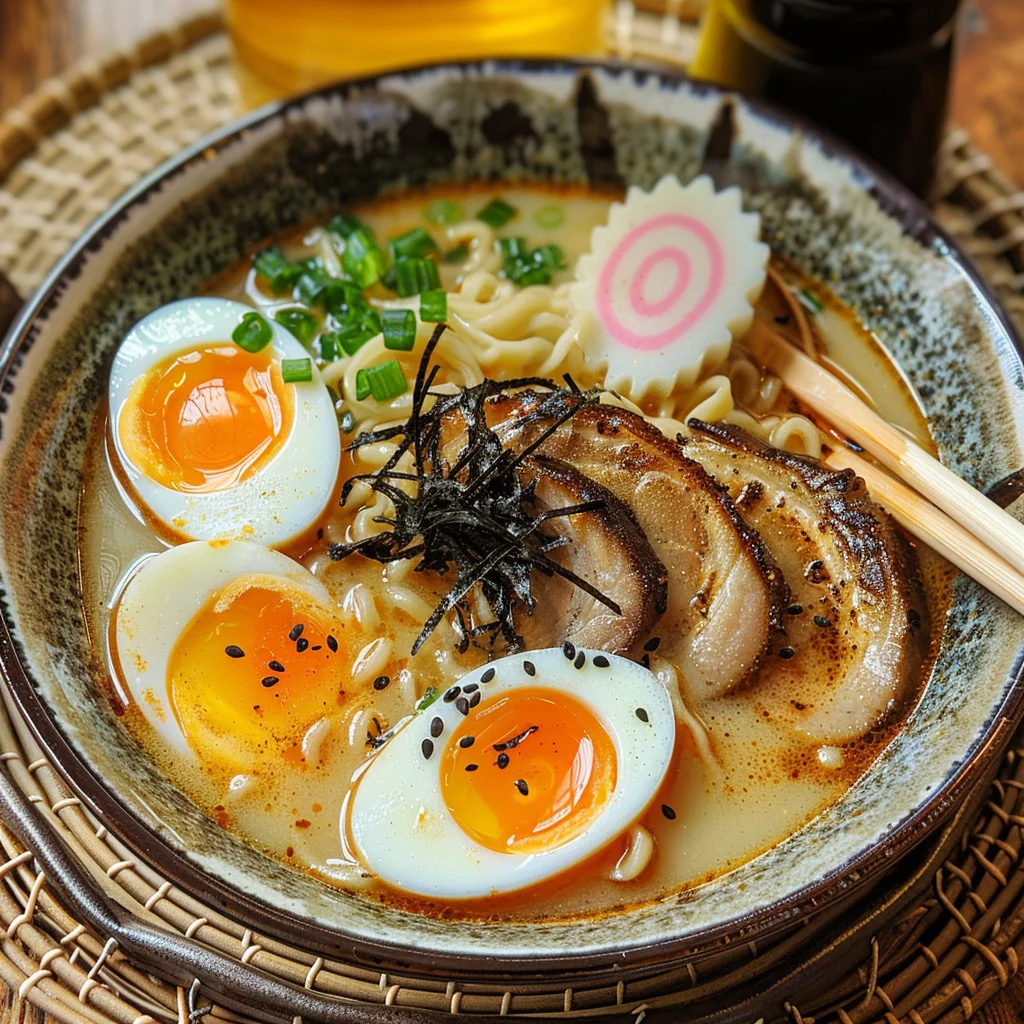
- Quickly add toppings and serve immediately to prevent noodles from absorbing too much broth. Add sliced green onions, ramen eggs, chashu, menma, wood ear mushrooms, and pickled red ginger as desired.
- Store leftovers in separate containers in the fridge or freezer for up to 3 days, noting that flavors may diminish over time. Cook noodles fresh before serving leftover broth.
Crafting Easy Tonkotsu Ramen At Home
Fundamentals
Creating Easy Tonkotsu Ramen At Home starts with understanding the core ingredients that build its rich, savory broth. The backbone of this dish lies in beef leg bones and beef hock, which infuse the broth with deep umami flavors. Complement these with garlic and ginger to add depth, and you’re well on your way to a flavorful base.
Adding dashi components like kombu, dried shiitake mushrooms, and iriko/niboshi enhances the broth’s complexity. These ingredients are essential for achieving the signature taste of Easy Tonkotsu Ramen At Home. The tare, a blend of sake, mirin, soy sauce, and water, adds a delicate balance of sweetness and saltiness, crucial for rounding out the flavors.
Preparation/setup
Begin by preparing the beef bones and hock to ensure a clean, flavorful broth. Rinse them thoroughly under running water, then soak them to remove any impurities. This step is crucial for a clear broth. As you soak the bones, prepare your garlic and ginger, slicing them to release their flavors during cooking.
Using a pressure cooker or Instant Pot is ideal for achieving the rich, creamy texture of Easy Tonkotsu Ramen At Home. Add the prepped bones, garlic, ginger, and water to your cooker, ensuring not to exceed the maximum fill line. This method saves time while extracting maximum flavor from the bones, making it perfect for home cooks.
Mastering the Art of Homemade Ramen
Technique
The technique for creating Easy Tonkotsu Ramen At Home involves layering flavors meticulously. While the broth cooks, prepare the dashi by soaking kombu, shiitake mushrooms, and anchovies in water. This step draws out the umami essence crucial to the dish. Simultaneously, create the tare, ensuring to dissolve the salt thoroughly.
After pressure cooking, transition to the Sauté mode to continue reducing the broth. This step is vital for intensifying flavors and achieving the creamy consistency that Easy Tonkotsu Ramen At Home is known for. Skim impurities regularly to maintain clarity and richness, ensuring a smooth finish.
Easy Tonkotsu Ramen At Home
Tips/tricks
For the best Easy Tonkotsu Ramen At Home, patience is key. Allow the broth to reduce sufficiently for concentrated flavors. Keep a fine-mesh skimmer handy to remove impurities without losing the precious fat and marrow. This careful skimming ensures a clean, flavorful broth.
Enhance your ramen by experimenting with toppings and textures. Consider adding ramen eggs or chashu for protein, and menma for a delightful crunch. These additions not only elevate the dish but also offer a personalized touch, making your Easy Tonkotsu Ramen At Home truly unique.
Achieving Perfection in Ramen Crafting
Perfecting results
Perfecting Easy Tonkotsu Ramen At Home involves fine-tuning each component for harmony in flavor and texture. After straining the broth, taste and adjust the seasoning with salt if necessary. The balance of salty, savory, and umami notes is crucial to achieving that authentic ramen experience.
Consistency is another key element. Use the Sauté mode to emulsify the broth, blending the fat seamlessly for a creamy texture. This step is essential for the luxurious mouthfeel that distinguishes high-quality Easy Tonkotsu Ramen At Home.
Troubleshooting/variations
If your broth lacks depth, extend the simmering time to extract more flavor from the bones. Adjust the tare if the broth is too light, adding more soy sauce or mirin as needed. These tweaks ensure your Easy Tonkotsu Ramen At Home remains flavorful and satisfying.
For variations, consider integrating seasonal vegetables or different mushrooms to enhance your ramen. These additions can add a new dimension to your Easy Tonkotsu Ramen At Home, offering both nutritional benefits and flavor variety.
Serving and Enjoying Your Ramen Creation
Serving/presentation
The presentation of Easy Tonkotsu Ramen At Home can elevate the dining experience. Warm your bowls before serving to keep the broth hot, and arrange the noodles neatly. Add toppings like green onions, ramen eggs, and pickled red ginger to create a visually appealing dish.
Consider using homemade Japanese ramen bowls for an authentic touch. These bowls enhance the overall experience, making your Easy Tonkotsu Ramen At Home feel like a special occasion.
Easy Tonkotsu Ramen At Home
Pairings/storage
Pair your ramen with light sides like a salmon teriyaki bowl or chicken potato soup for a balanced meal. Store leftover broth separately from noodles to maintain freshness. Refrigerate for up to three days or freeze for longer storage, ensuring your Easy Tonkotsu Ramen At Home remains a convenient delight.
For creative pairings, explore dishes like butter chicken or fun options like homemade oatmeal cream pies for a sweet finish. These combinations can add variety and excitement to your ramen experience.
Conclusion
Easy Tonkotsu Ramen At Home offers a fulfilling culinary journey, rich with flavors and textures. Mastering this dish involves patience, attention to detail, and a love for crafting something delicious. From the aromatic broth to the perfectly cooked noodles, each element plays a crucial role in the final masterpiece.
This dish exemplifies the joy of home cooking, providing a comforting meal that warms both body and soul. Whether you’re enjoying it solo or sharing it with loved ones, Easy Tonkotsu Ramen At Home is a testament to the power of simple, heartfelt cooking. Embrace the process, and savor each flavorful bite.
