📑 Table of Contents ▶
- Part 1 — Christmas Cake Pops Fundamentals
- Fundamentals
- Preparation/Setup
- Directions
- Part 2 — Creating Perfect Cake Pops
- Technique
- Tips/Tricks
- Part 3 — Perfecting Your Christmas Cake Pops
- Perfecting Results
- Troubleshooting/Variations
- Part 4 — Serving and Storing Christmas Cake Pops
- Serving/Presentation
- Pairings/Storage
- Conclusion
- Christmas Cake Pops with Cake Mix
Christmas Cake Pops with Cake Mix
Creating holiday treats has always been special to me. As the festive season approaches, the kitchen feels alive with the joy of baking. Christmas cake pops, made from cake mix, have become a favorite tradition in my home. The delightful combination of flavors and colors brings back memories of laughter and joy shared with family and friends.
These cake pops are not only fun to make, but they also allow everyone to get involved. From the little ones who love to sprinkle holiday decorations to the adults who enjoy crafting the perfect cake pop, there’s something for everyone. Christmas cake pops hold a special place in our hearts as they transform any gathering into a celebration filled with sweet treats.
Imagine your kitchen filled with the sweet scent of baking cake, and vibrant sprinkles adding festive flair. With a simple box of cake mix, you can create these scrumptious treats to share with loved ones. Easy to prepare and, more importantly, delicious—these cake pops embody the spirit of the holidays.
Embrace the warmth and joy of the holidays by whipping up a batch of Christmas cake pops. They’ll surprise and delight, ensuring your gatherings are memorable and your spirits high. Let’s dive into the delightful process of making these cake pops with cake mix, step-by-step.
Part 1 — Christmas Cake Pops Fundamentals
Fundamentals
The foundation of great Christmas cake pops starts with a solid recipe. The star ingredient here is a 13.25 oz box of super moist yellow cake mix. This provides a tender texture and rich flavor that pairs perfectly with festive add-ins and decorations. Additionally, you’ll need large eggs, unflavored oil, and water to create the cake batter. These ingredients combine effortlessly into a fluffy cake, setting the stage for your cake pops.
To add richness and creaminess, incorporate a half cup of cream cheese frosting, which will help bind the cake crumbs together. Cake pops take on a delightful texture and taste thanks to this frosting, allowing you to enjoy a sweet indulgence with every bite.
Preparation/Setup
Begin your holiday baking adventure by preheating your oven to 350°F (175°C). Prepare your baking sheet pan—opt for a 9×13-inch size—by greasing it with cooking spray or lining it with parchment paper. This simple step ensures your cake doesn’t stick, making it easier to remove from the pan once it cools.
In a large mixing bowl, combine your super moist yellow cake mix, three large eggs (at room temperature), ⅓ cup of unflavored oil, and one cup of water. Use a hand mixer or whisk to blend the mixture until the cake batter appears smooth and well-combined—about two minutes will do the trick.
Transfer the smoother batter into your prepped baking pan, ensuring you spread it out evenly. Bake the cake for 25-28 minutes or until a toothpick inserted in the center comes out clean. Once baked, allow the cake to cool completely before moving on to the next step.
Ingredients
Here’s a quick rundown of the ingredients required for your Christmas cake pops:
- 1 box (13.25 oz) super moist yellow cake mix (like Betty Crocker)
- 3 large eggs (at room temperature)
- ⅓ cup unflavored oil (such as vegetable oil)
- 1 cup water
- ½ cup cream cheese frosting (like Betty Crocker Rich and Creamy)
- 12 oz vanilla almond bark (or white chocolate/candy melts)
- 15 cake pop sticks
- Holiday sprinkles (for decorating)
Directions
-
Preheat your oven to 350°F (175°C).
-
Grease a 9×13-inch baking sheet pan with cooking spray or parchment paper and set it aside.
-
In a large bowl, combine the yellow cake mix, eggs, oil, and water. Use a hand mixer or whisk to blend until the batter is smooth, about 2 minutes.
-
Spread the cake batter evenly in the prepared pan and bake for 25-28 minutes. A toothpick in the center should come out clean when done.
-
Once baked, allow the cake to cool completely. Trim off the brown edges to create a clean surface, then break the cake into large pieces and crumble into fine crumbs in a bowl.
-
Mix the cream cheese frosting into the crumbled cake until well incorporated, forming a dough-like consistency.
-
Using an ice cream scoop, portion out the mixture into golf ball-sized portions, rolling them into smooth balls. Place on a plate and refrigerate for 10 minutes to firm up.
-
In a microwave-safe bowl, melt the white chocolate or almond bark in short intervals (20-30 seconds), stirring until smooth.
-
Dip the tip of each cake pop stick into the melted chocolate, then insert it halfway into each cake pop to secure it in place. Chill for another 10 minutes.
-
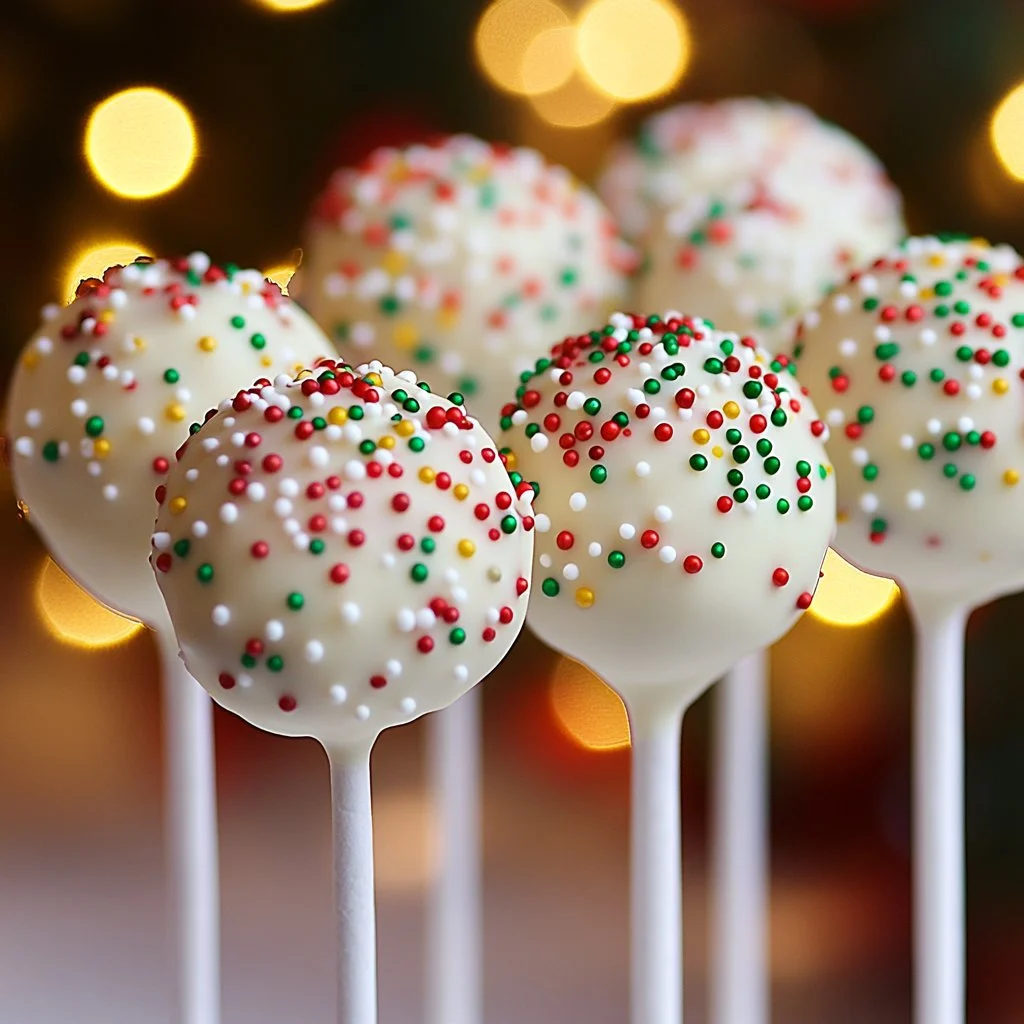
Coat each cake pop in the melted chocolate, gently tapping to remove excess. Decorate with holiday sprinkles while still wet.
-
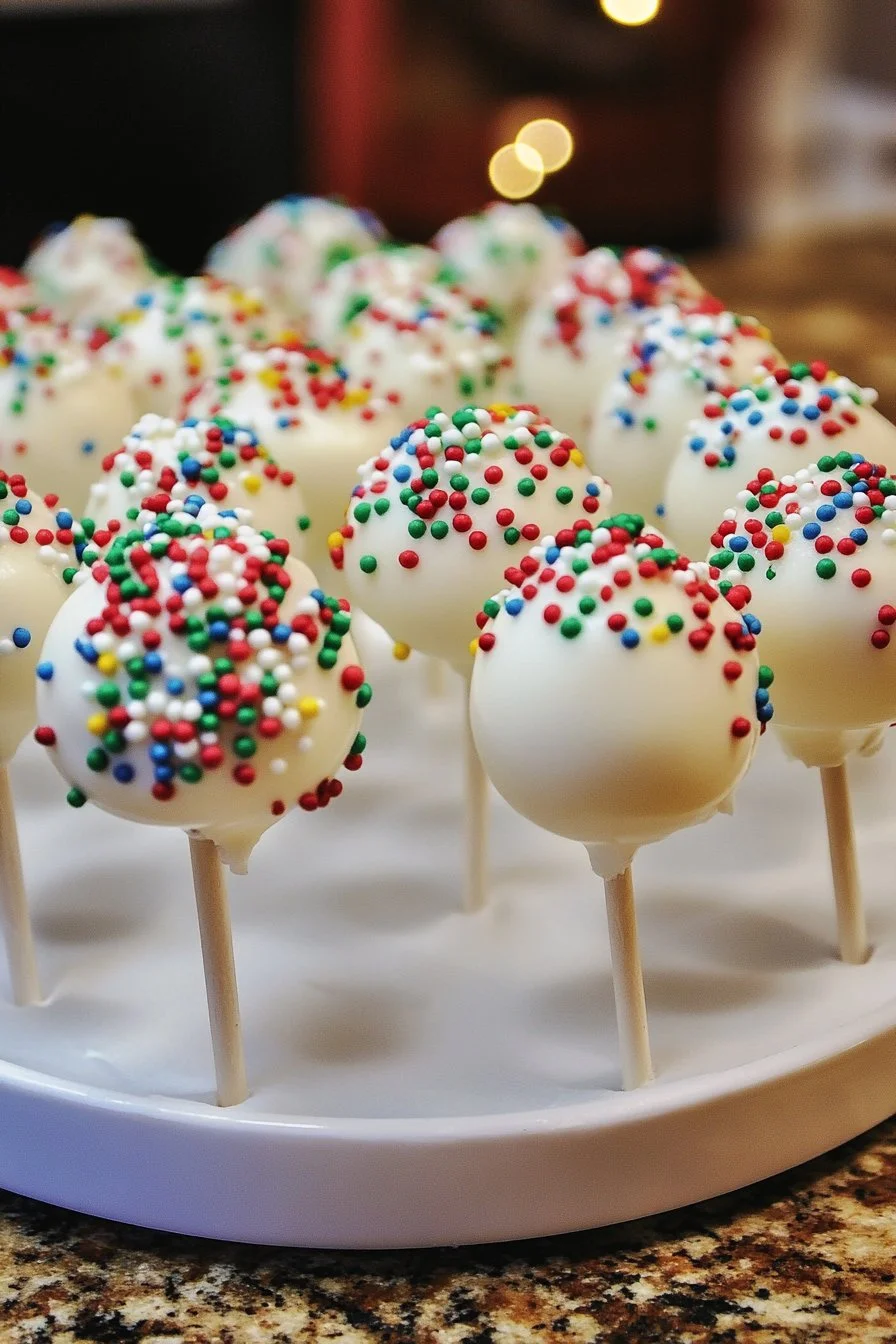
Stick the cake pops upright in a foam block or similar surface and let them set until the chocolate hardens.
Part 2 — Creating Perfect Cake Pops
Technique
Understanding the technique for creating cake pops is essential for success. When you crumble the cooled cake and mix it with frosting, aim for a dough-like consistency that’s easy to mold. This mixture should hold its shape once rolled, providing a firm base for your festive creation.
When coating your cake pops, ensure the melted chocolate isn’t too hot. If the chocolate is hot, it can cause the cake pop to melt or fall apart during dipping. Aim for a velvety smooth consistency that coats evenly without dripping excessively.
Tips/Tricks
Here are some helpful tips to elevate your cake pops:
-
Chill the crumbled cake mixture to make shaping easier. Refrigeration allows the mixture to firm up, providing more control when rolling into balls.
-
Use a foam block to secure the cake pops while they set. This prevents them from touching each other and ruining their beautiful decoration.
-
Mix different types of sprinkles for a more festive look. Combine holiday-themed sprinkles, colored sugars, and edible glitter for variety and visual appeal.
Part 3 — Perfecting Your Christmas Cake Pops
Perfecting Results
To perfect your Christmas cake pops, monitor the consistency of both your cake mixture and chocolate coating. A too-dry mixture won’t mold, while a very wet mixture can crumble. The goal is to create cake balls that are moist yet firm, ensuring they hold up during decorating.
Experiment with different decorations! Try drizzling chocolate over the pops or rolling them in crushed candy canes for added flavor and texture. The sky’s the limit when it comes to personalizing your festive treats.
Troubleshooting/Variations
If cake pops crack while being dipped, consider thinning your coating. Incorporating a small amount of vegetable shortening into the melted chocolate can help achieve a smoother consistency.
Variations in flavor can also add an exciting twist. Try switching the flavor by using chocolate cake mix or adding peppermint flavoring to the frosting. These simple tweaks can enhance your pop’s festive spirit and taste, making your treats stand out even more.
Part 4 — Serving and Storing Christmas Cake Pops
Serving/Presentation
Presenting your Christmas cake pops beautifully sets the tone for your festive gatherings. Consider standing them upright in a decorative holder, like a holiday-themed foam block or even a cake pop stand. This not only showcases your creations but also makes them easily accessible to guests.
Enhance their appeal by arranging them in festive patterns or color themes. Use holiday-themed platters to create stunning presentations that will impress your friends and family.
Pairings/Storage
These delightful cake pops can be paired with various beverages, like hot cocoa or coffee, enhancing the overall dessert experience. The sweetness of the cake pops complements the warmth of these drinks perfectly.
Store your cake pops in a cool, dry area. If you need to keep them fresh for longer, place them in an airtight container in the refrigerator. They typically last up to a week, but they’re so delicious that they might not stick around long!
Conclusion
The magic of baking Christmas cake pops with cake mix turns your kitchen into a joyful holiday space. Through simple ingredients and easy steps, you craft delightful treats that bring people together. Each cake pop offers a taste of celebration, sparking sweet memories with each bite. Enjoy the process as you share these delicious, festive treats with family and friends. Let the spirit of the holidays fill your home, one cake pop at a time.
Print
Christmas Cake Pops with Cake Mix
- Prep Time: 15 minutes
- Cook Time: 28 minutes
- Total Time: 45 minutes
- Yield: 15 servings
- Category: Dessert
- Method: Baking
- Cuisine: American
- Diet: Vegetarian
Description
Delightful and festive cake pops made easily with cake mix, perfect for holiday gatherings.
Ingredients
- 1 box (13.25 oz) super moist yellow cake mix
- 3 large eggs
- ⅓ cup unflavored oil
- 1 cup water
- ½ cup cream cheese frosting
- 12 oz vanilla almond bark
- 15 cake pop sticks
- Holiday sprinkles (for decorating)
Instructions
- Preheat your oven to 350°F (175°C).
- Grease a 9×13-inch baking sheet pan with cooking spray or parchment paper.
- In a large bowl, combine the yellow cake mix, eggs, oil, and water. Mix until smooth, about 2 minutes.
- Spread the batter in the prepared pan and bake for 25-28 minutes until a toothpick comes out clean.
- Allow the cake to cool completely. Trim edges and crumble into fine crumbs.
- Mix cream cheese frosting into the crumbled cake until well combined, forming a dough-like consistency.
- Roll the mixture into golf ball-sized portions and refrigerate for 10 minutes.
- Melt the vanilla almond bark in a microwave-safe bowl in short intervals, stirring until smooth.
- Dip the tip of each cake pop stick in the melted chocolate and insert into each cake ball.
- Chill again for 10 minutes.
- Coat each cake pop in melted chocolate, tap to remove excess, and decorate with holiday sprinkles.
- Stand them upright in a foam block and let the chocolate harden.
Notes
Chill the mixture to make it easier to shape, and mix sprinkles for a festive look.
