📑 Table of Contents ▶
Thin Wilton Candy Melts for Perfect Cake Pops
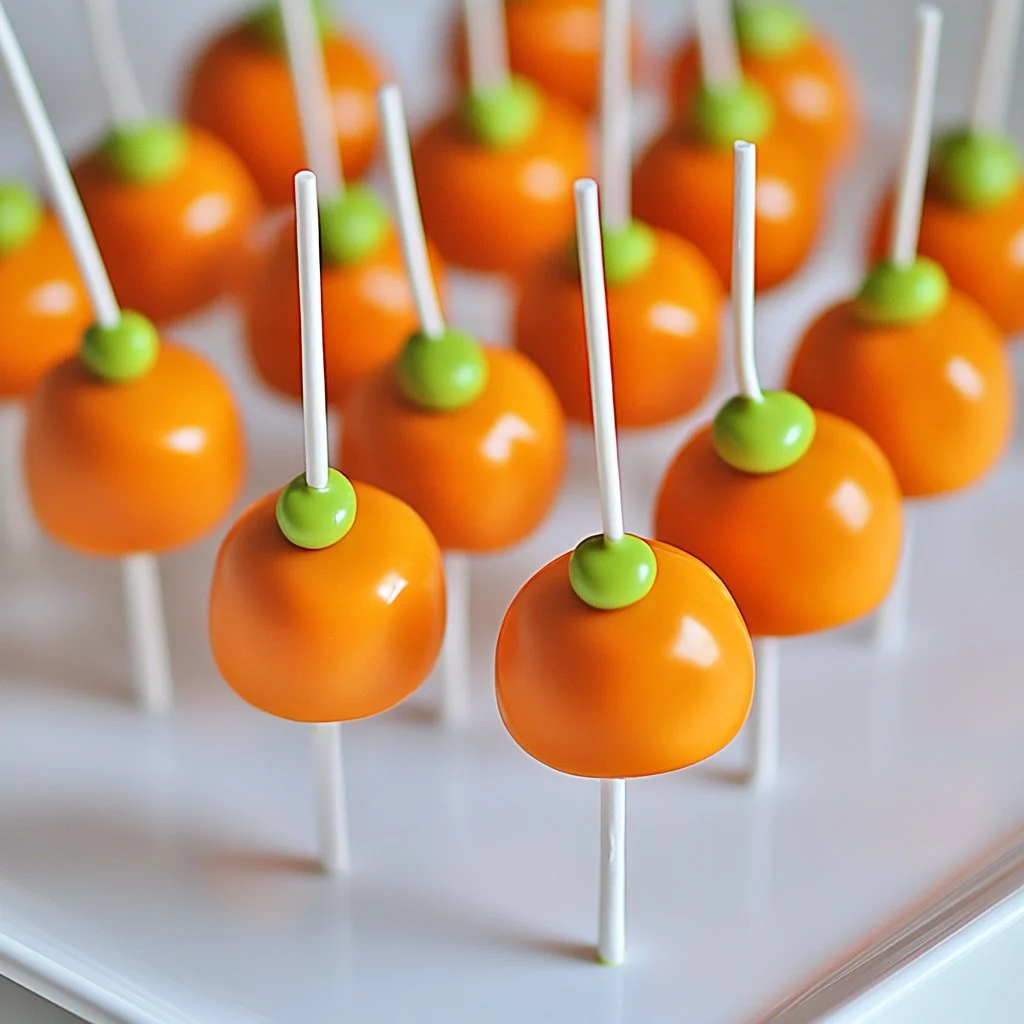
Creating perfect cake pops involves mastering the art of melting Wilton Candy Melts. The first time I encountered these colorful gems, I was skeptical about how much transformation they could bring to a simple dessert. However, as I melted and mixed these candy melts, the transformation that took place was incredible. The vibrant colors and glossy finish turned plain treats into eye-catching delights.
Melting Wilton Candy Melts opens up a world of creativity. These candy melts provide a smooth coating that adheres beautifully to cake pops. The process of melting them is straightforward, but it requires attention to detail for optimal results. You want that perfect thin consistency that coats your cake pops just right. The flexibility of these melts allows bakers of all skills to customize their treats uniquely.
Each batch of melted Wilton Candy Melts can evoke a range of emotions, from nostalgia to joy. Remembering the first time my family gathered around, each holding a cake pop coated in colorful candy melts, brings back cherished memories. This experience motivates me to share the technique of melting Wilton Candy Melts to ensure everyone can recreate that happiness.
Understanding Wilton Candy Melts
Fundamentals
Wilton Candy Melts serve as the star ingredient for crafting delightful cake pops. These candy melts come in various colors and flavors, making them perfectly suited for all occasions. When melted correctly, they achieve a smooth and pourable consistency that enhances the appearance of baked treats.
Understanding the melting process involves a few key concepts. Always ensure you use a microwave-safe bowl when melting cons to avoid any mishaps. The right technique can prevent overheating, which can lead to undesirable clumps. This approach guarantees that the melted candy maintains its vibrant color and smooth texture, perfect for coating your treats.
Preparation/Setup
Before diving into melting Wilton Candy Melts, gather all necessary items. A microwave-safe bowl should be your first step, ensuring durability under heat. Make sure to have a spatula or spoon handy for stirring the melts as they heat.
Prepare your microwave by removing any items that could obstruct the heating process. Clear space is essential for stirring and monitoring the melting process effectively. Keeping everything organized will streamline your journey toward creating perfect cake pops.
Ingredients
- Wilton Candy Melts
- Vegetable oil (optional)
- Paramount crystals (optional)
Directions
- Place the Wilton Candy Melts in a microwave-safe bowl.
- Heat in the microwave in 30-second intervals, stirring after each interval until melted and smooth.
- If the mixture is too thick, add a small amount of vegetable oil or paramount crystals and stir until fully incorporated.
- Continue to heat in intervals until reaching the desired consistency for cake pops.
Mastering the Technique of Melting
Technique
Mastering the technique of melting Wilton Candy Melts involves precision and patience. Start by pouring a desired amount of candy melts into a microwave-safe bowl. Choosing the right quantity can prevent waste and ensure you have just enough for your cake pops.
Fire up the microwave, setting the timer for 30 seconds. Approach this step with caution; the goal is to achieve a smooth blend, not to create clumps. Stirring after each interval allows for even heating, promoting a silky texture.
Tips/Tricks
For successful melting, consider these tips and tricks. First, ensure you don’t use plastic bowls, as they can warp or melt under high heat. Glass or ceramic bowls are ideal for this task.
If your mixture ends up thicker than expected, don’t panic. A small drizzle of vegetable oil or a dash of paramount crystals can help you regain that flowing texture. Always stir thoroughly before adding more liquid to avoid over-thinning.
Harness your creativity! Adding a few drops of food coloring to your melted Wilton Candy Melts gives your cake pops a unique twist. Experimenting can lead to beautiful results, making each cake pop a work of art.
Perfecting the Results
Perfecting Results
Perfecting the melting of Wilton Candy Melts leads to stunning cake pops that look as good as they taste. After successfully melting your candy melts, let’s discuss how to achieve that desired coating. A thin, even layer allows cake pops to shine and ensures flavors meld seamlessly.
Keep an eye on the texture; it should flow smoothly off a spoon. If you find it too thick, don’t hesitate to introduce a little vegetable oil or paramount crystals. This adjustment guarantees an exquisite finish on your treats, setting you up for success.
Troubleshooting/Variations
Sometimes, challenges arise in the melting process. If you notice that the melts aren’t giving you a smooth finish, there’s usually a simple fix. Overheating can cause clumps; if that happens, try adding a touch of vegetable oil to restore the desired consistency.
While Wilton Candy Melts come pre-colored, feel free to mix different colors to create unique shades. This way, you can match the cake pops to any celebration or theme. A swirl of colors can also enhance the visual appeal of your finished treats.
Serving and Storage Tips
Serving/Presentation
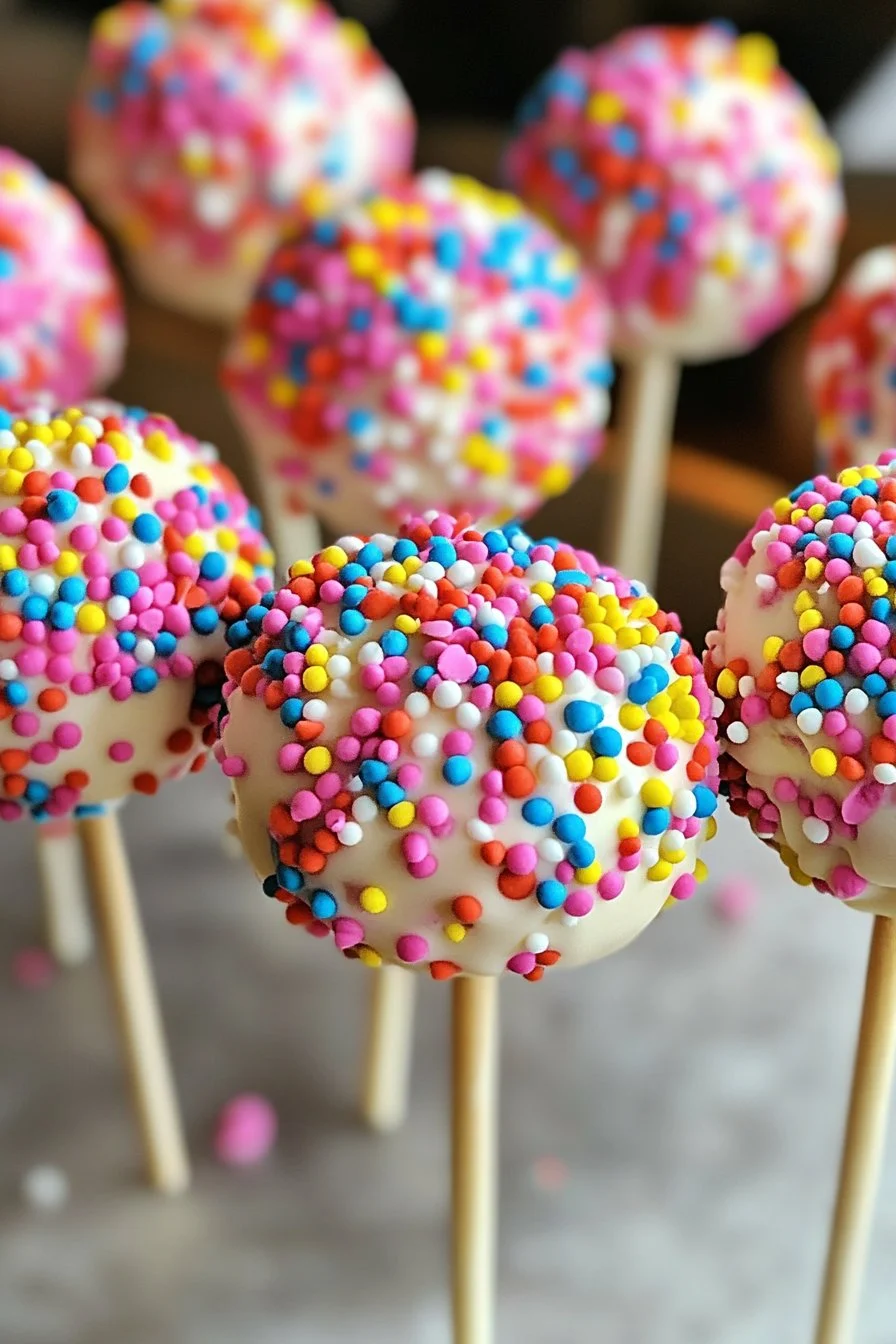
Presenting your cake pops beautifully makes a significant impact on any gathering. After coating your cake pops with melted Wilton Candy Melts, allow them to set on a stand or parchment paper. A little creative flair in the presentation can captivate your guests.
Consider using decorative sprinkles or edible glitter over the still-wet chocolate for a dazzling effect. The key is making the final product visually appealing, turning each cake pop into a miniature masterpiece.
Pairings/Storage
Cake pops pair well with various treats, adding a delightful touch to any dessert table. Consider presenting them alongside cupcakes or cookies for a charming display. They complement afternoon teas and birthday parties beautifully, elevating the entire experience.
For storage, keep your cake pops in an airtight container to maintain freshness. Avoid refrigerating them if possible, as cold temperatures can affect their texture. They can typically stay fresh for several days at room temperature, making them perfect for parties or as sweet gifts.
Allowing Wilton Candy Melts to shine in your cake pop creations offers a gateway to an enjoyable baking experience. Embrace the process and let those vibrant melts bring life to your treats.
Creating perfect cake pops transcends mere baking; it’s an opportunity to weave joyful experiences into everyday life. Melting Wilton Candy Melts allows you to craft delicious desserts that can light up any gathering, fostering moments worth savoring.
Print
Thin Wilton Candy Melts for Perfect Cake Pops
- Prep Time: 5 minutes
- Cook Time: 3 minutes
- Total Time: 8 minutes
- Yield: varies based on amount of candy melts used
- Category: Dessert
- Method: Microwaving
- Cuisine: American
- Diet: Vegetarian
Description
A guide to melting Wilton Candy Melts for creating perfect, colorful cake pops with a smooth coating.
Ingredients
- Wilton Candy Melts
- Vegetable oil (optional)
- Paramount crystals (optional)
Instructions
- Place the Wilton Candy Melts in a microwave-safe bowl.
- Heat in the microwave in 30-second intervals, stirring after each interval until melted and smooth.
- If the mixture is too thick, add a small amount of vegetable oil or paramount crystals and stir until fully incorporated.
- Continue to heat in intervals until reaching the desired consistency for cake pops.
Notes
Use glass or ceramic bowls instead of plastic to avoid warping. For unique colors, add food coloring to the melted candies.
