📑 Table of Contents ▶
- The Fundamentals of Same Day Focaccia
- Understanding the Essentials
- Preparation and Setup
- Directions
- Techniques for Perfecting Your Focaccia
- Embracing Baking Techniques
- Tips and Tricks
- Perfecting the Results
- Achieving the Best Focaccia
- Troubleshooting Common Issues
- Serving and Storing Your Focaccia
- Presentation for Any Occasion
- Storage Solutions
- Conclusion
Same Day Focaccia
Creating a warm, inviting focaccia at home quickly transforms an ordinary day into a cherished culinary experience. The delightful smell of freshly baked bread fills the air, reminding everyone of cozy family gatherings and special moments around the dinner table. Same day focaccia connects us to our roots, letting us create delicious memories in the kitchen without needing an all-day commitment.
The beauty of this focaccia recipe lies in its simplicity. With just a handful of ingredients, you can create a bread that rivals bakery offerings. Rolling up your sleeves and diving into this easy process brings abundant joy. This recipe invites experimentation, encouraging you to craft your own version of focaccia while doubling as a canvas for your creative toppings.
Whether it’s a weeknight dinner or a weekend gathering, this same day focaccia recipe allows everyone to savor freshly baked goodness in no time. Say goodbye to store-bought loaves and embrace the warmth of homemade focaccia that satisfies and delights. Let’s get started on this culinary adventure!
The Fundamentals of Same Day Focaccia
Understanding the Essentials
Focaccia stems from Italian origins and appears in various forms around the world. Its dough, enriched with olive oil, provides a unique flavor and texture. Unlike traditional bread, focaccia incorporates a relaxed approach to preparation, which makes it an excellent choice for home bakers.
In this recipe, you focus on fundamental techniques that yield impressive results. Make use of instant yeast to ensure a quick rise, allowing you to enjoy your warm focaccia in about an hour. The combination of all-purpose flour, warm water, salt, and olive oil sets the foundation for a delectable treat.
Preparation and Setup
Preparing your ingredients before starting helps streamline the process. Measure out 2 cups of all-purpose flour, 1 cup of warm water, 2 teaspoons of instant yeast, and 1 teaspoon of salt. You’ll also need 2 tablespoons of olive oil and any optional toppings like rosemary, sea salt, cherry tomatoes, or olives.
Designate a warm location in your kitchen for the fermentation process – this could be near a stove or a sunny window. Gather your mixing bowl, baking sheet, and a damp cloth to cover the dough while it rises.
Ingredients
- 2 cups all-purpose flour
- 1 cup warm water
- 2 teaspoons instant yeast
- 1 teaspoon salt
- 2 tablespoons olive oil
- Optional toppings: rosemary, sea salt, cherry tomatoes, olives
Directions
- In a large bowl, combine warm water and yeast. Let it sit for 5 minutes until frothy.
- Add flour, salt, and olive oil to the mixture. Stir until a sticky dough forms.
- Cover the bowl with a damp cloth and let it rise in a warm place for about 30 minutes.
- Preheat your oven to 425°F (220°C).
- Grease a baking sheet with olive oil and transfer the dough onto it. Press down to spread it out evenly.
- Dimple the surface of the dough with your fingers and add your desired toppings.
- Bake for 20-25 minutes until golden brown.
- Let it cool slightly before slicing and serving.

Techniques for Perfecting Your Focaccia
Embracing Baking Techniques
Understand the vital techniques for creating focaccia and make the most of each step. When incorporating the yeast, ensure the water temperature is warm, not hot. This temperature awakens the yeast and activates its leavening power.
Knead the dough by folding and stretching, introducing air into the mixture. This technique helps develop the gluten, adding necessary structure to the bread. When it’s time to spread it on the baking sheet, resist the urge to overwork the dough—it should remain slightly sticky and wet.
Tips and Tricks
A few simple tips can elevate your focaccia making experience. Always use fresh yeast for optimal rise, and be generous when greasing your baking sheet with olive oil. This ensures a beautifully crisp crust.
Consider allowing your focaccia to rise a bit longer if you have time, enhancing its flavor and lightness. Experiment with toppings, as they can completely change the flavor profile of your focaccia. Try simple combinations like sea salt and rosemary or get adventurous with sliced olives or cherry tomatoes.
Perfecting the Results
Achieving the Best Focaccia
To achieve the best results, focus on temperature control during fermentation. A warm environment allows the yeast to thrive, providing a better texture to your focaccia. If your kitchen is cooler, consider a longer rising time.
When it comes to baking, pre-heating the oven is crucial. A hot oven immediately sets the dough, helping it rise beautifully in the first few minutes of baking. Check for doneness at the 20-minute mark by looking for a golden-brown crust. The aroma alone will guide you!
Troubleshooting Common Issues
Common issues with focaccia can usually be addressed quickly. If your dough doesn’t rise properly, double-check the yeast’s freshness and ensure the water temperature was optimal. Avoid adding too much flour during mixing, as it can lead to a heavy loaf.
Use a gentle touch when handling the dough—overworking it can lead to toughness. If it comes out undercooked in the center, consider lowering the oven temperature and extending the baking time slightly.
Serving and Storing Your Focaccia
Presentation for Any Occasion
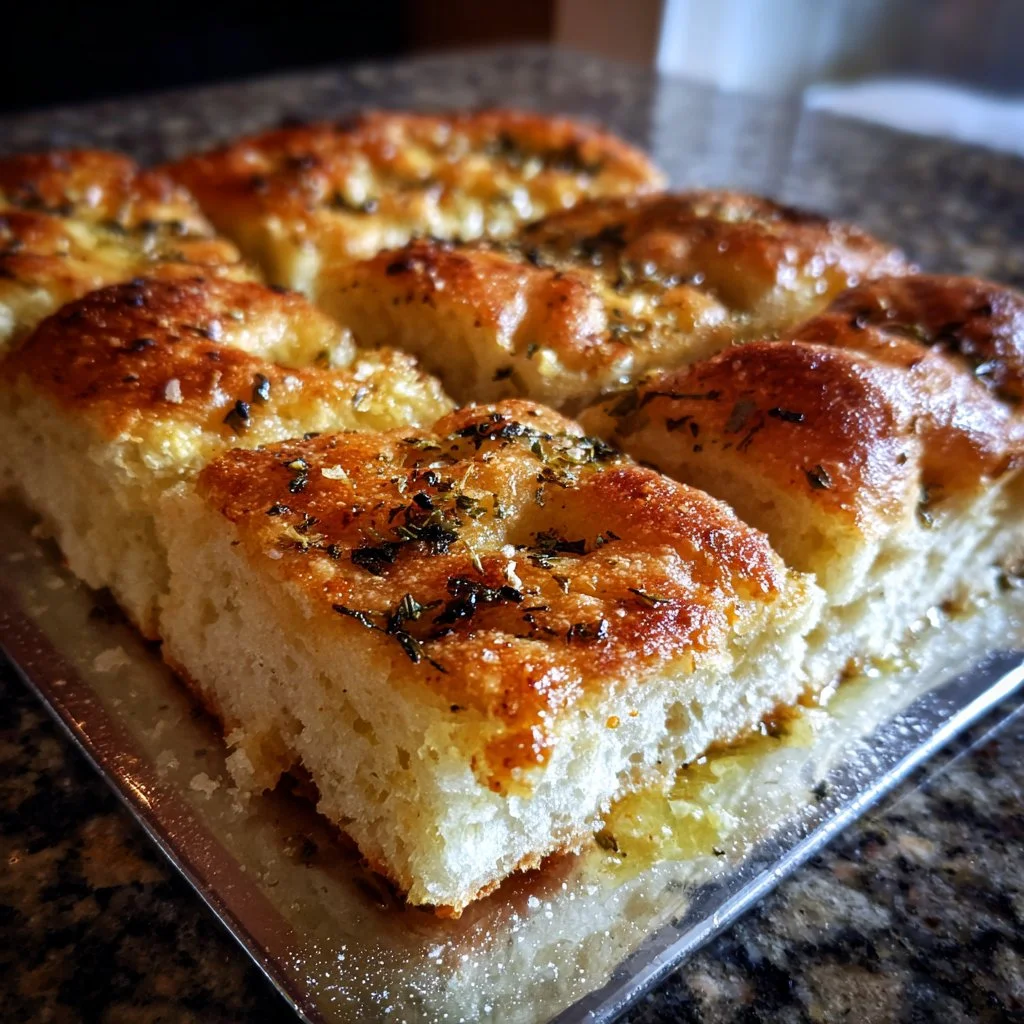
Serving focaccia elevates any occasion, be it a casual family dinner or an elegant gathering. Present your bread on a wooden board or platter. Slice it into squares for easy sharing, making it a perfect appetizer or side dish.
Add a drizzle of olive oil or balsamic reduction to the serving dish for a gourmet touch. Fresh herbs sprinkled on top enhances overall appeal, making it visually stunning and flavorful.
Storage Solutions
Properly storing your focaccia ensures you can enjoy it even after the initial baking. Allow the bread to cool completely before wrapping it tightly in plastic wrap or keeping it in a resealable bag. Store at room temperature for up to three days.
If you want to save some for later, consider freezing portions. Wrap individual pieces securely and place them in an airtight container. Thaw at room temperature, then reheat briefly in the oven for that just-baked taste.
Conclusion
Crafting same day focaccia is a delightful culinary experience that yields an irresistible bread. Enjoy the joy of mixing simple ingredients and watching them transform into a warm, flavorful delight. This easy recipe highlights the importance of shared moments, allowing everyone to savor delicious homemade focaccia together. Bring the heart of the kitchen home with this simple and rewarding dish that’s perfect for any occasion!
Print
Same Day Focaccia
- Prep Time: 15 minutes
- Cook Time: 25 minutes
- Total Time: 40 minutes
- Yield: 4 servings
- Category: Bread
- Method: Baking
- Cuisine: Italian
- Diet: Vegetarian
Description
Create delicious homemade focaccia quickly and easily with this simple recipe. Perfect for weeknight dinners or gatherings, enjoy the warm, flavorful bread right from your oven.
Ingredients
- 2 cups all-purpose flour
- 1 cup warm water
- 2 teaspoons instant yeast
- 1 teaspoon salt
- 2 tablespoons olive oil
- Optional toppings: rosemary, sea salt, cherry tomatoes, olives
Instructions
- Combine warm water and yeast in a large bowl. Let it sit for 5 minutes until frothy.
- Add flour, salt, and olive oil to the mixture. Stir until a sticky dough forms.
- Cover the bowl with a damp cloth and let it rise in a warm place for about 30 minutes.
- Preheat your oven to 425°F (220°C).
- Grease a baking sheet with olive oil and transfer the dough onto it. Press down to spread it out evenly.
- Dimple the surface of the dough with your fingers and add your desired toppings.
- Bake for 20-25 minutes until golden brown.
- Let it cool slightly before slicing and serving.
Notes
For the best texture, ensure your water is warm but not hot when activating the yeast. Allow longer rising times for improved flavor.
