📑 Table of Contents ▶
- Japanese Onigiri Rice Balls
- Creating Japanese Onigiri Rice Balls
- Fundamentals
- Preparation/setup
- Mastering the Art of Onigiri
- Technique
- Tips/tricks
- Achieving Onigiri Perfection
- Perfecting results
- Troubleshooting/variations
- Onigiri Serving and Storage
- Serving/presentation
- Pairings/storage
- Conclusion
- FAQs – Japanese Onigiri Rice Balls
I believe that a good recipe has the power to bring people together, spark joy, and turn ordinary moments into cherished memories. My culinary journey began long before I ever picked up a cookbook, in a home where the kitchen was the heart of everything. The clatter of pots and the smell of herbs simmering are some of my earliest and fondest memories.
My grandmother was my biggest inspiration—she didn’t need fancy ingredients or complicated techniques to make magic happen. Her meals were a reflection of care, patience, and creativity. Watching her cook taught me that food is more than sustenance—it’s a language of love. Those moments planted the seed that would eventually grow into Yumoti.
With Yumoti, I wanted to make cooking feel less intimidating and more joyful. I know the pride that comes with cooking a meal your loved ones truly enjoy. Whether you’re a beginner learning your way around the stove or an experienced home chef in search of fresh inspiration, Yumoti is for you. Now, let’s dive into the delightful world of Japanese Onigiri Rice Balls, a staple that embodies simplicity and flavor.
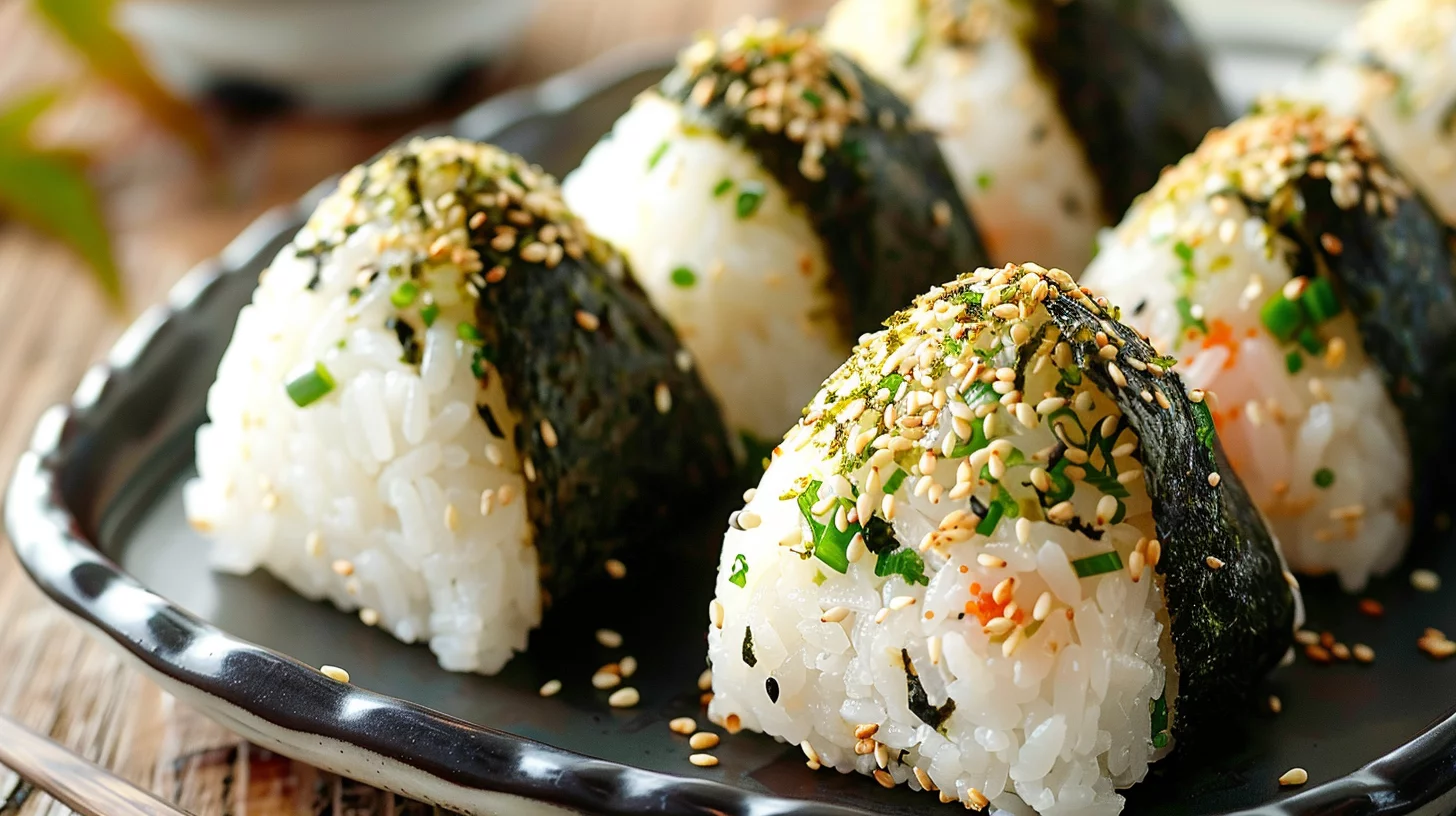
Japanese Onigiri Rice Balls
- Prep Time: 30 minutes
- Cook Time: 20 minutes
- Total Time: 50 minutes
- Yield: 9 onigiri rice balls
- Category: Main Course
- Method: Baking, Broiling
- Cuisine: Japanese
Description
Discover how to make delicious Japanese Onigiri Rice Balls with our easy-to-follow recipe. Learn the art of shaping, filling, and enjoying these popular snacks!
Ingredients
- 2 1/4 cups (540 ml) uncooked Japanese short-grain white rice
- 2 1/2 cups (600 ml) water
- Diamond Crystal kosher salt
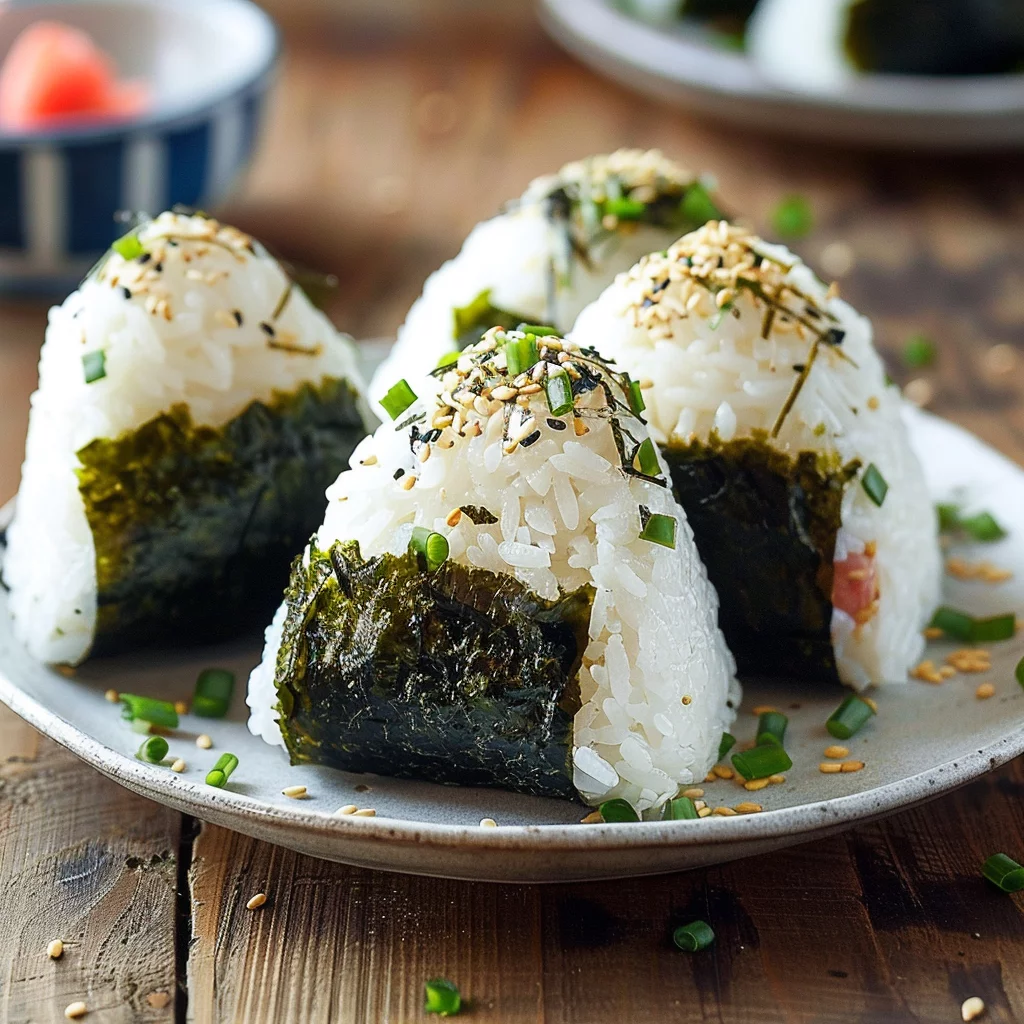
- 3 sheets nori (dried laver seaweed)
- 1–2 fillets salmon
- Diamond Crystal kosher salt
- 1 packet katsuobushi (dried bonito flakes) (one packet is typically 3 g or 5 g)
- 1 Tbsp (15 ml) soy sauce
- 1 (5-ounce) can albacore tuna (preferably packed in olive oil)
- 2 Tbsp (30 ml) Japanese Kewpie mayonnaise
- 1/2 Tbsp (8 ml) soy sauce
- 2 umeboshi (Japanese pickled plum)
- 2 sacs spicy salted pollock roe or cod roe (karashi mentaiko)
- shio kombu (prepared)
- furikake (rice seasoning)
Instructions
- To measure 2¼ cups of uncooked Japanese short-grain white rice, fill a US cup measure (a ¾-cup measure is effective for this) or a rice cooker cup with the raw short-grain rice, then level it. Transfer the rice to a large bowl. Repeat this process until you have the necessary amount of rice. Note: 2¼ cups (450 g, equivalent to 3 rice cooker cups) of uncooked Japanese short-grain rice results in 6⅔ cups (990 g) of cooked rice, which is sufficient for 9 onigiri rice balls (each typically weighing 110 g). One cup of cooked rice weighs about 5.3 oz (150 g).
- Proceed to wash and rinse the short-grain white rice and then cook it using a rice cooker, a pot on the stove, an Instant Pot, or a donabe. For detailed instructions on rinsing and cooking the rice, refer to the relevant posts. In this instance, add 2½ cups of water to the drained rice in a rice cooker. Note: The ideal rice-to-water ratio is 1 to 1.1 (or 1.2) for Japanese short-grain white rice. Allow the rice to soak for 20–30 minutes. Refer to the blog post for a comprehensive explanation.
- While the rice is cooking, prepare the fillings. For the Japanese Salted Salmon Filling, place 1–2 fillets of salmon on a baking sheet lined with either aluminum foil (for broiling) or parchment paper (for baking). Sprinkle both sides with Diamond Crystal kosher salt. Note: This is a quick method for salted salmon; for the traditional approach, consult the Japanese Salted Salmon recipe.
- Broil or bake the salmon at 425ºF (218ºC) in a toaster oven or standard oven for 10–20 minutes, ensuring the salmon is well-cooked to achieve a dry and flaky texture. Break the cooked salmon into flakes and set aside.
- For the Okaka Filling, place 1 packet of katsuobushi (dried bonito flakes) in a bowl and add 1 Tbsp of soy sauce. Mix until the katsuobushi is moistened, but not drenched, by the soy sauce.
- To make the Tuna Mayo Filling, put 1 drained (5-ounce) can of albacore tuna (preferably packed in olive oil) in a bowl. Add 2 Tbsp of Japanese Kewpie mayonnaise and ½ Tbsp of soy sauce, then mix to combine.
- For the Umeboshi Filling, remove and discard the seeds from 2 umeboshi (Japanese pickled plums) and place the flesh on a small plate or in a bowl.
- To prepare the Mentaiko Filling, cut 2 sacs of spicy salted pollock roe or cod roe (karashi mentaiko) in half and squeeze out the roe using your hands or a knife. Place the roe on a small plate or in a bowl.
- For the Shio Kombu Filling, place the prepared shio kombu in a bowl for easy access later.
- Gather all ingredients needed to make the onigiri, as well as a bowl of water for your hands. If shaping the onigiri by hand, transfer the freshly cooked rice to a large bowl, baking sheet, or sushi oke (hangiri) and allow it to cool slightly until it’s comfortable to handle. The rice should still be warm when making onigiri.
- Fill another bowl with water. Soak the onigiri mold and lid in the water to prevent the rice from sticking. Remove the mold and drain excess water. Next, sprinkle salt into the moistened mold, which is used for both seasoning and food safety.
- Half-fill the mold with warm rice, ensuring the rice reaches the corners. Add a spoonful of your chosen filling.
- Fill the rest of the mold with more rice, making sure it’s filled to the edges. Sprinkle additional salt on top of the rice.
- Place the lid on top and press down firmly. You should feel a slight resistance; if not, add a bit more rice. Remove the lid, flip the mold over, and press the “button” to release the onigiri onto a parchment-lined baking sheet or plate. Repeat with the remaining rice. Note: Always wet your fingers before handling the onigiri to prevent sticking.
- First, moisten both palms slightly to prevent sticking, then apply some Diamond Crystal kosher salt and spread it across both palms. For salt quantity, dip 2–3 fingers in the kosher salt. If using table salt, apply half the amount due to its stronger saltiness.
- Place a handful (about ⅓ cup, 50 g) of slightly cooled but still warm rice onto your left (non-dominant) hand. Note: Your left hand holds the rice ball and flattens the sides. Always keep it underneath the onigiri. Make a small well (indentation) in the center of the rice and add 1–2 tsp of one type of filling.
- Add more rice (another ⅓ cup, 50 g) to completely cover the filling. Shape the rice with your hands, gently pressing it around the filling to form a ball.
- Slightly bend your right (dominant) hand to form a “mountain” shape and place it on top of the rice. Your right hand shapes the triangle corners of the onigiri, always staying on top of the rice ball. Gently press to create a triangle corner. Note: Ensure your hands are firm enough to keep the onigiri intact but avoid squeezing too tightly. Aim to maintain an airy rice ball. Simultaneously, use the fingers and heel of your left hand to gently press the sides flat.
- Rotate the triangle corner you just formed toward you. Use a single upward motion to barely toss the rice ball in your left hand while your right hand rotates it toward you clockwise (if right-handed). The first corner should now point at you while the tip of the second corner points up. Repeat the “press and rotate” steps to form the second and third triangle corners, then press and rotate 2–3 more times to finish shaping the triangle.
- Turn the rice ball on its side and gently press to flatten one side, then repeat on the other side. Press and rotate one last time. Transfer to a parchment-lined baking sheet or plate. Repeat with the remaining rice.
- If you prefer not to touch the rice with bare hands, use this alternative method, especially when packing onigiri for lunch. Place a piece of plastic wrap in a rice bowl (or any small bowl) and sprinkle some Diamond Crystal kosher salt (used here to preserve the rice longer).
- Add the rice on top. If adding a filling, create a small well (indentation) in the center of the rice and place one type of filling (around 1–2 tsp) inside.
- Then, add more rice to completely cover the filling and sprinkle some salt on top.
- Gather the corners of the plastic wrap and twist it a few times to secure it around the rice.
- Shape the rice into a triangle as described earlier. Optionally, garnish with furikake and/or nori. Always wet your fingers before handling the onigiri to prevent sticking.
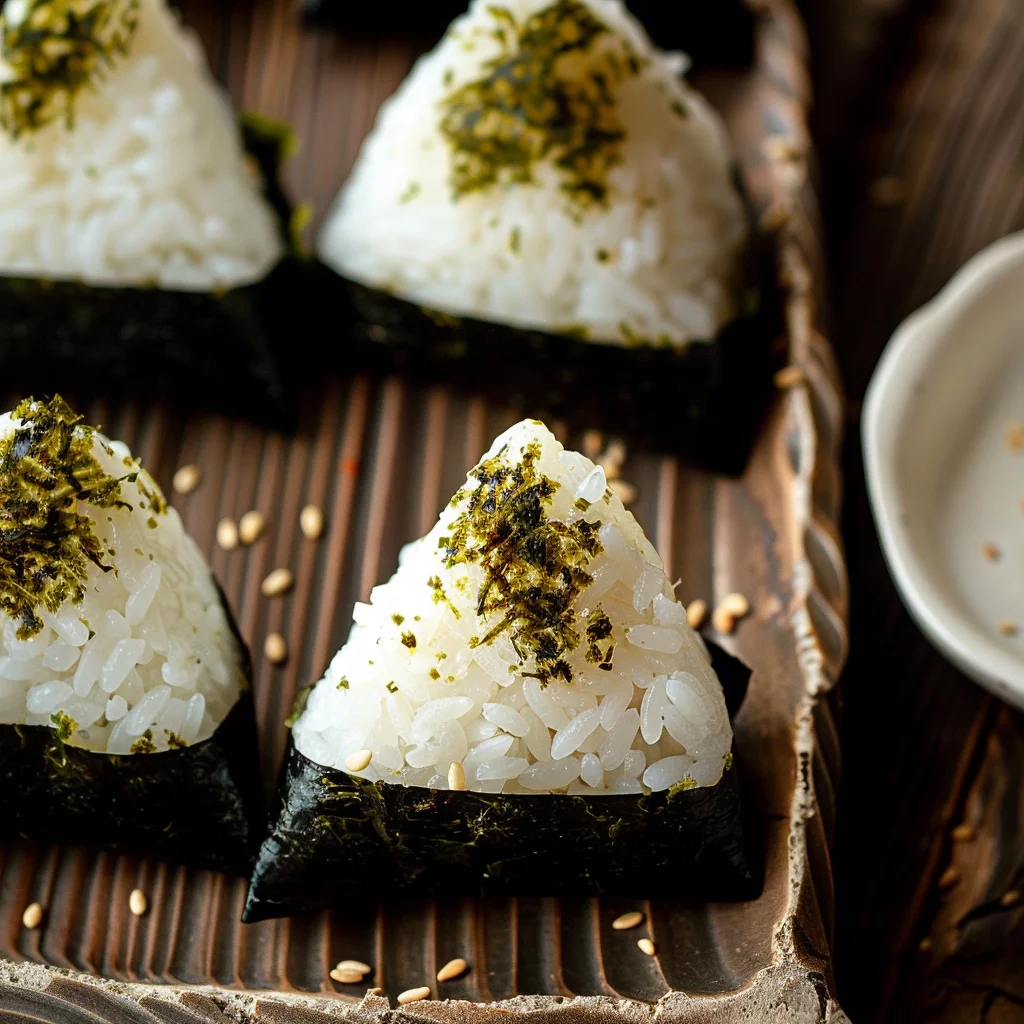
- Coat the three sides of the onigiri with furikake (rice seasoning).
- Toast 3 sheets of nori (dried laver seaweed) over an open flame, one by one.
- Then, cut them into thirds, following the lines on the nori sheet.
- Style A: Wrap a strip of nori on one side of the onigiri, trimming the nori into shorter and narrower strips if necessary.
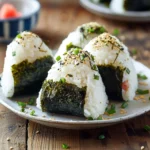
- Enjoy the onigiri while warm or at room temperature.
- Style B: Wrap the onigiri with a piece of nori seaweed. For crispy nori, wait to wrap it until just before eating the onigiri. Store nori in an airtight container or bag to prevent it from becoming stale.
- Place a small amount of each filling on the tip of the onigiri to indicate the filling inside. Enjoy the onigiri warm or at room temperature.
- To pack onigiri for lunch, ensure it stays cool and consume within 6 hours. Onigiri (or any rice dish) becomes hard when refrigerated as cold air dries the rice. Avoid making onigiri too far in advance. If necessary, wrap the onigiri with thick kitchen towels and store in the fridge to keep them cool and safe without getting too cold.
- If your onigiri has dried out, grill it in a frying pan and brush with soy sauce to create Yaki Onigiri.
Notes
- Ensure the salmon is thoroughly cooked and flaky for the best texture in your onigiri.
- Opt for albacore tuna packed in olive oil for added flavor and richness in the Tuna Mayo Filling.
- Wrap onigiri in plastic wrap with a sprinkle of salt to keep them fresh when packing for lunch.
Creating Japanese Onigiri Rice Balls
Fundamentals
Japanese Onigiri Rice Balls are a simple yet versatile dish that has been a staple in Japanese cuisine for centuries. The key to perfect onigiri lies in using the right rice. Japanese short-grain white rice, known for its sticky texture, is ideal because it holds together well when shaped into balls or triangles.
The process begins by measuring 2 1/4 cups of uncooked Japanese short-grain white rice, ensuring precise quantities for the best results. This rice, when cooked, becomes the perfect canvas for a variety of fillings, from traditional salted salmon to innovative tuna mayo mixes.
Preparation/setup
Start by rinsing the rice thoroughly to remove excess starch, which helps in achieving the desired texture. Cook the rice using your preferred method—be it a rice cooker, pot, or donabe—ensuring that you maintain the ideal rice-to-water ratio of 1 to 1.1 or 1.2. Let the rice soak for 20–30 minutes before cooking to enhance its texture.
While the rice is cooking, prepare your fillings. Opt for traditional fillings like Japanese Salted Salmon or explore variations such as Okaka, Tuna Mayo, or Umeboshi. Each filling brings its unique flavor, enriching the onigiri experience. Once the rice is cooked, allow it to cool slightly, making it easier to handle while forming the rice balls.
Mastering the Art of Onigiri
Technique
Shaping onigiri is an art that combines precision and care. Begin by moistening your palms with water and lightly salting them. This step is crucial to prevent rice from sticking and to season the onigiri. Use about ⅓ cup of slightly cooled rice, forming it into a ball in your non-dominant hand.
Create a small well in the center of the rice, add your filling, and cover it with another layer of rice. Using your dominant hand, shape the rice into a triangle, gently pressing to ensure it holds together. Rotate and press the rice several times to form the iconic onigiri shape.
Japanese Onigiri Rice Balls
Tips/tricks
To prevent sticking, always wet your fingers before handling the rice. If you’re new to making onigiri, consider using an onigiri mold to help with shaping. These molds are handy tools that simplify the process, ensuring uniformity in size and shape. For a creative twist, coat the onigiri with furikake, a popular rice seasoning that adds both flavor and visual appeal.
For those who prefer not to handle rice directly, use plastic wrap to shape the onigiri. This method is particularly useful when packing onigiri for lunch, as it keeps the rice fresh and prevents it from drying out. Just be sure to consume onigiri within 6 hours to enjoy its optimal taste and texture.
Achieving Onigiri Perfection
Perfecting results
Perfect onigiri is all about balance—between the rice and filling, and between tradition and creativity. Experiment with different fillings to discover what you enjoy most. Whether you stick to classic flavors or venture into new territories with ingredients like shio kombu or spicy mentaiko, the possibilities are endless.
To ensure your onigiri stays fresh, wrap it with nori just before eating. This keeps the seaweed crisp and enhances the overall experience. Store your nori in an airtight container to maintain its freshness until use.
Troubleshooting/variations
If your onigiri dries out, don’t despair. Transform it into Yaki Onigiri by grilling it in a frying pan and brushing with soy sauce. This variation offers a deliciously crispy alternative that can revive even the most stubborn of leftovers.
For those seeking a sweet twist, consider fillings like azuki bean paste or a mix of katsuobushi with a hint of soy sauce. These variations highlight the versatility of onigiri, catering to both traditionalists and adventurers alike.
Onigiri Serving and Storage
Serving/presentation
Onigiri is as much about presentation as it is about taste. Serve onigiri on a platter, garnished with a small amount of the filling on top to indicate its contents. This not only adds visual appeal but also guides your guests on what to expect within each rice ball.
For an added touch, wrap the onigiri with nori just before serving. This ensures the seaweed remains crisp, complementing the soft rice interior perfectly. Whether you enjoy them warm or at room temperature, onigiri is sure to delight with every bite.
Japanese Onigiri Rice Balls
Pairings/storage
Pair onigiri with a light side dish like edamame or a simple miso soup for a complete meal. If you love creative comfort food, you’ll definitely want to try these homemade Japanese ramen bowls or easy Thai baked chicken meatballs to complement your onigiri feast.
To store, wrap onigiri in plastic wrap and place them in an airtight container, consuming them within the same day to enjoy their freshness. Avoid refrigeration, which can dry out the rice, but if necessary, wrap them in thick kitchen towels to keep them cool without getting too cold.
Conclusion
Japanese Onigiri Rice Balls are a delightful fusion of simplicity and flavor, offering endless possibilities for culinary exploration. From the fundamental rice preparation to creative filling combinations, onigiri provides a canvas for both tradition and innovation. Embrace the art of onigiri-making, and enjoy the satisfaction of crafting these beloved rice balls for yourself and your loved ones.
Whether you pair them with a hearty chicken and rice soup or explore new flavors with stuffed beef and rice peppers, onigiri is a versatile dish that complements any meal. Dive into your culinary journey with confidence, knowing that onigiri will always be a cherished part of your kitchen repertoire.
