📑 Table of Contents ▶
How to Make Oreo Cake Pops
Creating delectable treats often comes from the joy of combining simple ingredients to make something extraordinary. The process of making cake pops is a delightful adventure. I still remember the first time I made Oreo cake pops with my friends. It was a rainy afternoon, and we needed something sweet to brighten our day.
With a few Oreo cookies, some cream cheese, and chocolate, we crafted these little balls of joy. Everyone was amazed at how easy it was to turn crushed cookies into delightful pops. The joy of watching our friends smile as they took their first bites made that day unforgettable. Oreo cake pops capture that essence of shared happiness, making them a perfect treat for gatherings, parties, or just to enjoy at home.
Exploring how to make Oreo cake pops is not just about the ingredients; it’s about unleashing creativity and having fun in the kitchen. Let your imagination run wild with colors, decorations, and flavors as you embark on this sweet journey.
Making Oreo Cake Pops
Fundamentals
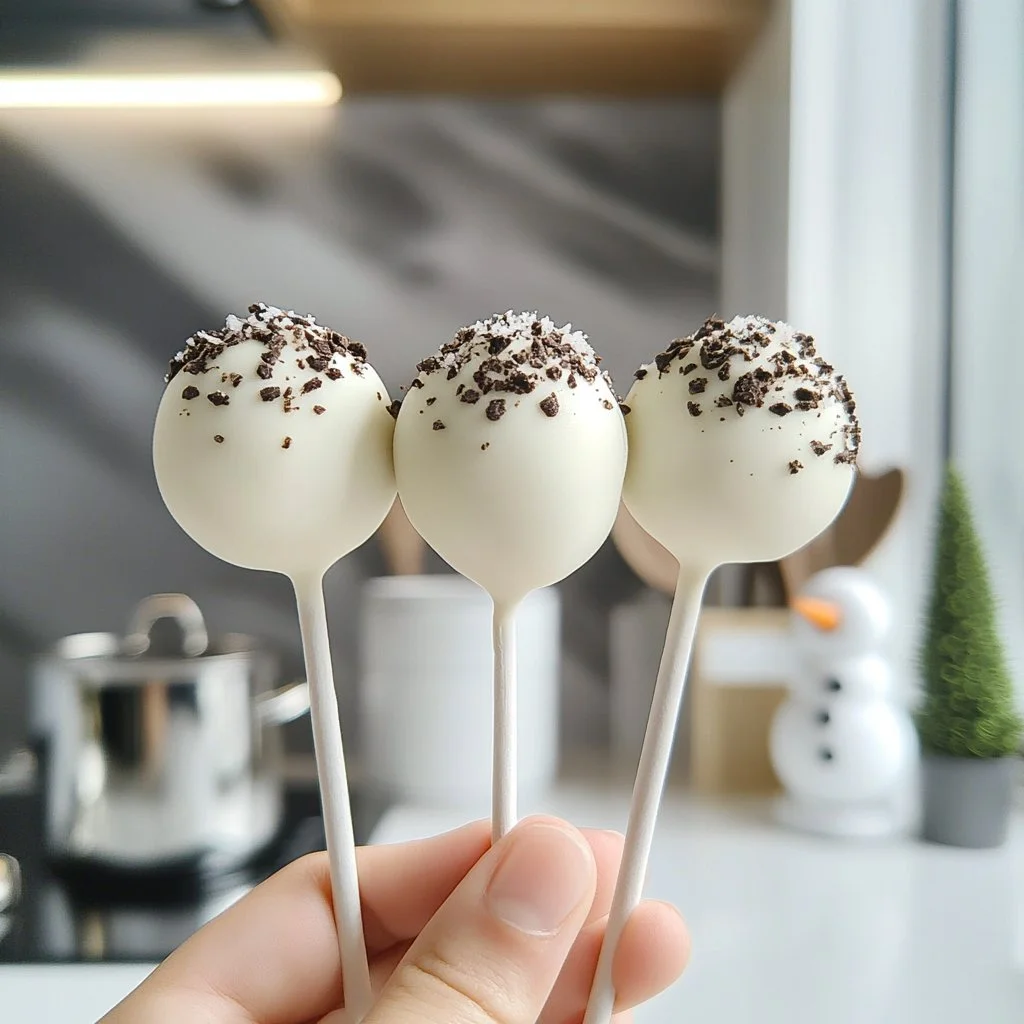
Oreo cake pops stand out for their simplicity and delightful flavor. At its core, this recipe consists of crushed Oreo cookies and cream cheese, forming a delicious mixture. The beautiful chocolate coating enhances the enjoyment, making each bite a rich experience. The beauty of these treats lies in their versatility.
Whether you want to create them for a festive occasion or a simple snack, Oreo cake pops can fit any occasion. The ingredients needed are minimal and require no prior baking experience. Even beginners can master this recipe easily. The key is in the technique and attention to detail during the assembly.
Once you gather the ingredients, the fun begins. These cake pops require little prep work and involve no baking. You can make them quickly, ensuring you have a delightful treat ready for sharing or enjoying yourself.
Preparation/Setup
Before jumping into the recipe, prepare your workspace. Clear a countertop or table and gather all your ingredients. You will need Oreo cookies (standard or double-stuffed depending on your preference), softened cream cheese, chocolate for coating, and sticks for the pops. The setup ensures a smooth workflow.
Start by crushing the Oreo cookies into fine crumbs. You can use a food processor or place them in a zip-top bag and crush them with a rolling pin. Make sure there are no large chunks, as it will affect the consistency of your cake pops.
After crushing the cookies, mix them with the softened cream cheese in a bowl. This combination creates a rich, creamy filling. Once blended, roll the mixture into uniform balls using your hands. Place them on a baking sheet lined with parchment paper. Finally, let these balls chill in the fridge for 30 minutes to firm up before coating them.
Ingredients
- 1 package of Oreo cookies (standard or double-stuffed)
- 4 ounces of cream cheese, softened
- 8 ounces of semi-sweet or white chocolate for coating
- Cake pop sticks or lollipop sticks
- Sprinkles or other decorations (optional)
Directions
- Start by crushing the Oreo cookies into fine crumbs.
- In a mixing bowl, combine the crushed cookies with softened cream cheese until well blended.
- Roll the mixture into petite, uniform balls, placing them on a parchment-lined baking sheet.
- Chill the balls in the fridge for 30 minutes until firm.
- Melt the chocolate in a microwave-safe bowl in 30-second increments, stirring until smooth.
- Dip the end of each cake pop stick into the melted chocolate, then insert it into the cookie ball.
- Dip the cake pops into the melted chocolate, ensuring an even coating.
- Allow excess chocolate to drip off and decorate with sprinkles or toppings as desired.
- Place the finished cake pops upright in a foam block or stand until set.

Mastering Cake Pops
Technique
The technique plays a crucial role when creating Oreo cake pops. Coating the little treats with melted chocolate can be tricky. Ensure the melted chocolate maintains a smooth consistency to avoid clumping. If it becomes too thick, simply reheat it gently.
Another important aspect is the chilling process before coating. Chilling the cookie balls helps maintain their shape during the dipping process. If the balls are too warm, they may lose form and result in a fussy appearance.
Experimenting with various chocolate types, including dark or flavored varieties, adds another level of delight to your cake pops. This adaptability enables you to customize them for different occasions, allowing creativity in flavor profiles.
Tips/Tricks
Use these tips to enhance your Oreo cake pops:
- Choose high-quality chocolate for the coating to ensure a richer flavor.
- If you want a colorful twist, use candy melts instead of chocolate.
- Decorate your cake pops with various toppings—like coconut flakes, nuts, or colorful sprinkles— for added flair.
- If you find the chocolate hard to work with, adding a small amount of vegetable oil can improve fluidity.
- Consider making themed cake pops for holidays or events by varying colors and decorations.
Perfecting the Results
Perfecting Results
Achieving the perfect Oreo cake pops often involves some trial and error. The texture remains critical; they should be moist yet firm. If they crumble during assembly, adjust the cream cheese quantity to ensure a better bind.
Temperature also matters with the melted chocolate. It should be warm, not hot, for proper coating. The cooling process is equally essential, ensuring the pops maintain their shape and firmness.
Take your time to decorate. Dipping the pops straight into the melted chocolate can lead to drips. Allowing the coating to set slightly before doing a second dip can give a more polished finish.
Troubleshooting/Variations
Even with the best intentions, you might encounter a few hiccups. Here are some common troubleshooting tips:
- If the mixture feels too soft, add more crushed Oreos to help it firm up.
- If the chocolate cracks upon drying, adjust the temperature—chocolate should be at room temperature when working.
- Should the pops fall off the sticks, ensure they were inserted into the cookie balls firmly and that they were chilled adequately.
Consider trying variations on the basic Oreo cake pops. Use other biscuits or cookies to create different flavors. Adapting the recipe allows for endless possibilities and creativity within your kitchen.
Serving and Storing Cake Pops
Serving/Presentation
Presentation elevates any treat. For Oreo cake pops, serve them on a decorative platter or stand. Utilize colorful wrappers or sprinkle additional toppings for a festive look. You can even arrange them in a bouquet style for special occasions, providing each guest with their own delightful treat.
Consider the overall vibe of your gathering. Showcase seasonal decorations or colors that match your theme. These small touches make your cake pops not just delicious but also visually appealing.
Pairings/Storage
Pair these delightful cake pops with a variety of beverages. Hot drinks, such as coffee and tea, complement their sweetness wonderfully. Also, consider serving them with fresh fruit for a refreshing contrast.
For storage, keep the cake pops in an airtight container in the refrigerator for up to a week. Make sure they are fully set before transferring to avoid damage. Enjoy the blend of textures and flavors in each cake pop; they will undoubtedly bring joy and sweet satisfaction to any occasion.
Making Oreo cake pops transforms simple ingredients into a cherished treat that brings people together. Each step unfolds delicious flavors, creativity, and warmth, making your kitchen the center of joy.
Print
Oreo Cake Pops
- Prep Time: 15 minutes
- Cook Time: 0 minutes
- Total Time: 45 minutes
- Yield: 12 servings
- Category: Dessert
- Method: No-Bake
- Cuisine: American
- Diet: Vegetarian
Description
Delightful Oreo cake pops made with crushed Oreo cookies and cream cheese, coated in chocolate.
Ingredients
- 1 package of Oreo cookies (standard or double-stuffed)
- 4 ounces of cream cheese, softened
- 8 ounces of semi-sweet or white chocolate for coating
- Cake pop sticks or lollipop sticks
- Sprinkles or other decorations (optional)
Instructions
- Start by crushing the Oreo cookies into fine crumbs.
- In a mixing bowl, combine the crushed cookies with softened cream cheese until well blended.
- Roll the mixture into petite, uniform balls, placing them on a parchment-lined baking sheet.
- Chill the balls in the fridge for 30 minutes until firm.
- Melt the chocolate in a microwave-safe bowl in 30-second increments, stirring until smooth.
- Dip the end of each cake pop stick into the melted chocolate, then insert it into the cookie ball.
- Dip the cake pops into the melted chocolate, ensuring an even coating.
- Allow excess chocolate to drip off and decorate with sprinkles or toppings as desired.
- Place the finished cake pops upright in a foam block or stand until set.
Notes
Ensure the melted chocolate maintains a smooth consistency. If too thick, reheat gently. Chill the cookie balls to maintain shape during dipping.
