
📑 Table of Contents ▶
- The Basics of Honey Buttermilk Bread
- Fundamentals
- Preparation/Setup
- Directions
- Mastering Honey Buttermilk Bread
- Technique
- Tips and Tricks
- Achieving the Best Honey Buttermilk Bread
- Perfecting Results
- Troubleshooting and Variations
- Serving Suggestions for Honey Buttermilk Bread
- Presentation
- Pairings and Storage
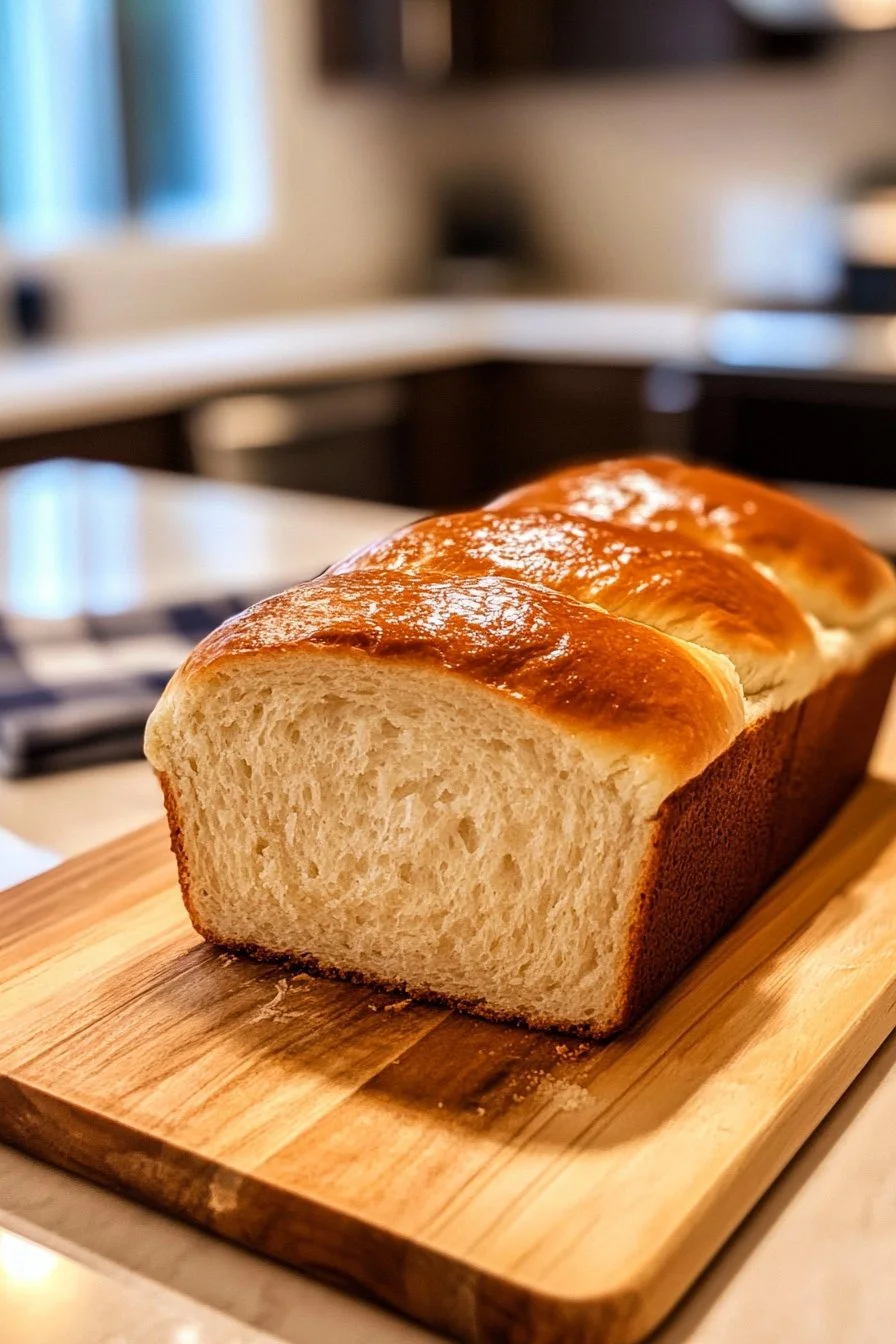
- Honey Buttermilk Bread
Honey Buttermilk Bread Recipe
Creating homemade bread offers a heartwarming experience, and Honey Buttermilk Bread is no exception. This delightful loaf blends sweet honey and tangy buttermilk, resulting in a soft texture and rich flavor that elevates any meal. This recipe has become a cherished tradition in my kitchen. The aroma of freshly baked bread whispers promises of comfort.
Every time I prepare this bread, I think of family gatherings. The warm loaf rests on the table, inviting everyone to enjoy a slice. I remember one particular Sunday afternoon. The sun streamed through the kitchen window as I kneaded the dough. Children eagerly awaited the golden crust, and the air filled with laughter and anticipation. As the bread baked, excitement bubbled over.
Honey Buttermilk Bread is not just about filling hunger; it creates moments that linger in memory. Its sweetness pairs perfectly with butter, jam, or as a base for hearty sandwiches. This recipe brings both warmth and joy to the table, making it an essential part of my culinary repertoire.
The Basics of Honey Buttermilk Bread
Fundamentals
Understanding the basic components of Honey Buttermilk Bread helps anyone become a proficient baker. This bread recipe shines due to the blend of yeast, buttermilk, and honey. Each ingredient plays a vital role in creating that perfect loaf.
Yeast serves as the magical ingredient, helping the bread rise. When it’s combined with warm water, it activates and begins to develop flavor. Buttermilk adds a subtle tang, enriching the overall taste while ensuring the bread remains soft and moist. Honey introduces natural sweetness, balancing the bread’s flavor profile perfectly.
Preparation/Setup
Setting up your kitchen for baking is crucial. Ensure you have all the ingredients ready before you begin. A clean, spacious workspace makes the process enjoyable. Gather your bowls, measuring cups, and spoons to streamline your cooking experience.
Starting with warm water to activate the yeast is essential. The ideal temperature sits between 105°F and 110°F. Too hot or too cold water can hinder the yeast’s ability to grow effectively. Measure out your buttermilk, making sure it reaches the same warm temperature. Preparing your ingredients in advance will ensure smooth sailing throughout the recipe.
Ingredients
For Honey Buttermilk Bread, here’s what you’ll need:
- 1 tablespoon yeast (or 1 packet)
- 1 pinch powdered ginger
- 1 teaspoon sugar
- 1/4 cup warm water (105°F to 110°F)
- 2 cups cultured buttermilk (also warm)
- 1/3 cup honey
- 1 teaspoon kosher salt (or 3/4 teaspoon if using table salt)
- 3/4 teaspoon baking soda
- 6 cups bread flour (or all-purpose flour)
- 1/4 cup melted butter (cooled to warm touch)
Directions
- In a medium-sized bowl, mix the yeast, ginger, sugar, and 110°F water. Allow it to sit for 5 minutes or until it becomes foamy.
- Whisk together the buttermilk, honey, salt, and baking soda in a separate bowl. Then, add this mixture to the yeast mixture.
- Gradually mix in three cups of flour until smooth; this takes about 3 to 5 minutes on low speed using a stand mixer.
- Pour in the melted butter, ensuring it fully incorporates into the batter.
- Incrementally add the rest of the flour, one cup at a time, while keeping the mixer on low speed.
- When the dough pulls away from the sides of the bowl, transfer it to a lightly floured surface. Knead until it’s elastic and smooth.
- Place the dough in a greased bowl, turning to coat the top lightly with grease. Cover the bowl with a clean tea towel and let it rise for 1.5 hours or until doubled in size.
- Once risen, punch down the dough and shape it into two loaves. Place each loaf in a greased pan with the seam side down. Grease the tops lightly and cover.
- Allow the bread to rise in a warm place for 45 minutes, nearing the tops of the pans.
- Preheat your oven to 375°F.
- Bake for 30 minutes, tenting with foil if the tops brown too quickly.
- After baking, brush the tops with melted butter and place them on a cooling rack.
- Allow to cool in the pans for 10 minutes before loosening the edges with a knife.
- Turn out and cool completely on a rack, covering the loaves if you prefer a soft crust.
Mastering Honey Buttermilk Bread
Technique
Perfecting Honey Buttermilk Bread resides in understanding the baking techniques involved. Yeast bread might seem intimidating, but it’s about patience and practice. Pay close attention to the dough’s texture; it should be smooth and slightly tacky after kneading.
Utilizing the correct kneading technique makes a significant difference. You can knead by hand or use a stand mixer with a dough hook attachment. If opting for hand-kneading, push the dough away with the heel of your hand, fold it over, and repeat. This builds gluten, contributing to a chewy, satisfying texture.
Tips and Tricks
To elevate your Honey Buttermilk Bread, consider a few handy tips. First, ensure your ingredients are at the right temperatures before combining them. Warm ingredients activate yeast effectively, resulting in a light loaf.
Second, avoid over-kneading. While gluten development is essential, overworking the dough can lead to tough bread. A few minutes is usually sufficient for a smooth result. Finally, patience during rising times will yield better texture and flavor, allowing the dough to develop fully.
Achieving the Best Honey Buttermilk Bread
Perfecting Results
Achieving the perfect loaf of Honey Buttermilk Bread comes down to small details. Pay attention to your dough’s rise; optimal dough will double in size during each rising period. When shaping loaves, ensure they fit snugly in their pans to optimize height.
Baking times and temperatures are also critical. Every oven varies slightly, so check on your bread towards the end of the baking period. The ideal loaf will present a golden-brown crust, suggesting it’s baked through. Use a thermometer to ensure the internal temperature reaches around 190°F.
Troubleshooting and Variations
Sometimes, things might not go as planned. If your bread is dense, this could indicate under-kneading or insufficient rising time. Always perform the “poke test” during the first rise; pressing a finger gently into the dough should leave a slight indentation that springs back slowly.
For variations in flavor, you can experiment with adding spices or herbs. Cinnamon, nutmeg, or rosemary can create unique spins on this classic recipe. If you’re feeling adventurous, try incorporating nuts or dried fruits while kneading for added texture.
Serving Suggestions for Honey Buttermilk Bread
Presentation
Serving Honey Buttermilk Bread can turn an everyday meal into a delightful occasion. Slice the bread neatly, and present it on a wooden board or a cloth-lined basket. Pair with an assortment of butters, jams, or flavored spreads for guests to enjoy.
Consider serving bread warm alongside dinner or as part of a brunch spread. A rustic look, with some loaves uncut, adds charm. Offer an array of toppings, so everyone can customize their experience to their taste.
Pairings and Storage
When it comes to pairings, Honey Buttermilk Bread truly shines. Serve it alongside soups, salads, or with savory dishes to balance flavors beautifully. It also makes an excellent base for sandwiches, complementing various fillings.
To store, keep the loaves in a sealed plastic bag or wrapped in a tea towel. If you want to maintain that soft crust, consider freezing loaves if you plan to save them for later. Thaw at room temperature for the best texture upon serving.
Homemade Honey Buttermilk Bread transforms simple ingredients into a splendid loaf that brightens any meal. Through patience and a touch of love, everyone can create delightful memories around the table shared over warm, fresh bread.
Print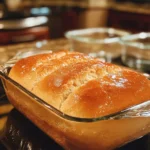
Honey Buttermilk Bread
- Prep Time: 15 minutes
- Cook Time: 30 minutes
- Total Time: 75 minutes
- Yield: 2 loaves
- Category: Bread
- Method: Baking
- Cuisine: American
- Diet: Vegetarian
Description
A delightful loaf that blends sweet honey and tangy buttermilk, resulting in a soft texture and rich flavor, perfect for any meal.
Ingredients
- 1 tablespoon yeast (or 1 packet)
- 1 pinch powdered ginger
- 1 teaspoon sugar
- 1/4 cup warm water (105°F to 110°F)
- 2 cups cultured buttermilk (also warm)
- 1/3 cup honey
- 1 teaspoon kosher salt (or 3/4 teaspoon if using table salt)
- 3/4 teaspoon baking soda
- 6 cups bread flour (or all-purpose flour)
- 1/4 cup melted butter (cooled to warm touch)
Instructions
- In a medium-sized bowl, mix the yeast, ginger, sugar, and 110°F water. Allow it to sit for 5 minutes or until it becomes foamy.
- Whisk together the buttermilk, honey, salt, and baking soda in a separate bowl. Then, add this mixture to the yeast mixture.
- Gradually mix in three cups of flour until smooth; this takes about 3 to 5 minutes on low speed using a stand mixer.
- Pour in the melted butter, ensuring it fully incorporates into the batter.
- Incrementally add the rest of the flour, one cup at a time, while keeping the mixer on low speed.
- When the dough pulls away from the sides of the bowl, transfer it to a lightly floured surface. Knead until it’s elastic and smooth.
- Place the dough in a greased bowl, turning to coat the top lightly with grease. Cover the bowl with a clean tea towel and let it rise for 1.5 hours or until doubled in size.
- Once risen, punch down the dough and shape it into two loaves. Place each loaf in a greased pan with the seam side down. Grease the tops lightly and cover.
- Allow the bread to rise in a warm place for 45 minutes, nearing the tops of the pans.
- Preheat your oven to 375°F.
- Bake for 30 minutes, tenting with foil if the tops brown too quickly.
- After baking, brush the tops with melted butter and place them on a cooling rack.
- Allow to cool in the pans for 10 minutes before loosening the edges with a knife. Turn out and cool completely on a rack, covering the loaves if you prefer a soft crust.
Notes
Ensure your ingredients are at the right temperatures before combining. Warm ingredients activate yeast effectively, resulting in a light loaf.
