📑 Table of Contents ▶
Homemade Strawberry Ice Cream
Strawberry ice cream has a magical way of evoking childhood memories. Picture a sunny day, laughter ringing in the air, and that delightful, creamy treat melting on your tongue. The fresh taste of strawberries dances around, refreshing and vibrant, giving a sense of summer bliss. This frozen indulgence has the power to bring everyone together, serving as the perfect end to a family dinner or the star at a backyard barbecue.
Creating homemade strawberry ice cream allows you to relive those joyful moments while crafting something uniquely yours. Using ripe strawberries bursting with flavor, you will transform a collection of simple ingredients into an irresistible treat that everyone will enjoy. The best part of this experience lies in the satisfaction of making it from scratch, from mixing the vibrant strawberries to the final touch of pouring it into your ice cream maker.
With just a few ingredients, you can create a dessert that embodies everything delightful about summer. As you mix and churn, you’ll discover that each scoop of homemade strawberry ice cream is not only a treat but a cherished memory waiting to be made.
Homemade Strawberry Ice Cream Fundamentals
Fundamentals
Homemade strawberry ice cream requires a few essential principles to create perfectly creamy and flavorful results. Start with high-quality, fresh strawberries for the best flavor. The strawberries should be ripe and luscious, ideally from your local farmer’s market or even your backyard garden if you have one. Ripe strawberries provide natural sweetness, reducing the need for excessive sugar.
Another essential element is patience. Allow the strawberry mixture to sit for 15 to 20 minutes. This resting period lets the strawberries release their sweet juices, which will enhance the flavor of your ice cream. Once you prepare this base, you will want to blend the ingredients expertly without over-mixing, ensuring you maintain a creamy texture.
Preparation/setup
Before diving into the recipe, gather all your ingredients. Have your strawberries hulled and diced, and measure out your honey, granulated sugar, lemon juice, heavy cream, half and half, and vanilla extract. Preparing in advance simplifies the process, allowing you to focus on mixing and churning. Use a large mixing bowl for combining ingredients, and ensure your ice cream maker is ready to go by following the manufacturer’s instructions.
You can experiment with the texture of the ice cream by mashing the strawberry mixture with a fork or potato masher, as desired. For a smoother consistency, using a blender or food processor is an option. Choose the method that best suits your preferences for the final texture.
Ingredients
Gather these simple yet delectable ingredients that work beautifully together to create homemade strawberry ice cream:
- 1 1/2 cups strawberries, hulled and diced
- 2 tablespoons honey
- 1/2 cup granulated sugar
- 1 teaspoon lemon juice
- 1 cup heavy whipping cream
- 1/2 cup half and half
- 1 teaspoon vanilla extract
This combination brings the classic flavors of strawberry ice cream to life and is simple enough for everyone to try their hand at making it.
Directions
Begin by mixing your hulled and diced strawberries with honey, granulated sugar, and lemon juice in a large bowl. Allow it to sit for 15 to 20 minutes. This waiting period enables the strawberries to release their juices, creating a flavorful mix. After this, mash the mixture with a potato masher, fork, or pastry cutter until you’re satisfied with the texture. For smoother ice cream, consider using a blender or food processor at this stage.
Next, add the heavy cream, half and half, and vanilla extract to the strawberry mixture. Stir gently just until combined. Pour this blend into your ice cream maker and follow the manufacturer’s instructions for churning. Typically, the mixture will churn for about 15 to 20 minutes. At this point, you have a choice; eat it immediately as a soft-serve, or transfer it to an airtight container and freeze it for 3 to 4 hours to thicken it further. For the best experience, let the ice cream sit at room temperature for about 5 to 10 minutes before serving.
Strawberry Ice Cream Techniques
Technique
Creating homemade strawberry ice cream relies on employing the right techniques throughout the process. The way you prep your strawberries significantly influences the final flavor. Use ripe, fresh strawberries, and when mashing, be cautious not to completely puree them if you want to retain some chunkiness. Mashing lets the natural juices flow while preserving a delightful fruit texture.
While mixing in the cream, half and half, and vanilla, stir just until everything is incorporated, avoiding over-mixing to preserve the airy texture of your ice cream. Churning is another critical step; keep an eye on the mixture as it transforms into creamy perfection, making sure not to let it churn too long, or it may turn overly firm.
Tips/Tricks
To take your homemade strawberry ice cream to the next level, consider these helpful tips:
- Freeze your ice cream maker bowl for several hours or overnight before using it to ensure the best results.
- If you wish to intensify the strawberry flavor, use a splash of strawberry extract alongside the fresh fruit. This small addition enhances the overall flavor profile.
- Play with texture by adding crushed graham crackers or chopped nuts during the last few minutes of churning for added crunch.
- Experiment with sweetness—add more or less sugar depending on the natural sweetness of your strawberries and personal preferences.
Refining Results for Strawberry Ice Cream
Perfecting Results
Achieving the right consistency for homemade strawberry ice cream takes practice. The balance of creaminess and flavor is key. Following the instructions carefully will yield delicious results, but consider adjusting sugar levels based on the freshness of your berries. If your initial batch seems too soft after churning, try freezing it longer.
If you prefer a scoopable ice cream, letting it freeze for a bit longer in an airtight container usually helps. Always taste your mixture before freezing; you want it to be vibrant and sweet. This can guide further adjustments to sugar or lemon juice if necessary.
Troubleshooting/variations
Sometimes, things don’t go as planned. If your ice cream turns out too hard after freezing, simply let it sit at room temperature for a few minutes before scooping. This allows it to soften and becomes easier to serve.
If the texture feels icy, it may be due to improper churning or not enough sugar to act as a stabilizer. Consider using a little more sugar in future batches for a creamier finish. If you’re looking to vary flavors, try adding a tablespoon of cocoa powder for a chocolate-strawberry twist or stirring in some fresh mint for a refreshing experience.
Serving Strawberry Ice Cream
Serving/presentation
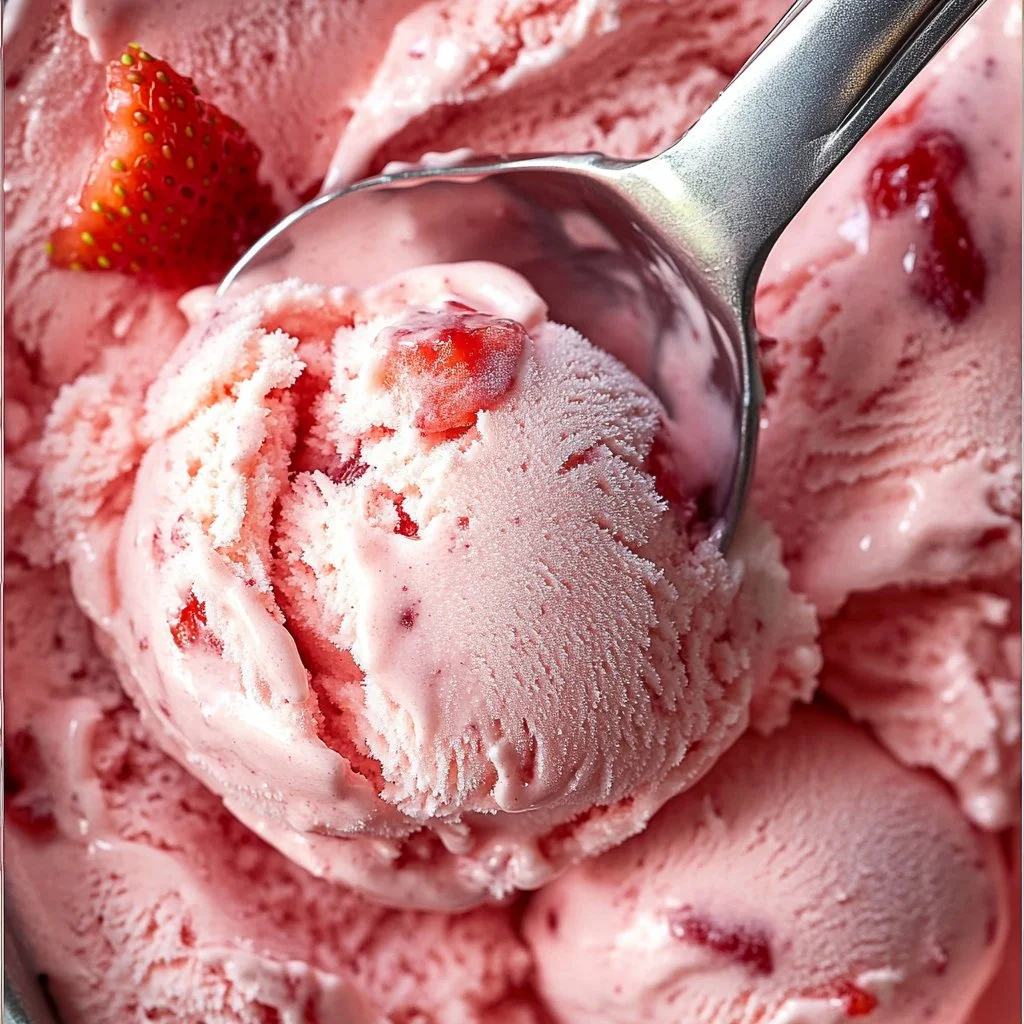
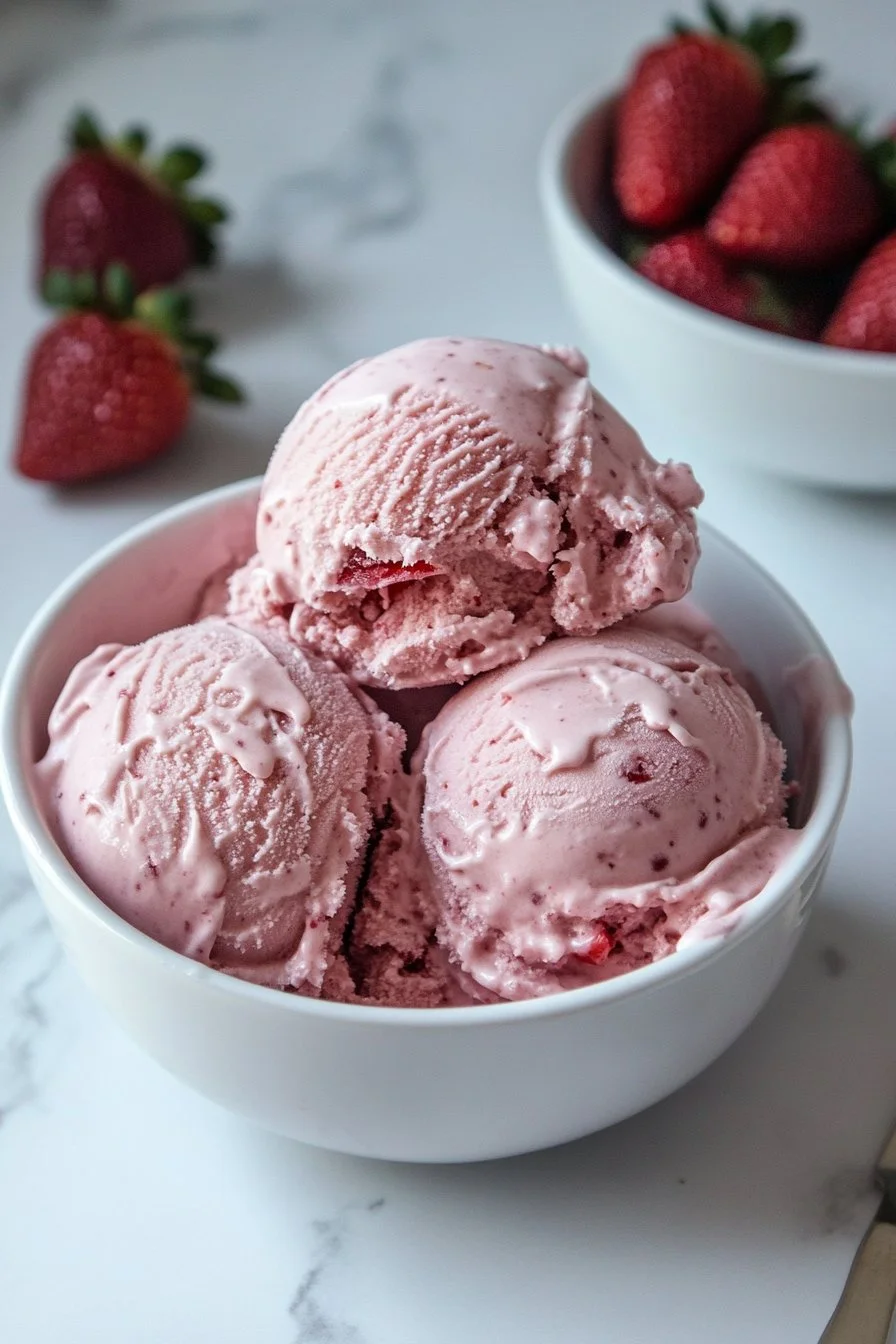
When it comes to serving your homemade strawberry ice cream, presentation makes a world of difference. Use a sturdy ice cream scoop to serve neat, round portions. Consider serving the ice cream in chilled bowls or cones for an extra touch of delight. Garnish with fresh strawberry slices or a sprig of mint to elevate its visual appeal.
For a fun spin, create a sundae by layering ice cream with homemade whipped cream, chocolate syrup, or your favorite toppings. Inspiration comes from different serving styles, so get creative and share this delightful treat with friends and family.
Pairings/storage
Homemade strawberry ice cream pairs beautifully with various foods—not necessarily wine. Think of serving it alongside freshly baked pie, layered with chocolate cake, or as a scoop atop warm pancakes. Try it with a side of chocolate chip cookies for a nostalgic combination.
Store your ice cream in an airtight container in the freezer. This helps prevent ice crystals from forming while maintaining the freshness of flavors. It’s best enjoyed within a few weeks, but you can keep it for up to a month for those sudden ice cream cravings.
Conclusion
Creating homemade strawberry ice cream at home evokes nostalgia while allowing you to enjoy fresh and delicious flavors. With simple ingredients and a bit of patience, anyone can master this classic treat. By experimenting and refining your technique, you will create that perfect scoop every time, bringing joy and flavor to warm days or special gatherings. Embrace the process and watch as you transform staple ingredients into a beloved dessert. Enjoy every moment, scoop, and smile with your homemade masterpiece!
Print
Homemade Strawberry Ice Cream
- Prep Time: 20 minutes
- Cook Time: 20 minutes
- Total Time: 40 minutes
- Yield: 4 servings
- Category: Dessert
- Method: Churning
- Cuisine: American
- Diet: Vegetarian
Description
A delightful and creamy homemade strawberry ice cream that captures the essence of summer with fresh strawberries and simple ingredients.
Ingredients
- 1 1/2 cups strawberries, hulled and diced
- 2 tablespoons honey
- 1/2 cup granulated sugar
- 1 teaspoon lemon juice
- 1 cup heavy whipping cream
- 1/2 cup half and half
- 1 teaspoon vanilla extract
Instructions
- In a large bowl, mix the hulled and diced strawberries with honey, granulated sugar, and lemon juice. Let it sit for 15 to 20 minutes to release juices.
- Mash the mixture with a potato masher or fork until desired texture is achieved.
- Add the heavy cream, half and half, and vanilla extract to the strawberry mixture. Stir gently until combined.
- Pour the blend into an ice cream maker and churn according to manufacturer’s instructions for about 15 to 20 minutes.
- Serve immediately as soft-serve or transfer to an airtight container and freeze for 3 to 4 hours for a firmer consistency. Let sit at room temperature for 5 to 10 minutes before serving.
Notes
Consider adding crushed graham crackers or chopped nuts during the last few minutes of churning for added texture.
