📑 Table of Contents ▶
- Fundamentals
- Preparation/setup
- Directions
- The Art of Crafting Garlic Parmesan Cheeseburger Bombs
- Technique
- Tips/tricks
- Perfecting Garlic Parmesan Cheeseburger Bombs
- Perfecting results
- Troubleshooting/variations
- Serving and Storing Garlic Parmesan Cheeseburger Bombs
- Serving/presentation
- Pairings/storage
- Conclusion
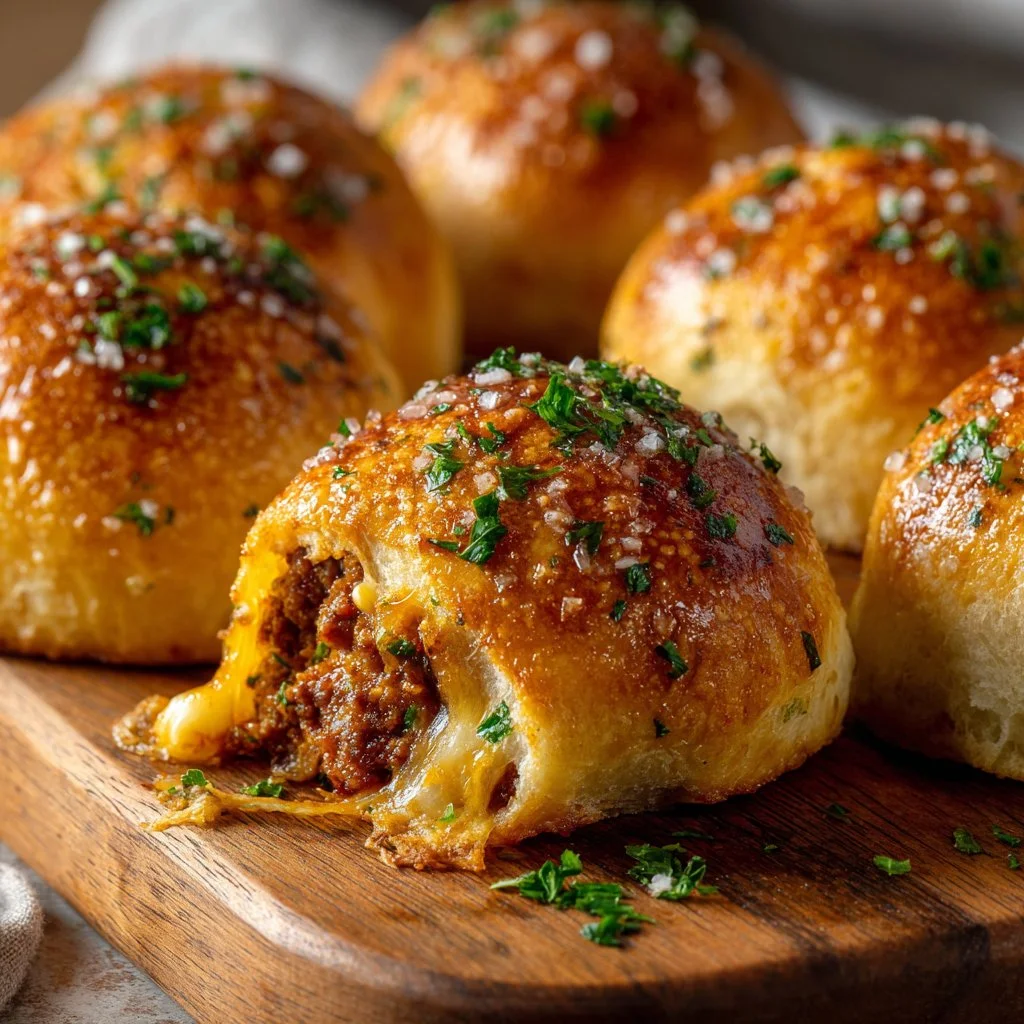
Garlic Parmesan Cheeseburger Bombs Recipe
The aroma of cooking cheeseburgers has a way of sparking joy and nostalgia. Growing up, the sound of sizzling beef on the grill carried throughout our neighborhood, signaling a gathering of friends and family. Each bite of a juicy cheeseburger became a celebration, bringing everyone together around the dinner table. The flavors melded into memorable moments that lingered long after the plates were cleared.
Fast-forward to today, that same spirit resonates when creating Garlic Parmesan Cheeseburger Bombs. Combining the mouthwatering flavors of cheeseburgers with the richness of garlic and the comfort of buttery biscuits transforms an ordinary meal into something extraordinary. This recipe encapsulates that sense of warmth and joy, making it a perfect fit for any gathering.
The beauty of these bombs lies in their simplicity. With minimal ingredients and straightforward steps, anyone can whip them up in no time. The satisfaction of seeing your family and friends enjoy each bite rivals the joy of the gathering itself. Each bomb bursts with cheesy goodness and a garlicky kick, ensuring that these will be the highlight of your meal.
In the kitchen, the possibilities seem endless when you draw inspiration from classic recipes. Garlic Parmesan Cheeseburger Bombs showcase how familiar flavors can create something entirely new and delightful. Let’s dive into how these delicious treats come together.
Garlic Parmesan Cheeseburger Bombs
Fundamentals
Creating Garlic Parmesan Cheeseburger Bombs starts with understanding the essence of this dish. The primary elements consist of hearty ground beef, gooey cheddar cheese, and tender biscuit dough. The key to achieving the perfect flavor balance lies in using the right amounts of seasonings, like garlic powder, salt, and pepper.
The use of ground beef with 80/20 fat content ensures juicy, flavorful bites. The cheddar cheese provides that classic cheeseburger experience, while the buttery, flaky biscuit dough wraps the filling, making every bite a delightful mix of textures. This combination of ingredients can make anyone’s mouth water in anticipation.
Incorporating garlic into this recipe elevates the flavor profile. With both garlic powder in the filling and as a topping, each Garlic Parmesan Cheeseburger Bomb bursts with rich, savory notes. The addition of grated Parmesan cheese creates a finishing touch that complements the other ingredients perfectly.
Preparation/setup
Before diving into cooking, gathering and preparing your ingredients is essential. Start by measuring out the ground beef, shredded cheddar cheese, butter, and the seasonings—this makes the cooking process smooth and efficient.
Preheat the oven to ensure it reaches the right temperature while you prepare the bombs. Line a baking sheet with parchment paper for easy cleanup once they are finished. Taking these simple steps simplifies the process, making it more enjoyable.
Once you have everything ready, you can turn your attention to cooking the ground beef. Breaking it up into small pieces while it cooks ensures even seasoning distribution. After cooking, let it cool slightly so that it’s safe to handle when assembling the bombs.
Ingredients
Here’s what you need to create Garlic Parmesan Cheeseburger Bombs:
- 1 lb Ground Beef (recommended fat content: 80/20)
- 1 cup Cheddar Cheese (shredded)
- 2 tsp Garlic Powder
- 1 tsp Salt
- 1 tsp Black Pepper
- 2 cans of Refrigerated Biscuit Dough (each containing eight biscuits)
- 2 tbsp Butter (melted)
- ½ cup Parmesan Cheese (grated)
- 1 tsp Garlic Powder for topping
Directions
Follow these steps to assemble and bake the Garlic Parmesan Cheeseburger Bombs:
-
Prepare Your Ingredients: Gather and measure out all ingredients. Preheat the oven to 375°F while you prepare the kosher beef.
-
Cook the Ground Beef: In a skillet, brown the ground beef over medium heat. Add 2 teaspoons of garlic powder, salt, and black pepper during cooking. Stir occasionally, breaking up the meat until it is fully browned. Drain any excess fat and set aside to cool.
-
Assemble Your Cheeseburger Bombs: Open the refrigerated biscuit dough. Flatten each biscuit into a round shape, then place a spoonful of cooked ground beef and a sprinkle of cheddar cheese in the center. Fold the biscuit dough over the filling and pinch the edges to seal.
-
Bake the Cheeseburger Bombs: Place the sealed bombs on a prepared baking sheet. Brush the tops with melted butter to enhance flavor and encourage browning. Bake for 15 to 20 minutes until golden brown.
-
Add the Parmesan Garlic Topping: While the bombs are baking, mix the grated Parmesan cheese with the remaining garlic powder. After removing the bombs from the oven, sprinkle the Parmesan mixture over the top for an added burst of flavor.
The Art of Crafting Garlic Parmesan Cheeseburger Bombs
Technique
Achieving the perfect Garlic Parmesan Cheeseburger Bombs relies on mastering a few key techniques. When cooking the ground beef, use a spatula or wooden spoon to break it into small pieces while it cooks. This ensures an even texture and helps the seasoning distribute uniformly.
Sealing the biscuit around the filling is a crucial step. Be sure to pinch the sides tightly to prevent any filling from leaking out during baking. You want each bomb to keep its cheesy goodness intact until it’s ready to be enjoyed.
Tips/tricks
Here are some helpful tips for a successful baking experience:
- Customize the filling: Feel free to experiment with additional ingredients like sautéed onions, bell peppers, or even different cheeses.
- Ensure even sizes: When flattening the biscuit dough, aim for uniform sizes for even baking.
- Let them cool slightly: After removing the bombs from the oven, allowing them to cool for a few minutes ensures that the cheese inside doesn’t burn the mouth upon the first bite.
Perfecting Garlic Parmesan Cheeseburger Bombs
Perfecting results
Pay attention to cooking times and temperatures for optimal results. If your oven tends to run hot, check the bombs a few minutes early to avoid over-browning them. Each oven operates differently, so minor adjustments help achieve the desired outcome.
Monitoring the filling’s internal temperature can also be beneficial, ensuring the ground beef reaches a safe level of 160°F. Use a meat thermometer if you’d like to ensure perfect doneness.
Troubleshooting/variations
In case your bombs don’t turn out as expected, here are some common troubleshooting tips:
- If they feel doughy, they may need more time in the oven. Check the bottoms for doneness, as they often brown faster than the tops.
- For variations, consider using turkey or chicken in place of ground beef. Just make sure to adjust the cooking time based on the meat used.
- If the biscuit dough doesn’t seal properly, try wetting your fingers with a bit of water to help the dough stick together better.
Serving and Storing Garlic Parmesan Cheeseburger Bombs
Serving/presentation
Presenting Garlic Parmesan Cheeseburger Bombs is as delightful as making them. Arrange the bombs on a rustic wooden platter or a brightly colored dish for a fun touch. A side of marinara or ranch dressing for dipping elevates the experience, creating a restaurant-style appetizer at home.
Consider garnishing with fresh parsley or chives for an eye-catching visual appeal. The green adds a pop of color against the golden biscuit, making for an inviting plate.
Pairings/storage
Storing leftover Garlic Parmesan Cheeseburger Bombs is simple. Keep them in an airtight container in the refrigerator for up to three days. For longer storage, consider freezing them. Allow the bombs to cool completely before placing them in a freezer-safe bag.
To reheat, simply bake them in the oven until warmed through. This method keeps the biscuit dough flaky and the filling deliciously gooey.
Conclusion
The joy of making Garlic Parmesan Cheeseburger Bombs reflects the happiness of home cooking. The process connects us to fond memories while creating new ones with family and friends. Each step provides an opportunity to engage with the flavors that define comfort food. With easily accessible ingredients and straightforward preparation, anyone can craft these delightful treats, making them an excellent addition to any meal or gathering. Embrace the flavors, and enjoy the warmth that comes from sharing food with those you love.
Print
Garlic Parmesan Cheeseburger Bombs
- Prep Time: 15 minutes
- Cook Time: 20 minutes
- Total Time: 35 minutes
- Yield: 16 bombs
- Category: Appetizer
- Method: Baking
- Cuisine: American
- Diet: None
Description
Delicious and easy-to-make Garlic Parmesan Cheeseburger Bombs filled with ground beef, cheddar cheese, and wrapped in buttery biscuit dough.
Ingredients
- 1 lb Ground Beef (80/20 fat content)
- 1 cup Cheddar Cheese (shredded)
- 2 tsp Garlic Powder
- 1 tsp Salt
- 1 tsp Black Pepper
- 2 cans Refrigerated Biscuit Dough (8 biscuits each)
- 2 tbsp Butter (melted)
- ½ cup Parmesan Cheese (grated)
- 1 tsp Garlic Powder for topping
Instructions
- Gather and measure out all ingredients. Preheat the oven to 375°F.
- Cook the ground beef in a skillet over medium heat. Add 2 teaspoons of garlic powder, salt, and black pepper. Stir and break up the meat until fully browned. Drain excess fat and let cool.
- Flatten each biscuit into a round shape, place cooked ground beef and a sprinkle of cheddar cheese in the center, fold and pinch to seal.
- Place the bombs on a lined baking sheet, brush tops with melted butter, and bake for 15-20 minutes until golden brown.
- Mix grated Parmesan cheese with remaining garlic powder and sprinkle over the bombs after baking.
Notes
Customize the filling by adding sautéed onions, bell peppers, or different cheeses. Allow bombs to cool slightly before serving.
