📑 Table of Contents ▶
Freezer Breakfast Sandwiches
A busy morning often calls for a quick yet satisfying breakfast. This is where freezer breakfast sandwiches come into play, making mornings blissful rather than stressful. The beauty of these sandwiches lies in their simplicity and efficiency. Preparing your own freezer breakfast sandwiches means you can enjoy a wholesome meal even on the most hectic days.
I vividly recall mornings when I would scramble through the kitchen, trying to prepare a nutritious breakfast while gathering my things for the day. That’s when I decided to create delicious breakfast sandwiches that not only taste great but can also be made ahead of time. With fluffy eggs, cheese, and savory meat nestled between English muffins, these sandwiches become a hearty start to any day.
This recipe for freezer breakfast sandwiches combines eggs, cheese, and choice meats to deliver a satisfying meal. The best part? You can whip them up in batch and keep them stored in the freezer for quick access. These sandwiches are perfect for anyone looking to make mornings easy without compromising on flavor or nutrition.
Freezer Breakfast Sandwiches
Fundamentals
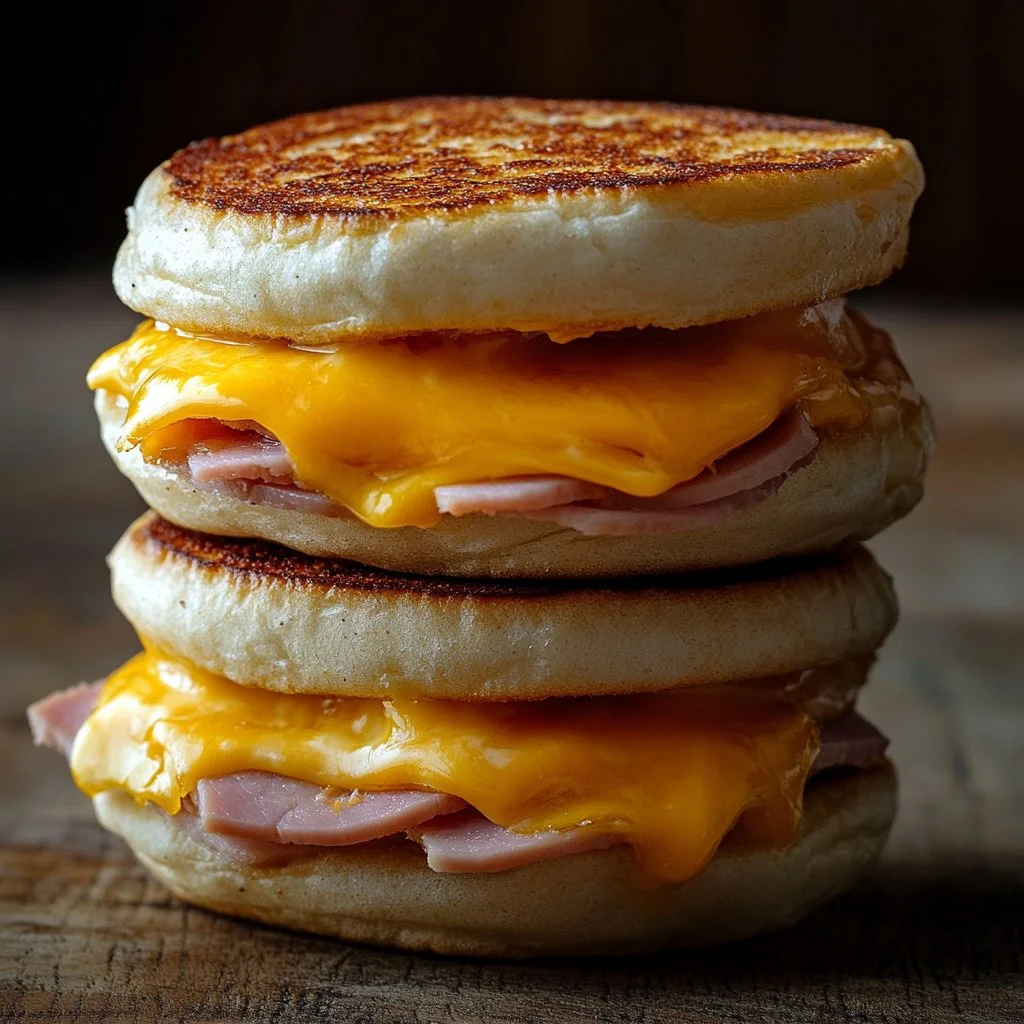
Freezer breakfast sandwiches are both versatile and satisfying, relying primarily on a few key ingredients. With 12 eggs acting as the star of the show, these sandwiches bring fluffy goodness that pairs exceptionally well with cheesy richness and savory flavors. The simple combination of English muffins and choice meats creates a filling and wholesome breakfast option.
You can customize these sandwiches to fit your taste buds. Using different types of cheese or alternating between cooked bacon, ham, or sausage patties allows for countless variations. This flexibility means you can cater to everyone’s preferences in your household or enjoy a unique flavor combo each morning.
Being able to prepare these sandwiches at home also means you control the quality and flavors. The ingredients are straightforward, promoting a sense of freshness that’s often lost in store-bought alternatives. Plus, you won’t have to worry about additives or preservatives, ensuring a clean-eating experience.
Preparation/Setup
To kick off your free freezer breakfast sandwiches, preheat your oven to 325 degrees. A well-prepared workspace goes a long way when prepping these scrumptious sandwiches. Start by generously greasing a 9×13” pan to prevent any sticky mishaps during the baking process. Utilizing nonstick spray or butter works wonders at keeping the sandwiches intact after baking.
Next, gather your ingredients to streamline the preparation. Whisk together the eggs, milk, salt, and freshly ground black pepper in a large bowl. An electric mixer makes this process much easier, ensuring a smooth and fluffy egg mixture that bakes beautifully.
Once the eggs are well combined, pour the mixture into your greased pan and spread it evenly. The eggs need a gentle baking touch so that they set without becoming rubbery. Bake for 18-22 minutes, or until the center is set, keeping a close eye to avoid overcooking.
After baking, take the eggs out of the oven and allow them to cool for a few minutes. Cooling makes cutting easier and cleaner, allowing for neat squares for your sandwiches. Finally, cut the baked egg layer into 12 squares to fit perfectly on each English muffin half.
Ingredients
- 12 eggs
- 2 tablespoons milk
- 1 teaspoon salt
- 1/2 teaspoon freshly ground black pepper
- 12 slices cooked bacon, sausage patties, ham, or Canadian bacon
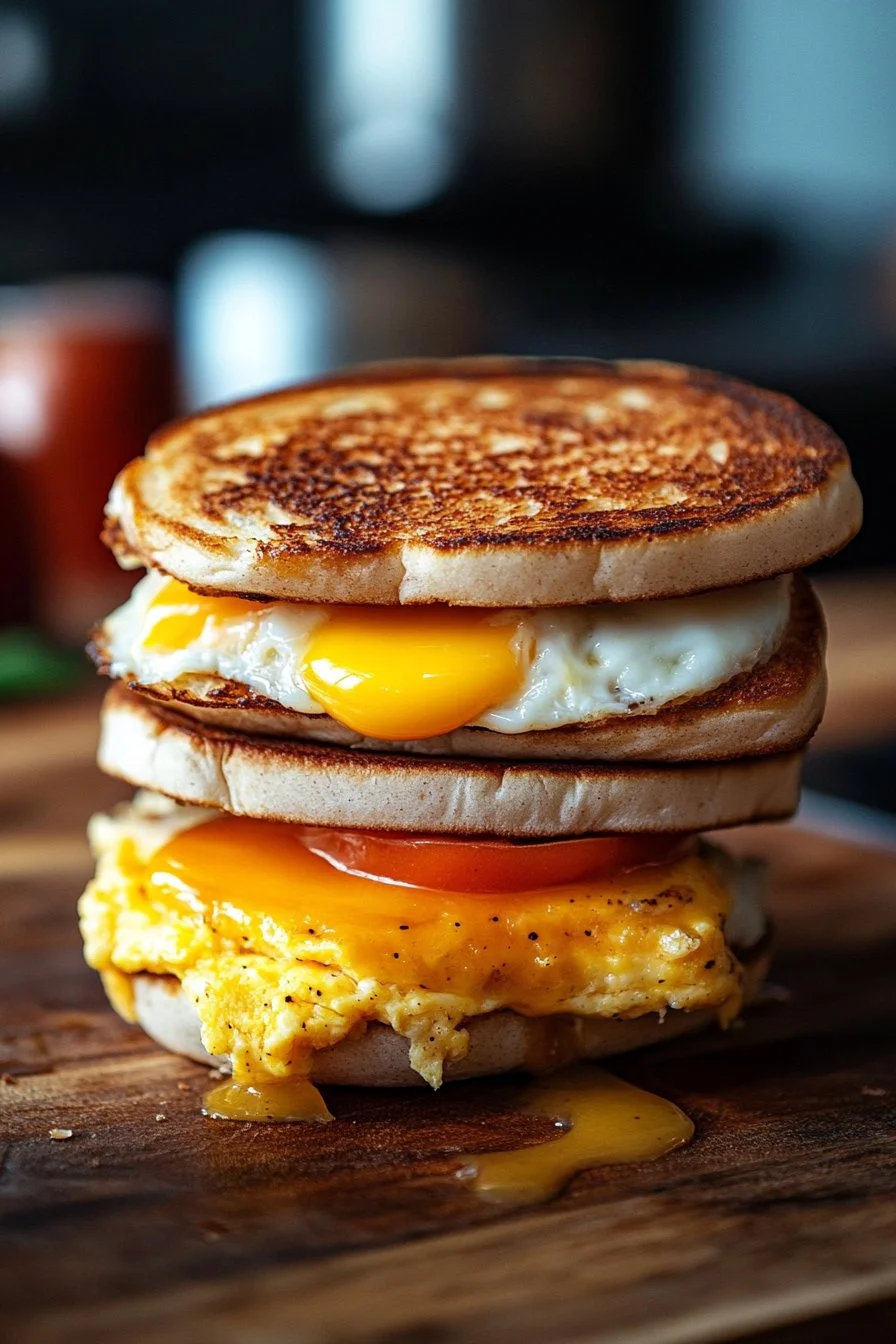
- 12 English muffins
- 12 slices cheddar cheese (or your favorite cheese)
Directions
- Preheat the oven to 325 degrees.
- Generously grease a 9×13” pan.
- In a large bowl, whisk together the eggs, milk, salt, and pepper using an electric mixer for ease.
- Pour the egg mixture into the greased pan.
- Bake for 18-22 minutes, until the center is set. Remove and cool slightly.
- Cut the baked egg into 12 squares.
- Top each English muffin half with an egg square, a slice of cheese, and your choice of meat.
- Place the other half of the English muffin on top.
If you consume the sandwiches right away, heat them at 350 degrees for about 5 minutes, or until the cheese melts.
Making Your Freezer Breakfast Sandwiches
Technique
Crafting perfect freezer breakfast sandwiches requires a bit of technique, but it’s quite straightforward. Start by ensuring that you select quality, fresh ingredients. This will contribute to the taste and overall appeal of your sandwiches.
Using freshly cooked meat adds a layer of warmth and flavor, elevating the entire breakfast experience. If you have leftovers from dinner, consider incorporating those—creativity in the kitchen is a part of what makes cooking rewarding.
Construct your sandwiches with care. Layer your egg squares with cheese and meat, ensuring even distribution throughout. This careful layering enhances flavor and presentation, providing an inviting breakfast that is great to eat on-the-go or at home.
After assembling your sandwiches, wrap each one individually in plastic wrap or aluminum foil if storing in the freezer. This step is crucial for maintaining freshness and avoiding freezer burn. Labeling each sandwich with the date ensures you keep track of freshness, as well.
Tips/Tricks
There are several tricks to ensure your freezer breakfast sandwiches remain delicious and ready for action. One essential tip is to avoid overbaking the eggs. Keeping a close eye can be the difference between soft, delightful eggs and dry, crumbly ones.
When selecting English muffins, choose ones that hold their structure well after freezing and reheating. Some brands offer denser options that resist becoming mushy once thawed.
Feel free to rotate the selection of meats and cheeses to prevent monotony. One morning could feature cooked bacon, while the next showcases sausage. This simple variation helps keep breakfasts exciting and tailored to your mood.
Labeling the frozen sandwiches with the date is a practical tip to avoid any unpleasant surprise meals from the depths of your freezer months later.
Perfecting Your Freezer Breakfast Sandwiches
Perfecting Results
Perfecting your freezer breakfast sandwiches comes down to understanding your oven and making necessary adjustments. Since oven temperatures can differ, checking on your eggs periodically during the baking process will help you achieve the right consistency.
Freezing is another aspect to master. Once you’ve assembled your sandwiches, allow them to cool fully before placing them in the freezer. This practice prevents condensation, which can lead to sogginess.
While reheating, consider placing the sandwiches in an air fryer if you have one. This method helps maintain a crispy outer layer and melty cheese. Heating in the oven or toaster oven works well, too. The key lies in ensuring even heat throughout.
Troubleshooting/Variations
Some common problems might arise during the preparation or freezing of the sandwiches. If your egg squares turn out dry, you may have overcooked them initially. A good practice is to slightly underbake them before cooling, allowing for a softer texture once reheated.
If you prefer a specific flavor profile, consider mixing herbs or spices into the egg mixture. Adding ingredients like chives or paprika can elevate the taste and add layers of flavor. Variations can also include replacing cheddar with pepper jack for an added kick or using whole grain English muffins for a healthier option.
Experiment freely with the ingredients; the beauty of these sandwiches is their versatility.
Serving Your Freezer Breakfast Sandwiches
Serving/Presentation
Serving your freezer breakfast sandwiches can be as casual or elaborate as you desire. For a quick breakfast, unwrap and reheat directly from the freezer and serve warm. If hosting friends or family, consider assembling a "make-your-own" station.
Set out various options—different meats, cheeses, and even flavorful dressings, allowing everyone to customize their sandwiches. This approach invites a communal cooking experience and celebrates the act of shared meals.
When serving, pair your sandwiches with fresh fruit or a refreshing smoothie for a balanced breakfast. This adds color and nutrition to the table, making the meal as visually appealing as it is satisfying.
Pairings/Storage
While pairing can be subjective, consider refreshing beverages that convey morning brightness. Juices or coffee can complement your sandwiches wonderfully.
For storage, ensure your sandwiches remain tightly wrapped if kept in the freezer. Consuming within 1-3 months provides the best flavor and freshness. To reheat, simply unwrap and warm in your preferred method, adjusting time as needed, and enjoy!
Once assembled, these freezer breakfast sandwiches transform into a time-saving delight, making busy mornings a breeze while delivering flavor and nutrition. Get creative with recipes, flavors, and combinations, enhancing your overall breakfast experience.
Print
Freezer Breakfast Sandwiches
- Prep Time: 15 minutes
- Cook Time: 22 minutes
- Total Time: 37 minutes
- Yield: 12 servings
- Category: Breakfast
- Method: Baking
- Cuisine: American
- Diet: None
Description
Quick and satisfying breakfast sandwiches that can be made ahead of time and stored in the freezer for easy morning meals.
Ingredients
- 12 eggs
- 2 tablespoons milk
- 1 teaspoon salt
- 1/2 teaspoon freshly ground black pepper
- 12 slices cooked bacon, sausage patties, ham, or Canadian bacon
- 12 English muffins
- 12 slices cheddar cheese (or your favorite cheese)
Instructions
- Preheat the oven to 325°F (160°C).
- Generously grease a 9×13” pan.
- In a large bowl, whisk together the eggs, milk, salt, and pepper using an electric mixer.
- Pour the egg mixture into the greased pan.
- Bake for 18-22 minutes, until the center is set. Remove and cool slightly.
- Cut the baked egg into 12 squares.
- Top each English muffin half with an egg square, a slice of cheese, and your choice of meat.
- Place the other half of the English muffin on top.
- If consuming right away, heat at 350°F (175°C) for about 5 minutes, or until the cheese melts.
Notes
Store individual sandwiches wrapped in plastic wrap or aluminum foil to maintain freshness. Label with the date for tracking.
