📑 Table of Contents ▶
- Understanding 4-Ingredient Artisan Bread
- Fundamentals
- Preparation/Setup
- Directions
- Techniques for Perfect Artisan Bread
- Technique
- Tips/Tricks
- Perfecting Your Artisan Bread
- Perfecting Results
- Troubleshooting/Variations
- Serving and Storing Artisan Bread
- Serving/Presentation
- Pairings/Storage
- Artisan bread creates a lasting impression in any setting, from lively family dinners to quiet weekends at home. Embrace the process and enjoy the simple pleasure of baking. The 4-ingredient artisan bread recipe invites you to join in this timeless culinary tradition, promoting connection and wholesome enjoyment with every loaf.
4-Ingredient Artisan Bread Recipe
Baking artisan bread holds a special place in my heart. The aroma of freshly baked bread fills the home with warmth and comfort. Growing up, my family often came together in the kitchen as we waited for the bread to rise—anticipation creating a bond over shared moments.
This 4-ingredient artisan bread recipe reflects that joyful culinary experience. With simplicity at its core, this recipe invites anyone keen to create delicious bread at home. Using just all-purpose flour, instant yeast, fine sea salt, and warm water, you can craft bread that rivals those found in bakeries.
The beauty lies in the process. As the dough rises, radiant bubbles form, promising a delightful texture and taste. Whether enjoyed fresh for breakfast or as a side at dinner, this artisan bread adds an inviting touch to any meal. In just a few steps, you can bring the magic of artisan bread into your kitchen.
Understanding 4-Ingredient Artisan Bread
Fundamentals
Artisan bread, known for its crusty exterior and soft interior, relies on a few essential components. The foundation of this recipe is all-purpose flour. It lends the necessary structure and absorbs the water beautifully. The use of unbleached flour ensures rich flavors and is widely available, making it convenient for all bakers.
Instant yeast serves as the catalyst for fermentation, allowing the dough to rise without lengthy prep work. At just ¼ teaspoon in this recipe, it activates with warm water, simplifying the process and reducing the wait time. The tiny quantity might surprise some, but the results speak for themselves.
Salt plays a vital role in this 4-ingredient artisan bread. It enhances flavor while controlling the yeast’s activity and building gluten structure. Opt for fine sea salt or kosher salt, steering clear of iodized options to maintain the bread’s nuanced taste.
Preparation/Setup
Preparation sets the stage for your baking adventure. Begin by gathering all your ingredients: 3 cups of all-purpose flour, 1½ teaspoons of fine sea salt, and ¼ teaspoon of instant yeast, along with 1½ cups of warm water. The warmth of the water at 105-115°F (40-46°C) helps awaken the yeast, facilitating its fermentation.
In a large mixing bowl, combine the flour, salt, and instant yeast. Whisk them together to ensure everything is dispersed evenly, a crucial step for a consistent rise and flavor. If you are using active dry yeast, take care to proof it first in warm water, ensuring it blooms and becomes frothy before blending it with the dry mixture.
Once appropriately combined, pour the warm water into the bowl with the dry ingredients. Using a wooden spoon or spatula, mix until the dough becomes shaggy and sticky. Avoid the temptation to knead; this no-knead recipe thrives on being slightly wet and unkempt, allowing the yeast to work its magic without the need for extensive handling.
Ingredients
- 3 cups (approximately 400g) of all-purpose flour
- ¼ teaspoon of instant yeast
- 1½ teaspoons of fine sea salt (or kosher salt)
- 1½ cups (approximately 355-360ml) of warm water (at about 105-115°F)
Directions
- In a large mixing bowl, whisk together the all-purpose flour, fine sea salt, and instant yeast until thoroughly combined.
- Pour the warm water into the bowl and mix with a sturdy spatula or wooden spoon until no dry flour remains. The dough should appear shaggy and sticky, which is normal for no-knead recipes.
- Cover the bowl tightly with plastic wrap or a reusable cover. Allow the dough to rise at room temperature for 12 to 18 hours, developing flavor and texture.
- After the initial rise, lightly flour a clean work surface. Gently scrape the dough onto the surface, folding it a few times to create surface tension without overworking it.
- Transfer the dough seam-side down onto a piece of parchment paper, cover loosely, and let rise for another 1 to 2 hours.
- Preheat your Dutch oven to 450°F (232°C) about 30-45 minutes before the second rise completes.
- After the final rise, carefully remove the hot Dutch oven and place the dough into it. Cover and bake for 30 minutes.
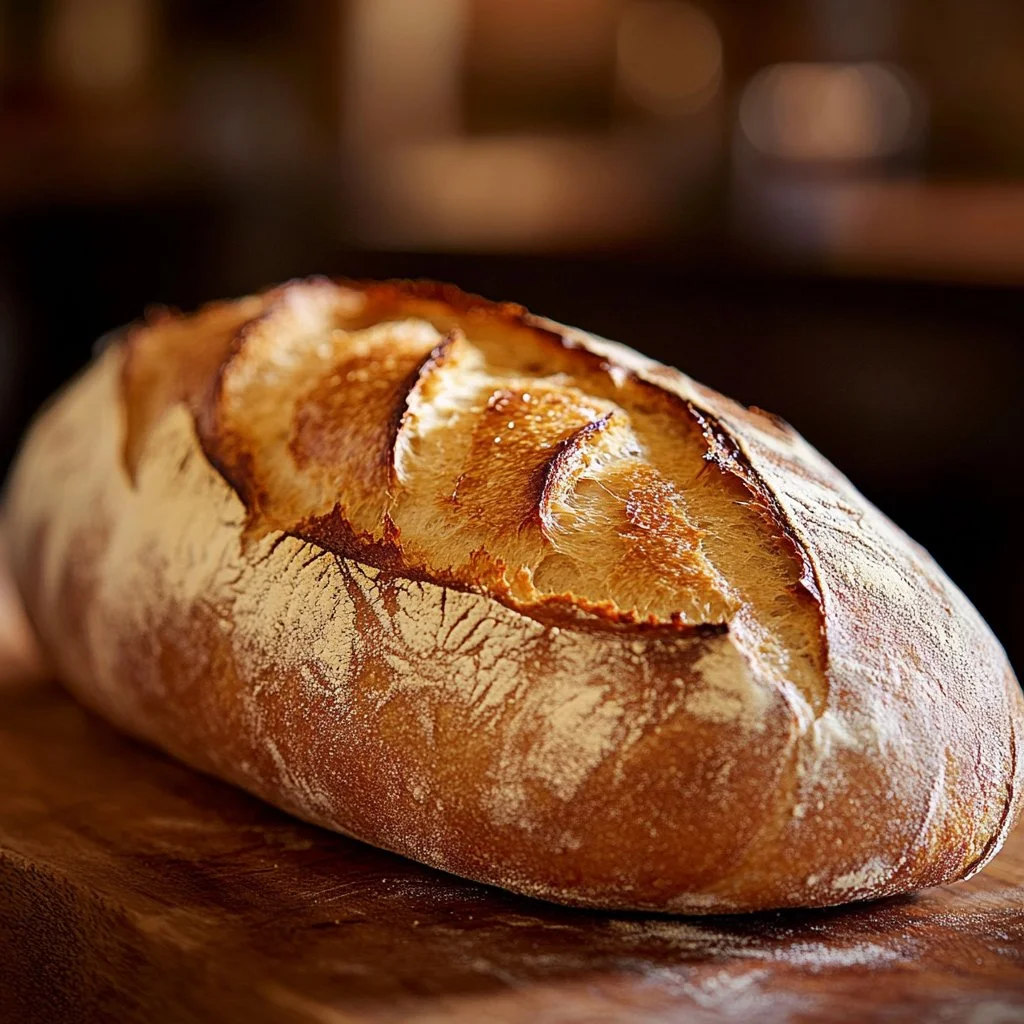
- Remove the lid and continue baking uncovered for 15 to 25 minutes, until the crust turns deep golden brown and crackled.
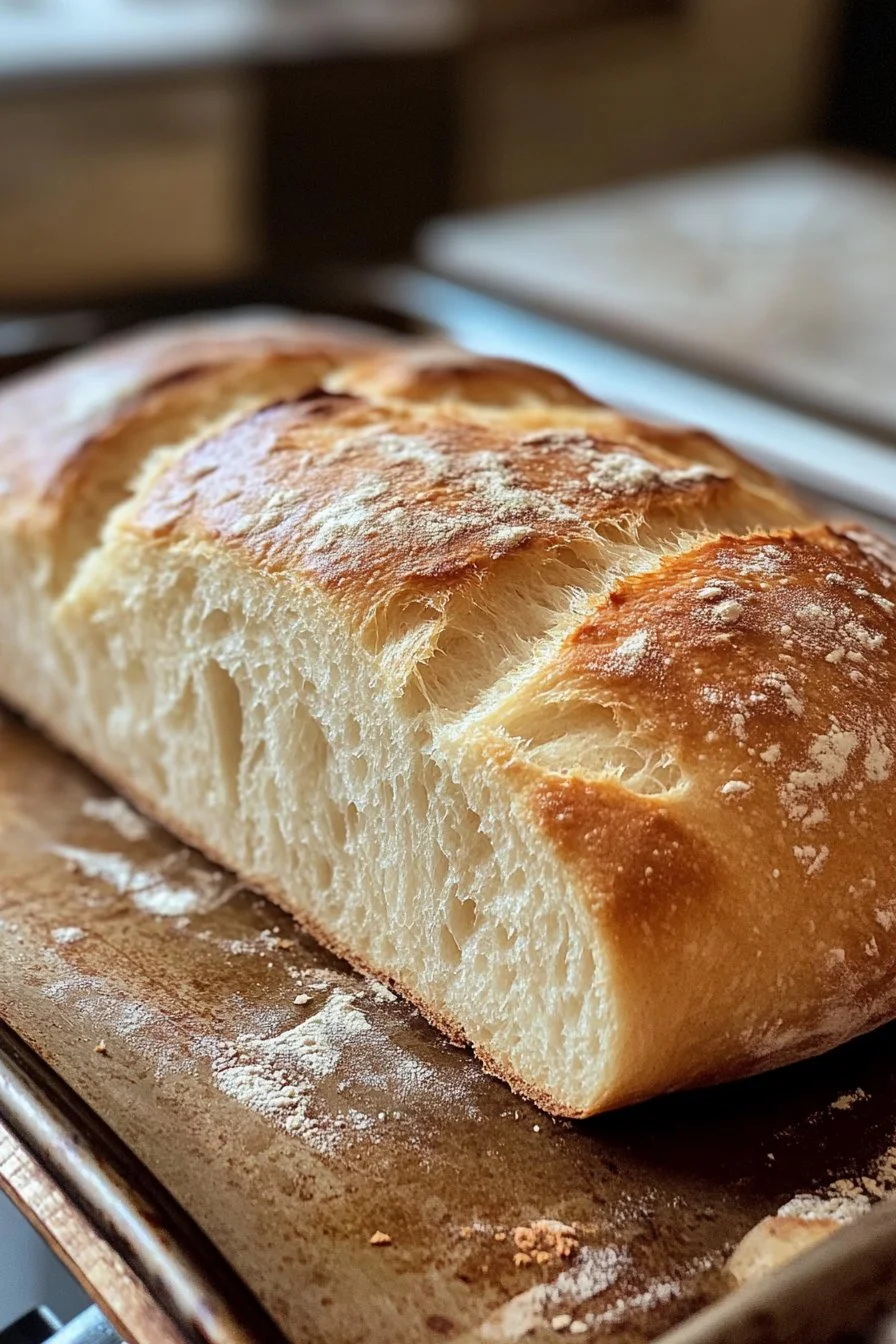
- Transfer the bread to a cooling rack, avoiding slicing until it cools completely.
Techniques for Perfect Artisan Bread
Technique
Using the right techniques ensures your artisan bread turns out perfectly every time. Handle the dough gently to preserve the air bubbles formed during fermentation. This step is crucial for achieving the desired light and airy structure.
When covering the dough during the rising phases, make sure to prevent it from drying out. Plastic wrap works best for this purpose. Maintain a consistent room temperature when allowing the dough to rise, as warmer temperatures can speed up the fermentation process.
Tips/Tricks
Do not rush the rising process. Extended fermentation enhances flavors and results in a more complex taste. Patience rewards you with the best results.
If you find the dough is too sticky to handle comfortably, lightly flour your hands and work surface. Remember, however, a little stickiness is expected and part of the charm of no-knead bread.
Lastly, use a sharp knife or bread lame to score the top of your dough before baking. This helps control the steam escaping during baking and allows the loaf to rise properly in the oven, known as "oven spring."
Perfecting Your Artisan Bread
Perfecting Results
Once you’ve mastered the 4-ingredient artisan bread, it’s time to focus on perfecting your results. For a crustier exterior, consider placing a pan with water in the preheating oven. This will create steam, enhancing the texture of the crust.
Checking the internal temperature of your bread also helps to ensure doneness. Aim for an internal temperature between 200°F to 210°F (93°C to 99°C). This indicates that the bread has fully cooked through and will help you achieve that desirable crumb structure inside.
Troubleshooting/Variations
Baking can sometimes present challenges. If your bread does not rise as expected, consider checking yeast freshness as a first step. Older yeast may lack the vigor needed for proper fermentation.
Should the bread appear too dense after baking, try increasing the hydration by adding slightly more water next time. This will create an environment for optimal gluten formation and a lighter structure.
Feel free to experiment with this artisanal base. You can introduce mix-ins like herbs or garlic during the initial mixing phase or brush with oil and sprinkle seeds on top for unique textures and flavors.
Serving and Storing Artisan Bread
Serving/Presentation
Serving artisan bread can transform any meal into a delightful experience. Present your bread beautifully, adding a rustic touch by slicing it only just before serving. This helps preserve its warmth and freshness.
Pair your artisan bread with a variety of accompaniments. Think olive oil, flavorful spreads, or even a simple butter that complements its fresh-baked taste. Its versatility makes it an ideal addition to any meal or snack.
Pairings/Storage
Artisan bread pairs beautifully with soups, salads, and cheese. Experiment with different spreads and dips to find your perfect match.
To store your artisan bread, wrap it in a clean kitchen towel to allow it to breathe while keeping the crust crisp. For longer storage, consider freezing slices in an airtight container. This provides a delightful treat whenever you crave fresh-baked goodness.
Artisan bread creates a lasting impression in any setting, from lively family dinners to quiet weekends at home. Embrace the process and enjoy the simple pleasure of baking. The 4-ingredient artisan bread recipe invites you to join in this timeless culinary tradition, promoting connection and wholesome enjoyment with every loaf.
Print
4-Ingredient Artisan Bread
- Prep Time: 15 minutes
- Cook Time: 45 minutes
- Total Time: 1440 minutes
- Yield: 1 loaf
- Category: Bread
- Method: Baking
- Cuisine: Baking
- Diet: Vegetarian
Description
A simple and delightful recipe for artisan bread using just four ingredients: flour, yeast, salt, and water. Perfect for beginners.
Ingredients
- 3 cups (approximately 400g) of all-purpose flour
- ¼ teaspoon of instant yeast
- 1½ teaspoons of fine sea salt
- 1½ cups (approximately 355-360ml) of warm water (at about 105-115°F)
Instructions
- In a large mixing bowl, whisk together the all-purpose flour, fine sea salt, and instant yeast until thoroughly combined.
- Pour the warm water into the bowl and mix with a sturdy spatula or wooden spoon until no dry flour remains. The dough should appear shaggy and sticky.
- Cover the bowl tightly with plastic wrap or a reusable cover and allow the dough to rise at room temperature for 12 to 18 hours.
- After the initial rise, lightly flour a clean work surface and gently scrape the dough onto the surface, folding it a few times.
- Transfer the dough seam-side down onto a piece of parchment paper, cover loosely, and let rise for another 1 to 2 hours.
- Preheat your Dutch oven to 450°F (232°C) about 30-45 minutes before the second rise completes.
- After the final rise, carefully remove the hot Dutch oven and place the dough into it. Cover and bake for 30 minutes.
- Remove the lid and continue baking uncovered for 15 to 25 minutes, until the crust turns deep golden brown and crackled.
- Transfer the bread to a cooling rack and avoid slicing until it cools completely.
Notes
Do not rush the rising process for best flavor, and consider scoring the top of the dough before baking for improved oven spring.
