
📑 Table of Contents ▶
- Witches’ Hat Cookies
- Crafting Enchanting Witches’ Hat Cookies
- Fundamentals
- Preparation/setup
- Mastering the Art of Witches’ Hat Cookies
- Technique
- Tips/tricks
- Perfecting Witches’ Hat Cookies
- Perfecting results
- Troubleshooting/variations
- Serving and Storing Witches’ Hat Cookies
- Serving/presentation
- Pairings/storage
- Conclusion
- FAQs – Witches’ Hat Cookies
I remember the first time I set out to create Witches’ Hat Cookies. It was a chilly autumn afternoon, and the leaves were starting to turn vibrant shades of orange and red. Inspired by the season, I wanted to make something magical and fun for my family to enjoy. The idea of transforming simple ingredients into whimsical treats fascinated me.
My kitchen was bustling with anticipation, the air filled with the sweet aroma of butter and sugar blending together. As I rolled the dough into little balls, I imagined the joy these Witches’ Hat Cookies would bring. The process was therapeutic, the kind of calming activity that makes you appreciate the art of baking.
Each step was like adding a brushstroke to a canvas, culminating in a finished product that was both enchanting and delicious. These cookies quickly became a family favorite, a staple at our gatherings, sparking smiles and conversations. The magic of Witches’ Hat Cookies lies not only in their delightful taste but also in the memories they help create.

Witches’ Hat Cookies
- Prep Time: 25 minutes
- Cook Time: 10 minutes
- Total Time: 35 minutes
- Yield: 30 cookies
- Category: Dessert
- Method: Baking
- Cuisine: American
Description
Discover how to make spooky and delicious Witches’ Hat Cookies with our easy step-by-step recipe. Perfect for Halloween parties and treats!
Ingredients
- – 1 ¾ cups (218 g) all-purpose flour
- – 1 teaspoon (5 ml) baking soda
- – 1/4 teaspoon (1 ml) salt
- – ½ cup (100 g) granulated sugar, plus more for rolling cookies in
- – ½ cup (100 g) light brown sugar
- – ½ cup (128 g) creamy peanut butter
- – 1/2 cup (113 g or 1 stick) unsalted butter, room temperature
- – 1 large egg, room temperature
- – 1 teaspoon (5 ml) pure vanilla extract
- – 30 chocolate melting wafers
- – 1/2 cup (113 g or 1 stick) unsalted butter, room temperature
- – 1 ¼ cups (150 g) confectioners’ sugar, sifted
- – 1 teaspoon (5 ml) pure vanilla extract
- – Pinch salt
- – 1-2 Tablespoons (23 ml) heavy cream or whole milk, room temperature
- – Gel food coloring, orange, purple, green
- – 30 chocolate kisses, unwrapped
- – Sprinkles
Instructions
- Heat the oven to 375º F and prepare a baking tray with parchment paper; put it aside.
- In a medium-sized bowl, combine the flour, baking soda, and salt by whisking them together. Set this mixture aside.
- In a mixing bowl, use a stand mixer or hand mixer to blend the granulated sugar, brown sugar, butter, and peanut butter until the mixture is fluffy and well combined, which should take around 2 minutes. Scrape the sides as needed. Add the egg and vanilla, mixing for about 30 seconds until well incorporated.
- With the mixer on a low setting, gradually incorporate the flour mixture and mix just until everything is blended together.
- Take a tablespoon of dough, shape it into 1-inch balls, and roll each ball in extra sugar. Place them on the prepared baking tray, pressing down gently. Ensure the dough balls are spaced 1 1/2 inches apart.
- Bake for approximately 10 minutes or until they turn a light golden color. Remove from the oven and immediately place a chocolate wafer on each cookie. Let the heat from the cookie melt the wafer slightly, then use the back of a spoon to spread it out so it extends beyond the base of a chocolate kiss. Move the cookies to a wire rack to cool completely and allow the chocolate to set.
- To prepare the frosting, beat the butter in a mixing bowl with a stand mixer or hand mixer until it is creamy, which should take about 2 minutes.
- With the mixer on a low setting, slowly add the confectioners’ sugar until fully mixed in.
- Switch to medium speed and add the vanilla, one tablespoon of heavy cream, and a pinch of salt, mixing until combined. If a thinner frosting is needed, add more cream; for a thicker one, add extra confectioners’ sugar.
- Divide the frosting among different bowls and add a few drops of gel food coloring to each bowl (orange, purple, green), stirring until the colors are evenly mixed and you achieve the desired shade.
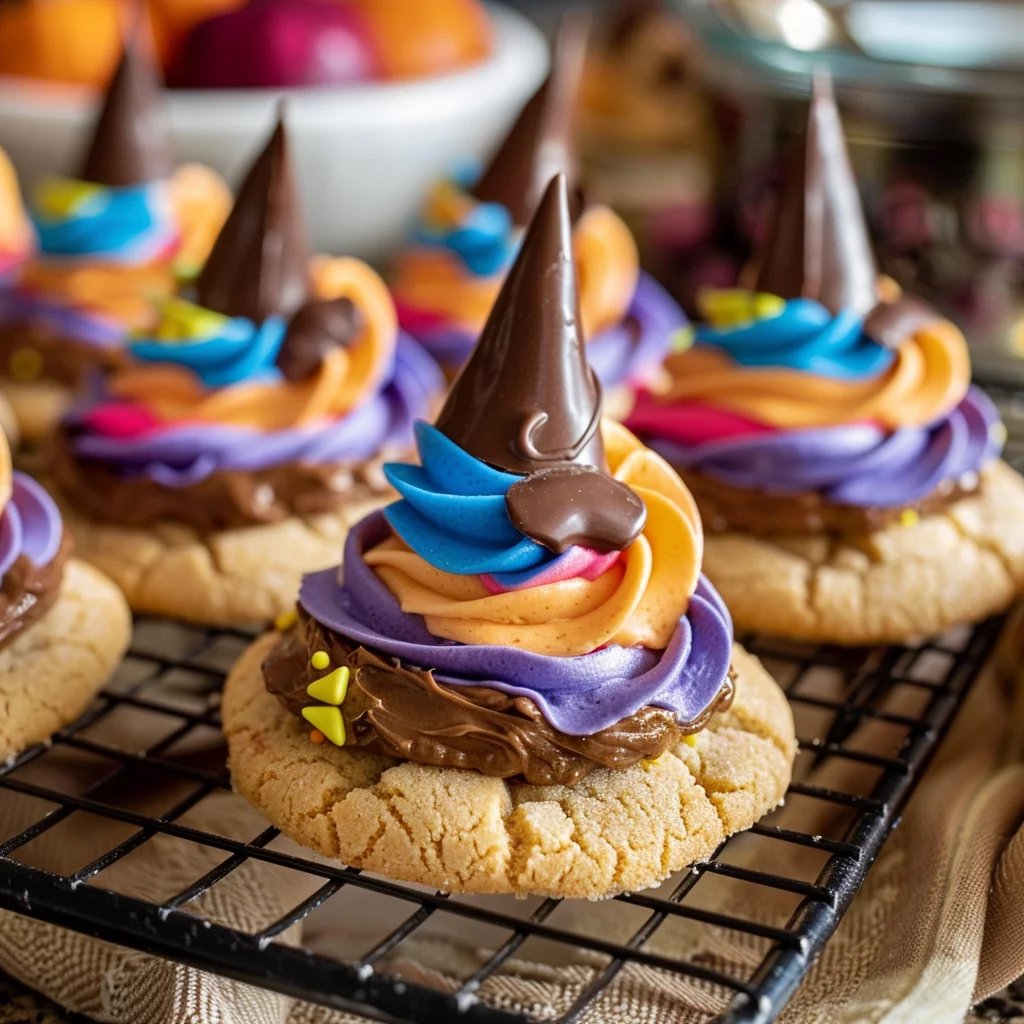
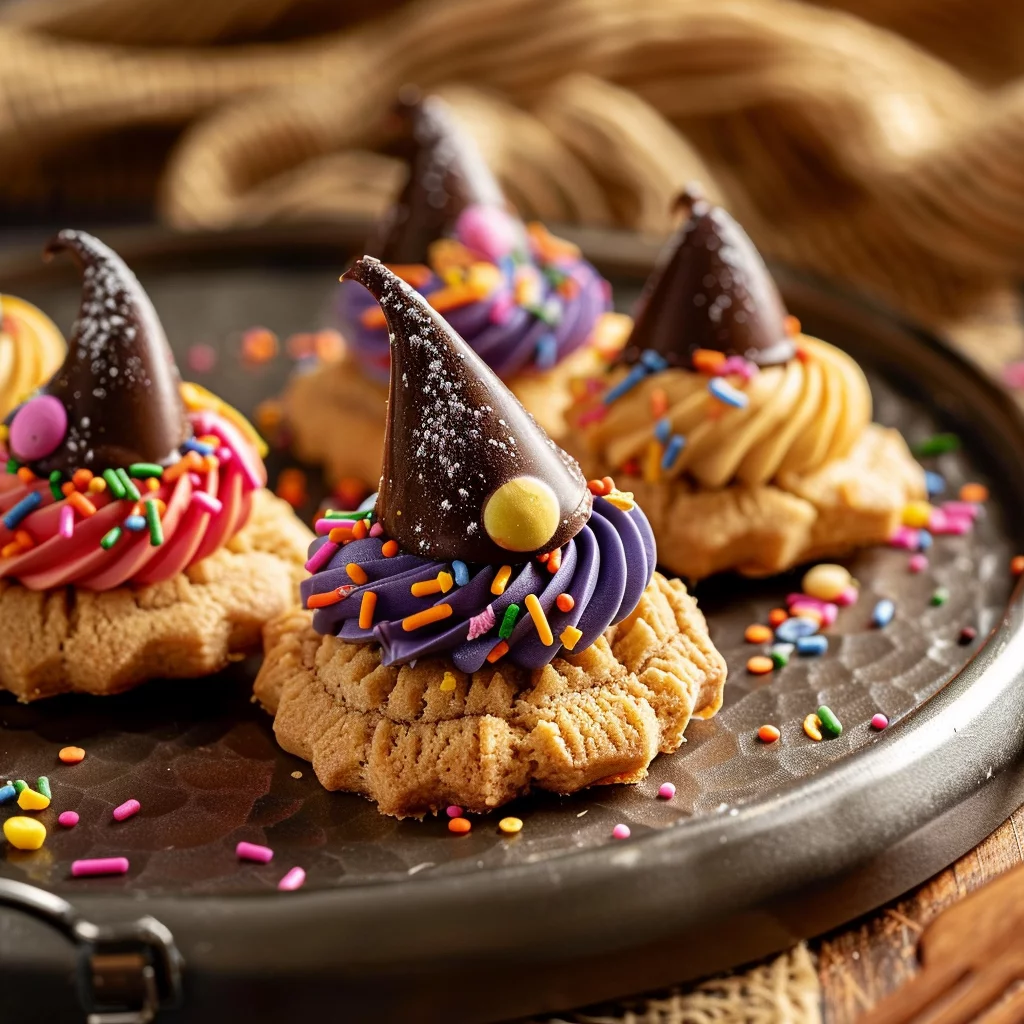
- Put the colored frostings into separate piping bags with round tips. Frost the bottom of each chocolate kiss and press it onto the solidified chocolate wafer. Ensure there’s enough frosting to slightly squeeze out from under the kiss. Optionally, add sprinkles on top and serve.
Notes
- Ensure all cookie dough balls are the same size for consistent baking results.
- Be gentle when attaching the chocolate wafers to avoid breakage.
- Adjust frosting consistency by adding more cream or confectioners’ sugar until desired texture is achieved.
Crafting Enchanting Witches’ Hat Cookies
Fundamentals
Creating Witches’ Hat Cookies involves a delightful combination of simple ingredients transformed into a whimsical treat. The essential components include all-purpose flour, baking soda, and a pinch of salt to provide structure and balance. The magic truly begins with the blend of granulated and brown sugars, unsalted butter, and creamy peanut butter, creating a rich and flavorful base.
The addition of a large egg and pure vanilla extract enriches the dough, ensuring a moist and tender texture. Chocolate melting wafers and chocolate kisses serve as the crowning glory, while colored frosting and sprinkles add a touch of festive fun. These ingredients come together to create a treat that is both visually appealing and irresistibly delicious.
Preparation/setup
The journey to crafting these delightful Witches’ Hat Cookies begins with preheating the oven to 375º F and lining a baking tray with parchment paper. This essential step ensures the cookies bake evenly and release effortlessly. In a separate bowl, whisk together the flour, baking soda, and salt, setting the stage for the dough’s structure.
Next, blend the sugars, butter, and peanut butter until the mixture is fluffy. Incorporating the egg and vanilla brings it all together. Gradually add the dry ingredients, mixing until just combined to maintain a tender crumb. Rolling the dough into sugar-coated balls sets the stage for their transformation in the oven.
Mastering the Art of Witches’ Hat Cookies
Technique
The technique behind crafting Witches’ Hat Cookies involves precision and creativity. Begin by shaping the dough into uniform balls, ensuring each is evenly coated in sugar for a delightful crunch. Arrange them on the baking tray, allowing space for spreading as they bake. Once in the oven, the cookies transform, filling the kitchen with a comforting aroma.
After baking, immediately place a chocolate wafer on each cookie. The residual heat melts the wafer slightly, creating a smooth surface. Use the back of a spoon to spread the chocolate, making it a perfect canvas for the chocolate kiss. This step is where the cookies truly take on their iconic shape, resembling a witch’s hat.
Witches’ Hat Cookies
Tips/tricks
To ensure consistently delightful Witches’ Hat Cookies, consider a few handy tips. Use room temperature ingredients to facilitate even mixing and a smoother dough. When rolling the dough balls, keep them uniform in size for consistent baking results. To achieve the perfect spread of chocolate, wait a minute after placing the wafer to let it soften before spreading.
For a touch of creativity, experiment with different colored frostings using gel food coloring. This allows for personalization, adding a unique flair to each batch of cookies. Additionally, adding a pinch of salt to the frosting enhances the flavors, balancing the sweetness and adding depth.
Perfecting Witches’ Hat Cookies
Perfecting results
Perfecting Witches’ Hat Cookies involves a keen eye for detail and a bit of patience. Ensure the dough is thoroughly mixed, allowing for an even distribution of ingredients. Properly spacing the dough balls on the tray prevents them from merging during baking, ensuring each cookie retains its shape.
The timing of placing the chocolate wafer is crucial. It should happen immediately after the cookies come out of the oven. This ensures the chocolate melts just enough to spread smoothly, providing the ideal base for the chocolate kiss. Letting the cookies cool on a wire rack allows the chocolate to set properly.
Troubleshooting/variations
If your Witches’ Hat Cookies don’t turn out as expected, don’t fret. Common issues like cookies spreading too much can often be solved by chilling the dough for a few minutes before baking. If the chocolate doesn’t melt as desired, a quick return to the oven for a minute can help achieve the right consistency.
For variations, consider adding different extracts like almond or coconut to the dough for a unique twist. Experimenting with the type of chocolate used can also alter the flavor profile, allowing for endless customization. These small adjustments can make your Witches’ Hat Cookies stand out at any gathering.
Serving and Storing Witches’ Hat Cookies
Serving/presentation
Witches’ Hat Cookies are as delightful to present as they are to eat. Arrange them on a festive platter, allowing their vibrant colors and whimsical shapes to shine. Adding a sprinkle of edible glitter or a dash of colorful sprinkles enhances their visual appeal, making them the centerpiece of any dessert table.
These cookies serve as a delightful conversation starter at gatherings, perfect for sharing with friends and family. Their playful design invites curiosity and admiration, making them ideal for parties or holiday celebrations. Each bite promises a symphony of flavors, from the rich peanut butter base to the decadent chocolate topper.
Witches’ Hat Cookies
Pairings/storage
Pair these cookies with a tall glass of milk or a warm cup of tea for a comforting treat. For those who prefer a bit of variety, pair them with other baked goods like Healthy Grab-and-Go Banana Breakfast Cookies for a delightful dessert spread. To keep your Witches’ Hat Cookies fresh, store them in an airtight container at room temperature for up to a week.
If you’re planning to enjoy them over a longer period, consider freezing the cookies. Simply place them in a freezer-safe container, separating layers with parchment paper to prevent sticking. When ready to serve, allow them to thaw at room temperature, preserving their delightful texture and flavor.
Conclusion
Witches’ Hat Cookies offer a delightful blend of creativity and flavor, perfect for any occasion. Their whimsical design and rich taste make them a hit among both children and adults alike. The straightforward process of making them invites bakers of all skill levels to join in the fun.
The recipe’s flexibility allows for endless customization, encouraging bakers to experiment with flavors and colors. Whether you’re crafting them for a party or simply to enjoy at home, these cookies promise to be a memorable treat. Embrace the joy of baking and share the magic of Witches’ Hat Cookies with those you love.
