📑 Table of Contents ▶
Starbucks Cake Pops
Creating the perfect cake pop feels like an art form that many people aspire to master. The delightful experience of biting into a rich, moist cake-covered treat sparks joy in people of all ages. This dessert has effortlessly made its way into coffee shops, birthday parties, and family gatherings. Whether you crave a sweet indulgence or an eye-catching treat for a special occasion, these cake pops deliver.
A cherished memory that springs to mind involves a favorite local café where cake pops graced the counter. Every visit felt like a treat, and sharing those moments with family made it even sweeter. The blend of flavors, textures, and colors captured my imagination. This inspired the desire to recreate this little indulgence at home—each bite brings you one step closer to that lovely café experience.
Now, it’s time to embark on a flavorful journey. Let the cake pop magic unfold! These delightful bites, bursting with flavor and creativity, bring happiness to any gathering. They’re more than a sweet treat; they embody celebration and joy, making them perfect for every occasion.
Starbucks Cake Pops
Fundamentals
Cake pops start with a basic cake recipe or store-bought cake mix, leading to delicious results. The foundation lies in ensuring the cake remains moist and flavorful. A well-baked cake serves as the perfect canvas for this creative dessert. Pay attention to the baking time and temperature to achieve that wonderful texture—baking too long can lead to dry cake pops.
Choose a variety of cake flavors to cater to everyone’s taste. Classic options include vanilla, chocolate, or even red velvet. The choice of frosting also plays a crucial role. Creamy frosting acts as the glue that holds the cake pops together, adding moisture and flavor. Ideally, you’ll aim for a frosting that complements the cake without overwhelming it.
In terms of presentation, pick your stick. Whether you choose lollipop sticks or sturdy straws, ensure they provide the necessary support. Proper handling from the start simplifies dipping and decorating later.
Preparation/setup
To prepare for cake pops, gather all necessary tools. Mixing bowls, a spatula, and a baking sheet fit the bill. Start by baking the cake according to the instructions, then allow it to cool completely. This step is crucial; if the cake is too warm, it may not adhere well during the assembly process.
Once the cake cools, crumble it into fine pieces. Use your hands or a fork to break it down. The finer the crumble, the smoother the cake pops will turn out. Add frosting gradually, mixing as you go. Aim for a dough-like consistency, which should hold together when you form a ball.
Once the mixture reaches the desired texture, form small balls and place them on a baking sheet lined with parchment paper. Chill these cake balls in the refrigerator for at least 30 minutes. Chilling solidifies the mixture, making it easier to dip into candy melts or coating.
Ingredients
- 1 package of cake mix (any flavor)
- 1 jar of frosting (complementary flavor)
- Melting chocolate or candy melts (variety of colors)
- Lollipop sticks or sturdy straws
- Sprinkles or candies for decoration
- Parchment paper
Directions
- Bake the cake according to package instructions.
- Allow the cake to cool completely before crumbling it into fine pieces.
- Mix the cake crumbs with frosting until you achieve a dough-like consistency.
- Form small balls and place them on a parchment-lined baking sheet.
- Chill the balls in the refrigerator for about 30 minutes.
- Melt the candy melts in a microwave-safe bowl, following package instructions.
- Dip the end of each lollipop stick into the melted chocolate before inserting it into a cake ball. This step helps the stick adhere better.
- Dip each cake ball into the melted chocolate, ensuring even coverage. Tap gently to remove excess.
- Decorate with sprinkles or candies while the coating is still wet.
- Allow the cake pops to set on parchment paper.
Creative Cake Pop Techniques
Technique
Mastering cake pops requires not just following a recipe but also some techniques that enhance the overall culinary experience. Start with the temperature of your melted coating; it should be warm but not hot, ensuring smooth dipping. If it’s too thick, it can crack upon drying. Use a fork or dipping tool to help glaze each pop evenly.
Also, consider double coating for a thicker layer of chocolate. Dip them once, let them set, and then dip them again. This little extra effort results in a more luscious outer layer.
Tips/tricks
Experiment with flavor combinations to elevate your cake pops. You can add extracts like almond or lemon to the cake mixture for a distinctive twist. Consider using flavored candy melts like strawberry or mint for an added layer of flavor.
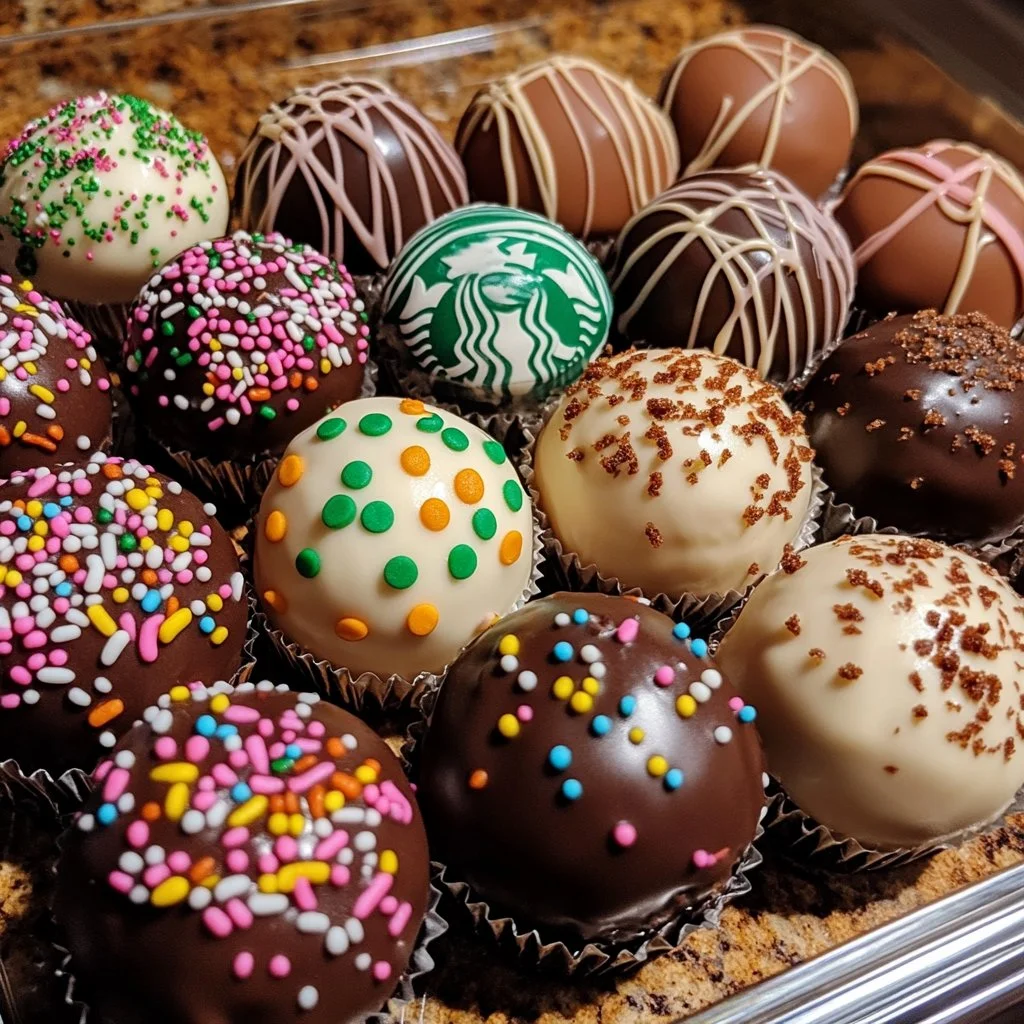
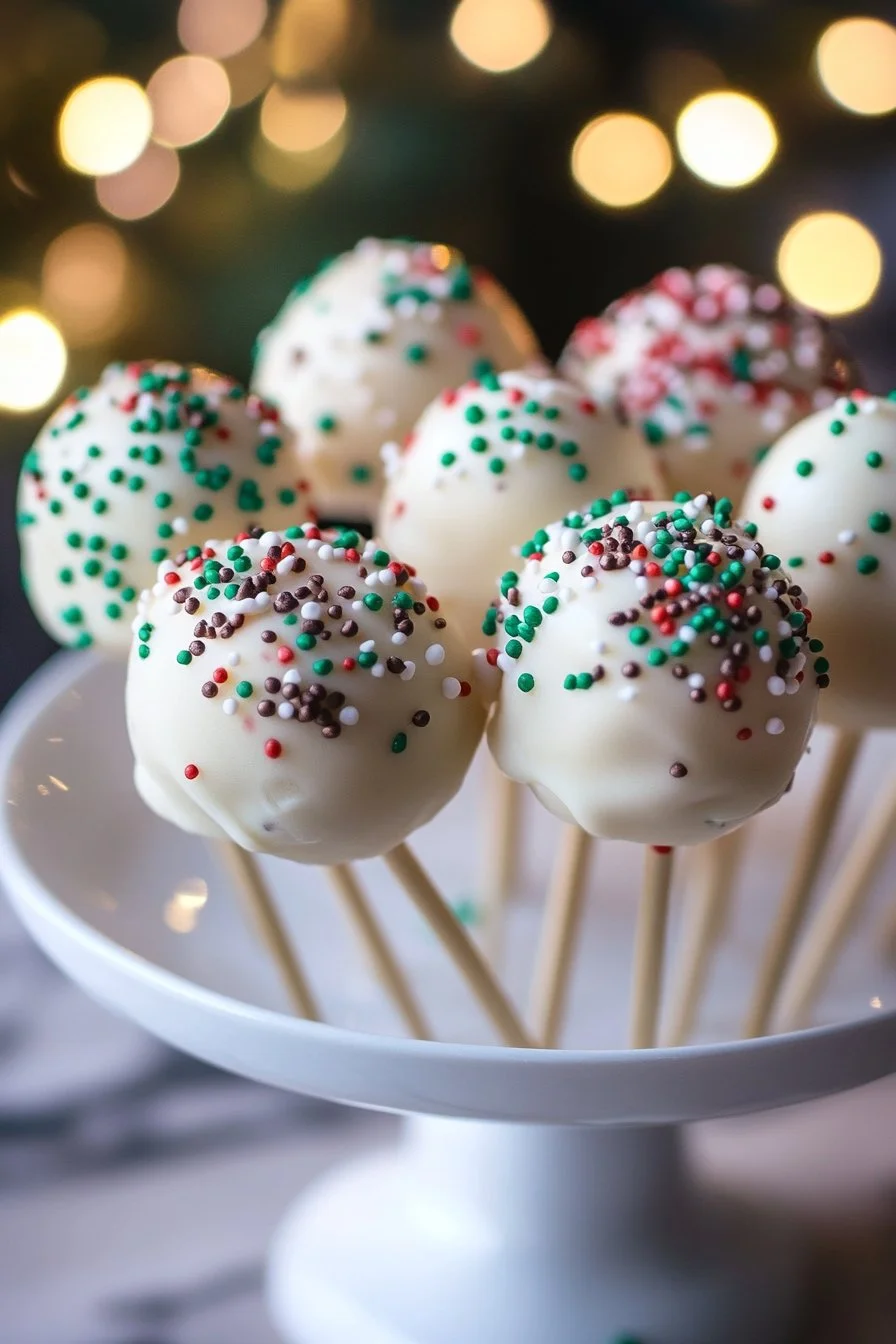
When decorating, get creative! Use a variety of sprinkles, edible glitter, or different colored coatings to make your cake pops visually appealing. Personalize them for holidays or celebrations—unleash your imagination! A few well-placed chocolate chips can represent eyes for cake pops shaped like fun characters.
Perfecting Your Cake Pops
Perfecting results
To perfect your cake pops, consistency is key in both flavor and texture. Achieving the right mixture of cake and frosting will prevent crumbliness. Remember, the cake should hold together seamlessly while being moist and flavorful.
Adjusting the ratio of frosting may help if you struggle with the balance. If the mixture is too soft, add more cake crumbs. If too dry, incorporate more frosting. Begin with small adjustments to maintain the integrity of your cake pops.
Troubleshooting/variations
If you encounter issues with chocolate coating, don’t fret. A common problem is the coating setting too quickly, making it difficult to decorate. If this happens, place the melted chocolate in the microwave for a few seconds to rewarm it slightly. If the cake pops fall off the sticks, ensure you’ve chilled them long enough before dipping.
Explore variations by changing the cake flavors or adjusting the types of coatings. You can also create themed cake pops by shaping them into fun shapes for holidays or events. With a bit of practice, enjoy results that impress both friends and family.
Serving and Storing Cake Pops
Serving/presentation
Presentation plays a significant role in elevating the appearance of your cake pops. Serve them in decorative jars or on stands to showcase their colorful coating and design. Simply placing cake pops in a mug or arranging them on a platter adds a festive touch. Pair them with other desserts for a vibrant dessert table that delights guests.
Using fresh ingredients ensures flavors shine through. For maximum freshness, serve them shortly after they set.
Pairings/storage
Enjoy cake pops on their own, or pair them with coffee, tea, or milk for a delightful treat. Their sweet flavors complement various beverages, making for a perfect afternoon snack.
Store leftover cake pops in an airtight container to maintain their freshness. Keep them in the refrigerator for up to a week. If you want to prepare cake pops ahead of time, freeze them! Just ensure they are well-wrapped; they can last up to three months in the freezer.
The experience combines a love for baking with creativity and sharing. Recreate your favorite Starbucks cake pops at home and cherish the moments they bring.
Creating these delightful treats doesn’t just end with the recipe; it’s about sharing them with loved ones and making memories, one tasty cake pop at a time.
Print
Starbucks Cake Pops
- Prep Time: 30 minutes
- Cook Time: 30 minutes
- Total Time: 60 minutes
- Yield: 12 servings
- Category: Dessert
- Method: Baking
- Cuisine: American
- Diet: Vegetarian
Description
Delightful cake pops that bring the joy of Starbucks treats to your home. Perfectly moist cake covered in colorful chocolate, ideal for every occasion.
Ingredients
- 1 package of cake mix (any flavor)
- 1 jar of frosting (complementary flavor)
- Melting chocolate or candy melts (variety of colors)
- Lollipop sticks or sturdy straws
- Sprinkles or candies for decoration
- Parchment paper
Instructions
- Bake the cake according to package instructions.
- Allow the cake to cool completely before crumbling it into fine pieces.
- Mix the cake crumbs with frosting until you achieve a dough-like consistency.
- Form small balls and place them on a parchment-lined baking sheet.
- Chill the balls in the refrigerator for about 30 minutes.
- Melt the candy melts in a microwave-safe bowl, following package instructions.
- Dip the end of each lollipop stick into the melted chocolate before inserting it into a cake ball.
- Dip each cake ball into the melted chocolate, ensuring even coverage. Tap gently to remove excess.
- Decorate with sprinkles or candies while the coating is still wet.
- Allow the cake pops to set on parchment paper.
Notes
Experiment with different cake flavors and coatings. For a thicker chocolate layer, consider double coating.
