
📑 Table of Contents ▶
- A Closer Look at No-Bake Peanut Butter Cheerio Bars
- Fundamentals
- Preparation/Setup
- Directions
- Crafting the Perfect Cheerio Bars
- Technique
- Tips and Tricks
- Perfecting No-Bake Peanut Butter Cheerio Bars
- Perfecting Results
- Troubleshooting and Variations
- Serving and Storing No-Bake Peanut Butter Cheerio Bars
- Serving and Presentation
- Pairings and Storage
- Conclusion
No-Bake Peanut Butter Cheerio Bars (3 Ingredients!)
Creating a quick, satisfying snack has always been a joy in my kitchen. No-bake recipes not only save time but also spark creativity. When I first discovered how to make Peanut Butter Cheerio Bars, I felt an instant connection to those carefree kitchen moments. These delightful bars with just three ingredients—Cheerios, peanut butter, and honey—pack nostalgia and flavor into every bite.
Picture the warmth of the kitchen, the comforting aroma of melting peanut butter mingling with sweet honey. This simple combination evokes memories of afternoons spent making treats with family, laughter echoing between joyful conversations. The moments spent assembling these bars transform them from mere snacks to cherished family rituals. Making them feels like reliving those sweeter times while introducing a new generation to simple joy.
The beauty of these No-Bake Peanut Butter Cheerio Bars lies in their simplicity. You can create something delicious with very little effort. This recipe brings together the crunch of Cheerios, the creaminess of peanut butter, and the natural sweetness of honey in a harmonious blend. Gather your ingredients, and let’s dive into this delightful treat!
A Closer Look at No-Bake Peanut Butter Cheerio Bars
Fundamentals
No-Bake Peanut Butter Cheerio Bars hold a special place in many kitchens. They are not only easy to make but also incredibly satisfying. With just three ingredients, you can whip these up in no time. The main star, Cheerios, provides a delightful crunch to the bars. This classic cereal is rich in whole grains and makes for a delightful snacking experience.
Peanut butter adds creaminess and protein, turning these bars from a simple snack into a fulfilling treat. Honey brings everything together, enhancing flavors and providing a natural sweetness. Together, these ingredients create a balance of taste and texture that pleases both kids and adults alike.
These bars fit perfectly into a busy lifestyle. They come together in minutes yet offer a rewarding bite every time. Whether you need a quick breakfast, an afternoon treat, or a dessert to satisfy a sweet tooth, these bars check all the boxes.
Preparation/Setup
Before you begin making your No-Bake Peanut Butter Cheerio Bars, gather all your ingredients. You will need 3 cups of Cheerios, 3/4 cup of peanut butter, and 1/2 cup of honey. Prepare an 8×8 pan by lining it with parchment paper or foil for easy removal.
Start by placing a medium saucepan over medium heat. Combine the peanut butter and honey, stirring gently until the mixture melts and combines into a smooth concoction. The gentle heat helps the flavors meld.
Once the peanut butter and honey blend together, remove the saucepan from the heat. This step is crucial, as boiling can alter the taste and texture of your mixture. Next, fold in the Cheerios with a spatula or wooden spoon until they are generously coated.
Ingredients
- 3 cups Cheerios: This popular cereal provides a crunchy base for your bars, ensuring a satisfying texture in every bite.
- 3/4 cup peanut butter: Choose your favorite style—creamy or crunchy. Both options work wonderfully, adding depth to these treats.
- 1/2 cup honey: This natural sweetener helps bind the ingredients together while introducing a gentle sweetness that complements the peanut butter.
Directions
- Line an 8×8 pan with parchment paper or foil; set aside.
- In a medium saucepan, heat the peanut butter and honey over medium heat until melted and well combined.
- Remove from the heat and stir in the Cheerios.
- Place the mixture into your prepared pan and press into place.
- Cover and refrigerate for at least 1 hour before cutting.
- Keep any leftovers stored in the fridge.
Crafting the Perfect Cheerio Bars
Technique
Mastering the technique of making No-Bake Peanut Butter Cheerio Bars involves a few key steps. Start by ensuring that your peanut butter and honey are well blended. This mixture acts as the glue that holds the bars together, so take the time to mix thoroughly.
Press the mixture firmly into your prepared pan. This step ensures your bars hold their shape when slicing. If you prefer a chewier texture, loosely pack the mixture. For a crunchier result, press it down more firmly.
Tips and Tricks
Use natural peanut butter for a healthier option that enhances the flavors while adding a nutty depth. If you want to add extra flavor, consider sprinkling in a dash of cinnamon or vanilla extract during the mixing process.
Be creative! Although the base recipe is simple, you can customize your bars. Try adding mix-ins like mini chocolate chips, dried fruits, or seeds to enhance their texture and taste. Just be mindful of balancing the ingredients to ensure the mixture remains cohesive.
Perfecting No-Bake Peanut Butter Cheerio Bars
Perfecting Results
To achieve the best no-bake bars, refrigerate them for at least an hour. This resting period allows the bars to set properly, making them easier to cut into squares. The cold temperature firms up the mixture, so you eliminate any chances of them falling apart when slicing.
For an extra touch, drizzle some melted chocolate over the top once the bars have chilled. This addition elevates the snack while adding a decadent finish.
Troubleshooting and Variations
If your mixture seems too crumbly, it likely needs more peanut butter or honey. A little extra can help bind the Cheerios together. Conversely, if it’s too sticky, add more Cheerios until you reach the desired consistency.
Explore alternative sweeteners if honey isn’t your preference. Maple syrup or agave nectar works well, providing a similar binding and sweetness. Just be aware that the flavor will vary slightly.
Serving and Storing No-Bake Peanut Butter Cheerio Bars
Serving and Presentation
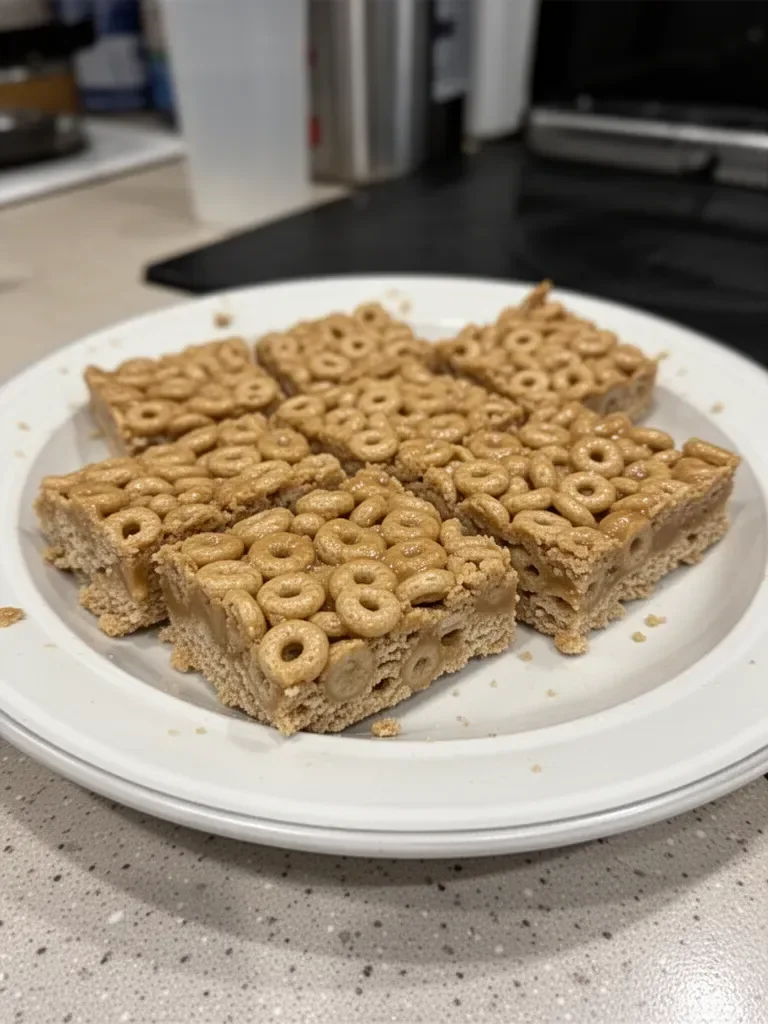
Serving these bars is a breeze. Once chilled and sliced, display them on a charming plate. Consider garnishing the plate with fresh fruit or a sprinkle of nuts for added color. They can also be individually wrapped for an on-the-go snack option.
These bars make a fantastic addition to lunchboxes or snack time after school. Their appeal transcends occasions—perfect for family gatherings or casual get-togethers.
Pairings and Storage
These No-Bake Peanut Butter Cheerio Bars pair wonderfully with a glass of milk or a cup of coffee. They also work well alongside fruit for a well-rounded snack.
For storage, keep any leftovers in an airtight container in the refrigerator. They will remain fresh for up to a week, maintaining their texture. Alternatively, these bars freeze nicely, allowing you to prepare them in advance.
Conclusion
No-Bake Peanut Butter Cheerio Bars embody simplicity and deliciousness. The quick prep time, combined with delicious flavors and textures, makes them a must-try. Whether you savor them as an after-school snack or enjoy them as a sweet treat with your family, they deliver joy in every bite. Keep this easy recipe in your rotation to transform ordinary moments into flavorful memories.
Print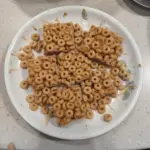
No-Bake Peanut Butter Cheerio Bars
- Prep Time: 10 minutes
- Cook Time: 5 minutes
- Total Time: 1 hour 15 minutes
- Yield: 8 servings
- Category: Snack
- Method: No-Bake
- Cuisine: American
- Diet: Vegetarian
Description
Quick and satisfying no-bake bars made with Cheerios, peanut butter, and honey.
Ingredients
- 3 cups Cheerios
- 3/4 cup peanut butter
- 1/2 cup honey
Instructions
- Line an 8×8 pan with parchment paper or foil; set aside.
- In a medium saucepan, heat the peanut butter and honey over medium heat until melted and well combined.
- Remove from the heat and stir in the Cheerios.
- Place the mixture into your prepared pan and press into place.
- Cover and refrigerate for at least 1 hour before cutting.
- Store any leftovers in the fridge.
Notes
For a chewier texture, loosely pack the mixture; for a crunchier result, press down more firmly.
