
📑 Table of Contents ▶
- Embracing Mini Chocolate Chip Muffins
- Fundamentals
- Preparation/setup
- Directions
- Variations on Mini Chocolate Chip Muffins
- Technique
- Tips/tricks
- Perfecting Your Mini Chocolate Chip Muffins
- Perfecting results
- Troubleshooting/variations
- Serving and Storing Mini Chocolate Chip Muffins
- Serving/presentation
- Pairings/storage
Mini Chocolate Chip Muffins
Baking often evokes warm memories, and nothing captures that feeling quite like mini chocolate chip muffins. Growing up, the smell of freshly baked muffins wafting through the kitchen became synonymous with cozy weekends. Those little bites of heaven held the power to bring my family together, filling our home with laughter and love. Each muffin packed with melty chocolate chips always seemed to create more than just a treat; they sparked joy.
Mini chocolate chip muffins have a unique way of brightening any day. They offer that perfect balance of sweet and wholesome. As a kid, I loved helping in the kitchen, mixing flour while my grandmother told stories about her childhood. Those treasured moments around the mixing bowl turned baking into a beloved family tradition. I still cherish the delight of indulging in mini chocolate chip muffins, perfectly portioned for sharing and snacking.
Ultimately, these muffins are not just a delicious baked good. They symbolize connection, love, and the simple joys life brings us. Whether for breakfast, a snack, or dessert, mini chocolate chip muffins fill hearts and bellies with warmth and satisfaction. Let’s explore how to create these delightful little treats and bring that cozy experience into your kitchen.
Embracing Mini Chocolate Chip Muffins
Fundamentals
Creating the perfect mini chocolate chip muffins starts with understanding the basics of baking. These muffins feature a simple yet effective mixture of ingredients that blend harmoniously to produce delightful treats. The key lies in mastering the right proportions of all-purpose flour, whole wheat flour, sugar, and leavening agents.
This recipe begins with a foundation of flour. The combination of all-purpose flour and whole wheat flour adds both texture and nutrition. Sugar enhances the muffins’ sweetness, while baking powder and baking soda provide that essential lift. Each ingredient plays a pivotal role in achieving the perfect fluffy texture that every muffin lover desires.
Understanding how to balance these ingredients also includes knowing the importance of wet components. Milk, vegetable oil, and egg contribute to moisture and richness. Similarly, a splash of vanilla extract elevates the flavor profile, making each bite unforgettable. The basic elements come together to create something that surpasses mere muffins—they transform into a symbol of love baked in a cup.
Preparation/setup
Baking mini chocolate chip muffins requires a well-prepared kitchen space. Begin by preheating the oven to 350°F (175°C) and lining a mini muffin tin with paper liners. An efficient setup not only makes the process smoother but also helps in maintaining focus.
Gather your ingredients beforehand. Having everything within reach allows for a seamless baking experience. Start by measuring out the flour, sugar, and leavening agents into a large bowl. Use a whisk to combine these dry ingredients, ensuring an even distribution of flavors. In a separate bowl, mix the wet ingredients: milk, vegetable oil, egg, and vanilla extract. This method helps prevent clumps and guarantees proper blending later on.
Once your dry and wet ingredients are ready, you can merge them together confidently. Pour the wet mixture into the dry mixture and stir gently to combine. Remember, overmixing can lead to dense muffins, so aim for a light touch. Finally, fold in the mini chocolate chips, distributing them evenly throughout the batter. With everything set, fill each muffin cup about two-thirds full and prepare for the delightful transformation that baking brings.
Ingredients
For a batch of mini chocolate chip muffins, gather the following ingredients:
- 1 cup all-purpose flour
- 1/2 cup whole wheat flour
- 1/2 cup sugar
- 1 tsp baking powder
- 1/2 tsp baking soda
- 1/4 tsp salt
- 1/2 cup milk
- 1/4 cup vegetable oil
- 1 large egg
- 1 tsp vanilla extract
- 1/2 cup mini chocolate chips
These straightforward ingredients come together to create a muffin that’s not only delicious but also offers a comforting homemade taste. Each component has its unique role in the development of flavor and texture, ensuring the muffins emerge from the oven with a wonderful aroma and pleasing appearance.
Directions
Follow these steps for a batch of irresistible mini chocolate chip muffins:
-
Preheat the oven to 350°F (175°C) and line a mini muffin tin with paper liners.
-
In a large bowl, whisk together the all-purpose flour, whole wheat flour, sugar, baking powder, baking soda, and salt.
-
In another bowl, combine the milk, vegetable oil, egg, and vanilla extract.
-
Pour the wet ingredients into the dry ingredients and stir until just combined.
-
Gently fold in the mini chocolate chips.
-
Fill each muffin cup about 2/3 full with the batter.
-
Bake for 10-12 minutes or until a toothpick inserted in the center comes out clean.
-
Let them cool for a few minutes before transferring to a wire rack.
The magic of baking comes from the transformation of simple ingredients into a treat that delights all who enjoy it. These muffins offer a playful experience, enticing everyone with their mini size while delivering big flavor.
Variations on Mini Chocolate Chip Muffins
Technique
Mastering the technique of making mini chocolate chip muffins contributes significantly to your baking success. Proper mixing techniques create the right texture you’re aiming for. It is crucial to avoid overmixing the batter once the wet ingredients meet the dry ones. Gentle folding preserves the fluffiness, giving way to light and airy muffins.
In addition to mixing, temperature plays a role. Using room temperature ingredients allows the batter to blend more easily, creating a consistent mixture. This consistency results in muffins that bake uniformly, crucial for avoiding raw centers.
Try experimenting with different mixing tools. A spatula or wooden spoon can help ensure your muffins remain fluffy. While it’s tempting to use an electric mixer, going manual allows you to control the batter’s texture better, leading to superior muffins.
Tips/tricks
Here are some helpful tips and tricks to elevate your mini chocolate chip muffins:
-
Add-ins: Consider incorporating other mix-ins along with the mini chocolate chips. Pecans, walnuts, or dried fruit can enhance flavor and texture.
-
Flavor Variations: Experiment with spices such as cinnamon or nutmeg to add depth to the flavor. A pinch can make all the difference.
-
Chocolate: Swap mini chocolate chips with other types of chocolate chips, such as dark or white chocolate, for variety.
-
Storage: Store leftover muffins in an airtight container to keep them fresh. Freezing muffins allows you to enjoy them at a later time.
-
Filling: For an extra surprise, create a small indentation in the center of each filled muffin cup and add a dollop of peanut butter or Nutella before baking.
These tips and tricks foster creativity in the kitchen, allowing you to customize each batch of muffins to suit your preferences and those of your guests.
Perfecting Your Mini Chocolate Chip Muffins
Perfecting results
Perfecting the results of your mini chocolate chip muffins involves attention to detail during the baking process. One critical aspect is the baking time, which can vary depending on your oven. Begin checking for doneness at the 10-minute mark; always use a toothpick inserted into the center of a muffin to gauge if they are done. If it comes out clean or with a few crumbs, your muffins are ready.
Pay attention to the color of the muffins, too. They should have a light golden brown hue on top, indicating that the sugars have caramelized beautifully. If you’re uncertain, err on the side of caution; undercooked muffins can always return to the oven for a minute or two more.
Lastly, be mindful of cooling times. Allow them to cool in the muffin tin for a few minutes prior to transferring them to a wire rack. This step helps them set and maintain their shape while ensuring they remain moist inside.
Troubleshooting/variations
Sometimes, baking doesn’t go as planned. Here are common troubleshooting issues and their solutions:
-
Dense muffins: Overmixing or using cold ingredients may lead to dense muffins. Ensure thorough blending without overdoing it and use room temperature components.
-
Flat tops: If muffins don’t rise as expected, check the freshness of your baking powder and baking soda. Improperly activated leavening agents lead to dense outcomes.
-
Burnt bottoms: If the bottom of your muffins brown too quickly, consider placing the muffin tin on a higher rack in the oven.
-
Sticking liners: If muffin liners stick to the muffins, lightly spray them with non-stick spray before filling. This ensures easy removal without losing any deliciousness.
Finally, variations abound! Consider tweaking the recipe for dietary needs, such as using gluten-free flour or plant-based milk. These adaptations allow anyone to enjoy mini chocolate chip muffins, no matter their preference.
Serving and Storing Mini Chocolate Chip Muffins
Serving/presentation
Serving mini chocolate chip muffins can become a delightful aspect of the overall experience. Their small size makes them perfect for various occasions, whether it’s a cozy brunch, an afternoon snack, or a special event.
Consider arranging the muffins on a decorative platter or cake stand. Dusting them with powdered sugar adds a touch of elegance. Wrap them in parchment paper for an adorable presentation at gatherings. You could also consider adding fresh fruits or sprigs of mint as garnishes to elevate the aesthetics.
These muffins also make excellent party favors. Wrapping them individually and tying them with twine or ribbon creates a sweet, personal touch. Guests will appreciate the gesture and take home a piece of your culinary creativity.
Pairings/storage
Enjoying mini chocolate chip muffins pairs well with various beverages. Serve them alongside a warm cup of coffee, milk, or herbal tea. The combination enhances the experience, making for a delightful snack break or dessert.
To keep your muffins fresh, store them in an airtight container. Room temperature muffins stay delicious for a few days, while you can freeze extras for longer storage. This ensures you always have a treat on hand.
When freezing, let the muffins cool completely before placing them in a freezer bag. Label the bag with the date for easy reference when you’re ready to enjoy them again. When the craving strikes, thaw them at room temperature or warm them in the microwave for a few seconds to bring back that freshly baked flavor.
Now you have the perfect recipe and tips for creating delicious mini chocolate chip muffins, ready to bake and share. Enjoy the process of mixing, baking, and savoring these delightful treats with family and friends.
Print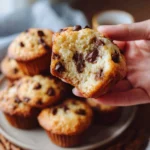
Mini Chocolate Chip Muffins
- Prep Time: 15 minutes
- Cook Time: 12 minutes
- Total Time: 27 minutes
- Yield: 12 servings
- Category: Muffins
- Method: Baking
- Cuisine: American
- Diet: Vegetarian
Description
Delicious mini chocolate chip muffins that are sweet, wholesome, and perfect for sharing. These little treats capture the warmth of home baking.
Ingredients
- 1 cup all-purpose flour
- 1/2 cup whole wheat flour
- 1/2 cup sugar
- 1 tsp baking powder
- 1/2 tsp baking soda
- 1/4 tsp salt
- 1/2 cup milk
- 1/4 cup vegetable oil
- 1 large egg
- 1 tsp vanilla extract
- 1/2 cup mini chocolate chips
Instructions
- Preheat the oven to 350°F (175°C) and line a mini muffin tin with paper liners.
- In a large bowl, whisk together the all-purpose flour, whole wheat flour, sugar, baking powder, baking soda, and salt.
- In another bowl, combine the milk, vegetable oil, egg, and vanilla extract.
- Pour the wet ingredients into the dry ingredients and stir until just combined.
- Gently fold in the mini chocolate chips.
- Fill each muffin cup about 2/3 full with the batter.
- Bake for 10-12 minutes or until a toothpick inserted in the center comes out clean.
- Let them cool for a few minutes before transferring to a wire rack.
Notes
For added flavor, consider incorporating nuts or other mix-ins. Store in an airtight container to keep fresh.
