
📑 Table of Contents ▶
- Understanding Homemade Oreo Cookies
- Fundamentals
- Preparation/Setup
- Directions
- Elevating Your Homemade Oreo Cookies
- Technique
- Tips/Tricks
- Perfecting Results with Homemade Oreo Cookies
- Perfecting Results
- Troubleshooting/Variations
- Serving and Storing Your Homemade Oreo Cookies
- Serving/Presentation
- Pairings/Storage
Homemade Oreo Cookies
Making cookies from scratch brings a wave of nostalgia and warmth, especially when it comes to homemade Oreo cookies. The first time I ventured into baking my own cookies, I felt a rush of excitement. The aroma of freshly baked cookies wafted through the kitchen, bringing everyone together for a sweet treat.
As I crafted my homemade Oreos, the simplicity of the process amazed me. Each step, from mixing the dough to forming those perfect little rounds, felt like an adventure. I knew I was creating something special that would delight my family and friends. Homemade Oreo cookies became a way to share love and creativity, turning ordinary afternoons into memorable moments.
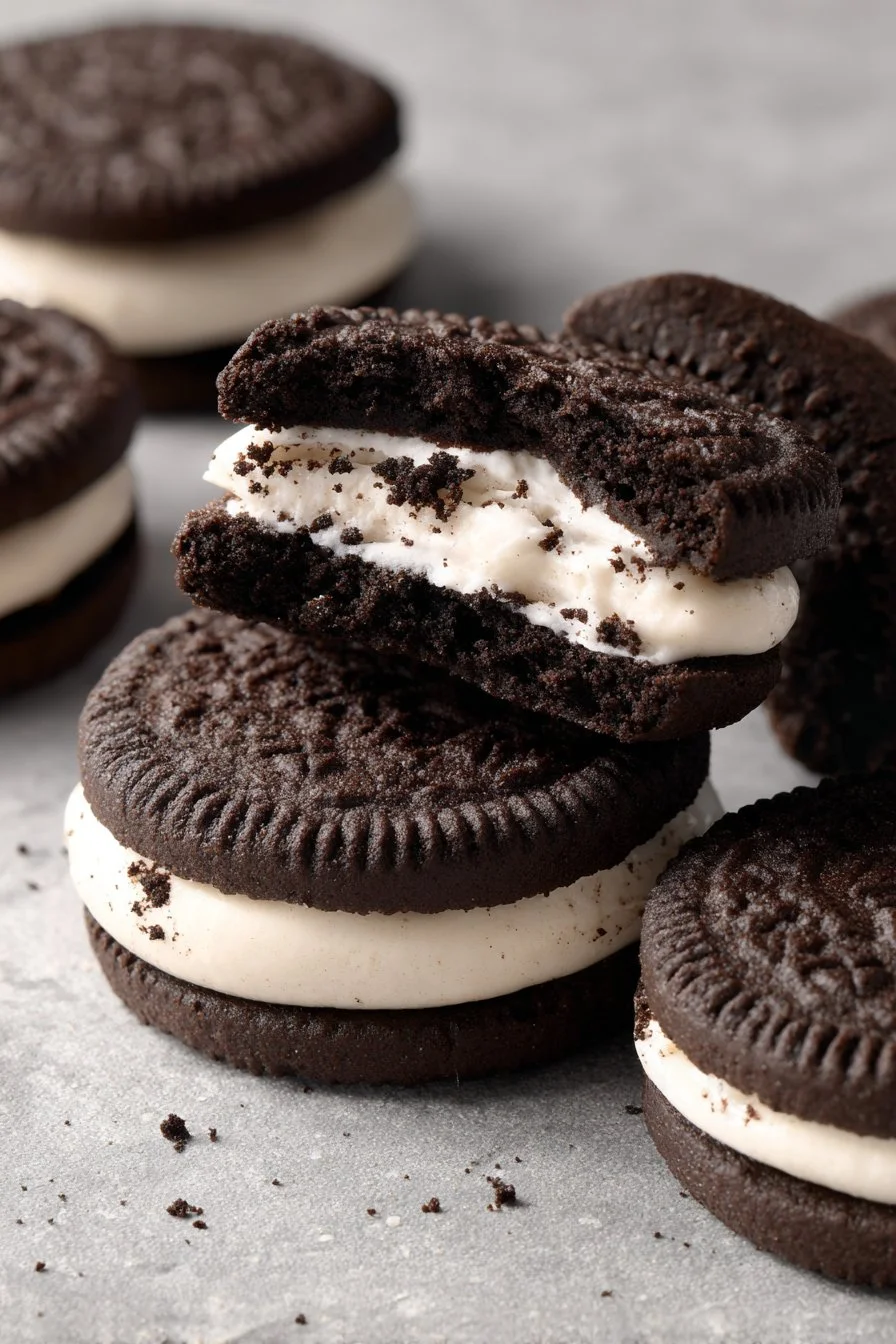
Every bite reveals layers of chocolatey goodness and creamy filling that make these cookies truly irresistible. Embracing the process of crafting these favorites offered me the joy of not just making cookies, but of making lasting memories with loved ones.
Let’s put on our aprons and dive into the delightful world of homemade Oreo cookies.
Understanding Homemade Oreo Cookies
Fundamentals
Homemade Oreo cookies consist of two components: the chocolate cookie and the creamy filling. The beauty of these cookies lies in their contrast. The rich, cocoa-flavored cookies meld perfectly with the smooth, sweet filling, offering everything a cookie lover desires. Crafting them requires a few fundamental techniques, but the results are overwhelmingly gratifying.
The ingredients for these cookies are straightforward and accessible. This makes them great for baking novices and seasoned pros alike. Here’s a quick glance at what you need: all-purpose flour, unsweetened cocoa powder, baking soda, salt, butter, granulated sugar, an egg, and vanilla extract. For the creamy center, you’ll utilize powdered sugar, more butter, milk, and a touch of vanilla.
Preparation/Setup
Before diving into baking homemade Oreo cookies, prepping your kitchen is key. Begin by gathering all your ingredients and measuring them out. This organization helps streamline the process and makes baking a joy rather than a hassle.
Start by preheating your oven to 350°F (175°C). This step is crucial as it ensures that your cookies bake evenly. While the oven warms up, mix the dry ingredients in a bowl. Combine the flour, cocoa powder, baking soda, and salt until you create a uniform mix. This preparation sets the stage for optimal cookie creation.
Ingredients
Here’s a closer look at the specifics:
- 1 1/4 cups all-purpose flour
- 1/2 cup unsweetened cocoa powder
- 1 teaspoon baking soda
- 1/2 teaspoon salt
- 1/2 cup unsalted butter, softened
- 1 cup granulated sugar
- 1 large egg
- 1 teaspoon vanilla extract
- 1 cup powdered sugar
- 1/4 cup unsalted butter, softened for filling
- 1-2 tablespoons milk
- 1 teaspoon vanilla extract for filling
These ingredients, when combined in the right way, create a cookie that’s crunchy on the edges and soft in the middle.
Directions
Start by whisking together the all-purpose flour, cocoa powder, baking soda, and salt in a bowl. This combination provides the essential dry mix for your dough.
In another bowl, cream together the softened butter and granulated sugar. Beat until the mixture looks light and fluffy. Add the large egg and vanilla extract, mixing until fully combined. Take care to incorporate everything well.
Gradually blend the dry ingredients into the wet mixture. This step allows for a smooth dough to form. Once you achieve that smooth texture, it’s time to shape the dough into cookies.
Roll tablespoons of dough into balls and place them onto a baking sheet lined with parchment paper. Gently flatten each ball a little. Bake for 8-10 minutes or until the edges feel firm. Allow the cookies to cool completely on a wire rack.
To make the filling, beat together the powdered sugar, butter, milk, and vanilla until smooth. This creamy center offers that signature Oreo deliciousness.
Spread the filling onto the bottom of one cookie and sandwich it with another. Now you have your very own homemade Oreos, ready to be enjoyed!
Elevating Your Homemade Oreo Cookies
Technique
Creating perfect homemade Oreo cookies requires a few techniques that enhance their texture and flavor. The process of creaming butter and sugar should never be rushed. This step incorporates air into the mixture, resulting in a lighter cookie.
When rolling out your dough, keep a consistent size for each cookie. This consistency ensures even baking, so all your cookies come out perfectly. Following the baking time is crucial, too—overbaking can lead to dry cookies, while underbaking can leave them too soft.
Tips/Tricks
A few tips can elevate your homemade Oreo experience. Consider chilling the dough for about 30 minutes before baking. Chilling helps the cookies hold their shape better during the baking process.
Vary the amount of cocoa powder in your recipe according to your taste. If you prefer a deeper chocolate flavor, use slightly more cocoa. Feel free to experiment by adding chocolate chips or other mix-ins for an exciting twist.
Always allow your cookies to cool completely before adding the filling. Freshly baked cookies can become too soft and fall apart under the weight of the cream.
Perfecting Results with Homemade Oreo Cookies
Perfecting Results
Perfecting your homemade Oreo cookies comes down to practice and attention to detail. Each baking session provides an opportunity to tweak the recipe according to your preferences.
If you find your cookies turning out too crumbly, consider adding a small amount of milk to the dough. Mixing it in will help bind it better. Conversely, if your dough feels too sticky, a touch more flour can balance it out.
Keep an eye on your oven; different ovens can have varying temperatures. Knowing how yours behaves can lead to better baking accuracy.
Troubleshooting/Variations
If your cookies don’t flatten as expected, try pressing down on them slightly before baking. This will help create that signature Oreo shape.
Variations can also transform your homemade cookies into something entirely different. Try using flavored extracts like almond or mint to add a unique twist to the classic Oreo experience.
Adjust the sweetness of the filling by varying the amount of powdered sugar to create a taste that suits your palate.
Serving and Storing Your Homemade Oreo Cookies
Serving/Presentation
Presenting your homemade Oreo cookies can be as delightful as eating them. Stack them neatly on a plate, or arrange them in a decorative tin. Such presentations make these cookies perfect for gatherings or gifting.
Consider pairing them with a glass of cold milk or a scoop of vanilla ice cream for an extra treat. These cookies provide a delicious contrast to the creaminess of the milk or ice cream.
Pairings/Storage
Storing your homemade Oreo cookies correctly will maintain their freshness and texture. Place the cookies in an airtight container. They will stay fresh for up to a week at room temperature.
If you want to keep them longer, consider freezing the cookies. Simply place them in a freezer-safe bag or container. They will retain their flavor and texture for several months in the freezer.
When you’re ready to enjoy a frozen cookie, simply let it thaw at room temperature for a delightful, fresh taste.
Every bite of your homemade Oreo cookies brings joy and nostalgia. With each step, from mixing the dough to savoring the final product, you experience the love and creativity that goes into baking. Whether you are sharing with loved ones or enjoying them solo, these cookies never fail to deliver happiness.
Print
Homemade Oreo Cookies
- Prep Time: 15 minutes
- Cook Time: 10 minutes
- Total Time: 25 minutes
- Yield: 24 cookies
- Category: Dessert
- Method: Baking
- Cuisine: American
- Diet: Vegetarian
Description
Delightful homemade Oreo cookies with layers of chocolatey goodness and creamy filling, perfect for sharing with loved ones.
Ingredients
- 1 1/4 cups all-purpose flour
- 1/2 cup unsweetened cocoa powder
- 1 teaspoon baking soda
- 1/2 teaspoon salt
- 1/2 cup unsalted butter, softened
- 1 cup granulated sugar
- 1 large egg
- 1 teaspoon vanilla extract
- 1 cup powdered sugar
- 1/4 cup unsalted butter, softened for filling
- 1-2 tablespoons milk
- 1 teaspoon vanilla extract for filling
Instructions
- Preheat your oven to 350°F (175°C).
- In a bowl, whisk together the all-purpose flour, cocoa powder, baking soda, and salt.
- In another bowl, cream together the softened butter and granulated sugar until light and fluffy.
- Add the egg and vanilla extract to the butter mixture and mix until fully combined.
- Gradually blend the dry ingredients into the wet mixture until a smooth dough forms.
- Roll tablespoons of dough into balls and place them on a lined baking sheet, gently flatten each ball.
- Bake for 8-10 minutes until the edges feel firm, then cool on a wire rack.
- For the filling, beat together the powdered sugar, butter, milk, and vanilla until smooth.
- Spread the filling onto the bottom of one cookie and sandwich with another cookie.
Notes
Chill the dough for 30 minutes before baking for better shaping. Allow cookies to cool completely before adding filling to prevent them from falling apart.
