
➤ Table of Contents
I remember the first time I encountered the concept of Halloween Zombie Guts. My grandmother, a culinary wizard in her own right, conjured up a Halloween feast that was both delicious and delightfully spooky. She had a knack for turning ordinary ingredients into something extraordinary, and that day was no exception. The dish she presented looked eerily like it belonged in a haunted kitchen, yet tasted heavenly.
This memory has stayed with me, inspiring my own culinary creations, especially around Halloween. The idea of whipping up a batch of Halloween Zombie Guts brings a playful and whimsical energy to the kitchen. It’s a perfect blend of creativity and taste, transforming a few simple ingredients into a centerpiece of flavor and fun.
As I grew older, my love for cooking evolved, but the joy of recreating those childhood memories remained. Halloween Zombie Guts have become a staple in my recipe repertoire, capturing the essence of the season while indulging in the nostalgia of simpler times. This dish encapsulates the spirit of Yumoti.com—where food is not just about sustenance but a celebration of moments shared.
Join me in making this dish that is sure to bring smiles and maybe a few playful screams to your Halloween gathering. With a few pantry staples like red velvet cake mix and beetroot juice, we’ll create a visually stunning and tasty treat that embodies the fun and flavor of Halloween Zombie Guts.
Print
Halloween Zombie Guts
- Prep Time: 30 minutes
- Cook Time: 30 minutes
- Total Time: 35 minutes
- Yield: 12 servings
- Category: Dessert
- Method: Baking
- Cuisine: American
Description
Discover the gruesome delight of Halloween Zombie Guts! Learn how to create this spooky and delicious dish for your next Halloween party.
Ingredients
- 2 tsp active dry yeast (10 ml)
- 1 tbsp brown sugar (15 g)
- 1 1/4 cup warm water (300 ml)
- Pinch of salt
- 1 tsp beetroot juice (5 ml)
- 5 cups red velvet box cake mix (dry) (180 g)
- 5 cups flour (300 g)
- 1/3 cup vegetable oil (80 ml)
- 1 cup brown sugar (200 g)
- 1/2 teaspoon (3 ml) cinnamon
- 1 cup powdered sugar (120 g)
- 1–3 tsp almond milk (5–15 ml)
Instructions
- In a mixing bowl, combine the yeast, brown sugar, and warm water. Stir well and let stand until it becomes foamy, approximately 5 minutes.
- Gradually incorporate the salt, red velvet cake mix, beetroot juice, and flour, mixing with a dough hook until a dough forms.
- Gather the dough into a ball, cover it, and allow it to rise for 60 minutes.
- After the dough has risen, sprinkle flour on a large surface, knead it briefly, and then roll it out into a rectangle, trimming any uneven edges.
- Prepare a mixture of vegetable oil and brown sugar, then spread it over the dough. Distribute the cinnamon evenly and press it in with a rolling pin.
- Roll the dough into a log shape, slice it into segments every 2 inches, then unfold each piece and fold them in half.
- Place the pieces in a greased 8×8 inch baking dish, arranging them to resemble “guts.” Cover and let them rise again for 45 minutes, while preheating the oven to 350°F.
- Uncover the dough and bake at 350°F for 25 to 30 minutes.
- After baking, blend the glaze ingredients in a medium bowl and drizzle over the baked rolls.
- Slice into portions and serve.
Notes
- Use a high-quality red velvet cake mix for enhanced flavor and vibrant color in the cinnamon rolls.
- Evenly distribute the cinnamon sugar mixture for a consistently flavorful outcome.
- Allow the rolls to properly rise for a light and fluffy texture. Adjust almond milk in the glaze for desired drizzling consistency.
Creating Halloween Zombie Guts: The Basics
Fundamentals
To start our Halloween Zombie Guts journey, we need to gather the fundamental ingredients. The core of this recipe revolves around the dough, which forms the base of our “guts.” By combining active dry yeast, brown sugar, and warm water, we activate the yeast, which is a crucial step in creating the perfect dough texture. The yeast mixture should become foamy, indicating that it’s ready for action.
Next, we incorporate a pinch of salt, red velvet box cake mix, beetroot juice, and flour. These ingredients give the dough its unique color and flavor. The beetroot juice, in particular, enhances the vibrant hue, making the Halloween Zombie Guts visually striking. Mixing these ingredients with a dough hook ensures a smooth and elastic dough that is easy to work with.
Preparation/Setup
Once the dough forms, gather it into a ball and let it rise for about an hour. This resting period allows the dough to double in size, developing its characteristic light and fluffy texture. While the dough rises, you can prepare the work surface by sprinkling it with flour to prevent sticking as we knead and roll out the dough later.
After the dough has risen, gently knead it on the floured surface to release any air bubbles. Roll it out into a rectangle, ensuring even thickness throughout. Trimming uneven edges will help in creating uniform pieces that resemble “guts” when baked, adding to the spooky presentation of our Halloween Zombie Guts.
Mastering the Halloween Zombie Guts
Technique
The technique of rolling and shaping the dough is key to achieving the desired appearance of Halloween Zombie Guts. Start by preparing a mixture of vegetable oil and brown sugar. Spread this mixture evenly over the rolled-out dough to ensure every bite is packed with sweetness. Sprinkle cinnamon for an aromatic touch that complements the sugary flavor.
Halloween Zombie Guts
Using a rolling pin, gently press the cinnamon into the dough. This step helps the flavors adhere better and intensifies the taste with every bite. Carefully roll the dough into a log shape, ensuring a tight roll to maintain structure. Slice the log into segments, then unfold and fold each piece in half to mimic the look of guts.
Tips/Tricks
For best results, ensure the dough rises again after shaping. This second rise, lasting about 45 minutes, allows the flavors to meld and the texture to become airy and light. As the dough rises, preheat your oven to 350°F, ensuring it’s at the right temperature when the dough is ready to bake.
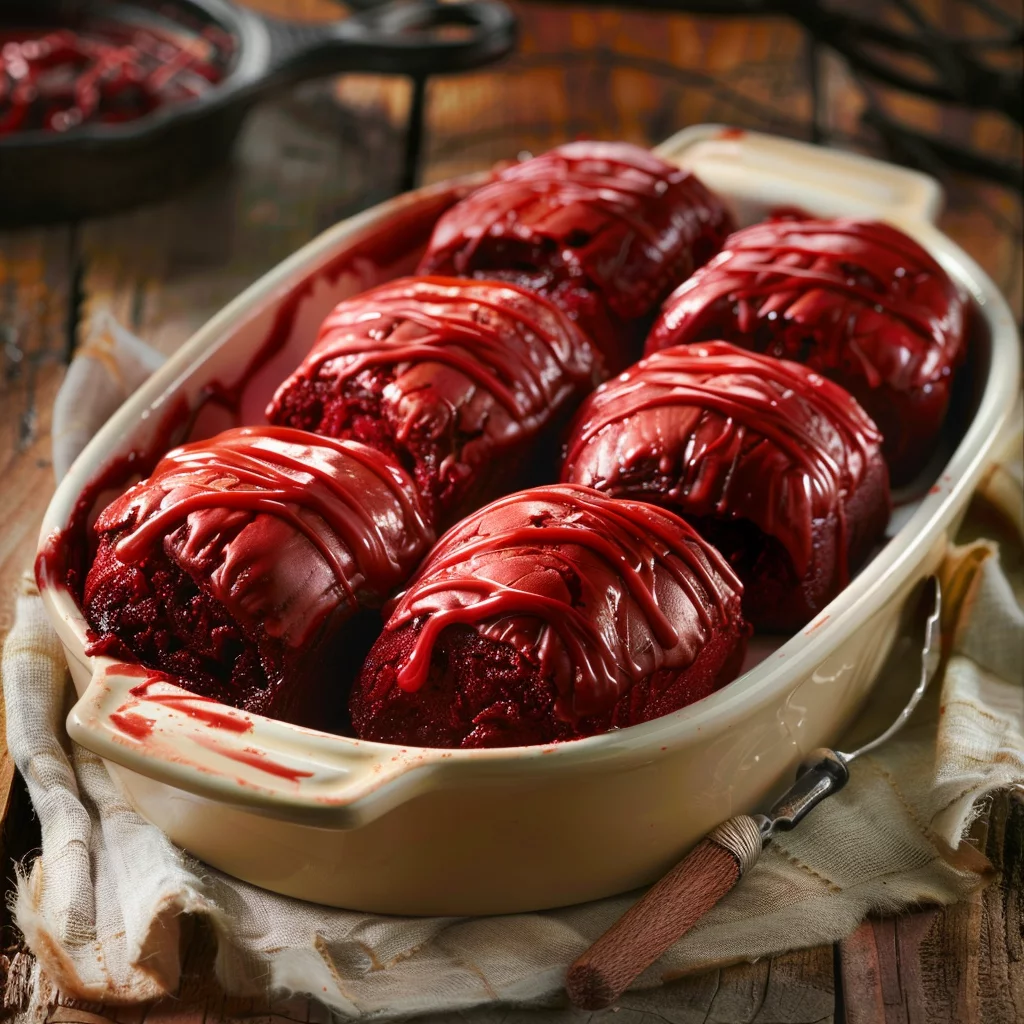
Arranging the pieces in a greased 8×8 inch baking dish can enhance the visual appeal. Position them to resemble intertwined guts, creating an eye-catching centerpiece. Cover the dish to prevent the dough from drying out during the rise, maintaining its soft and pillowy texture.
Perfecting Your Halloween Zombie Guts
Perfecting Results
Baking is an art, and achieving perfect Halloween Zombie Guts requires attention to detail. Once the dough is ready, uncover and place it in the preheated oven. Bake at 350°F for 25 to 30 minutes. The aroma of cinnamon and sugar should fill your kitchen, signaling that the “guts” are almost ready.
Check the dough for a golden-brown color, which indicates that it’s perfectly baked. The exterior should be slightly crisp, while the inside remains soft and chewy. This texture contrast is essential for a delightful eating experience. Allow the baked “guts” to cool slightly before adding the final touch: the glaze.
Troubleshooting/Variations
If the dough doesn’t rise as expected, ensure that the yeast is fresh and the water temperature is correct—too hot or too cold can affect yeast activity. For variations, consider adding nuts or dried fruits to the filling for added texture and flavor. Experiment with different spices like nutmeg or cardamom to create a unique twist on the classic recipe.
In case the glaze turns out too runny, gradually add more powdered sugar to thicken it. Conversely, if it’s too thick, incorporate almond milk sparingly until the desired consistency is reached. These adjustments will ensure your Halloween Zombie Guts are perfect for serving.
Serving and Enjoying Halloween Zombie Guts
Serving/Presentation
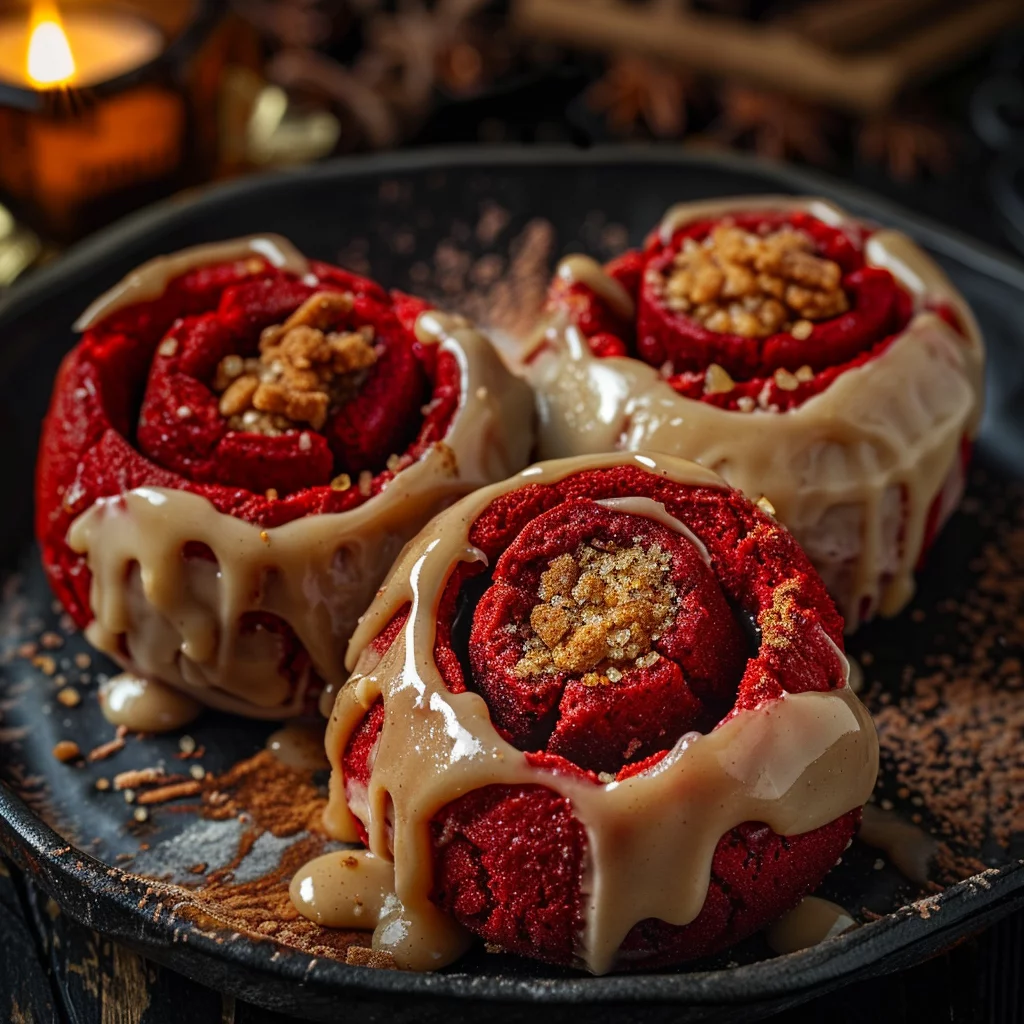
Presentation plays a significant role in the enjoyment of Halloween Zombie Guts. Drizzle the prepared glaze over the cooled rolls, creating a sticky, sweet coating that enhances both taste and visual appeal. The glaze should cascade down the sides, evoking a playful yet eerie appearance, perfect for a Halloween gathering.
Arrange the baked “guts” on a serving platter, allowing guests to easily help themselves. The unique look and flavor of Halloween Zombie Guts make them a conversation starter, turning any Halloween party into a memorable occasion. Pair these delightful treats with a warm beverage, like spiced apple cider, to complement their sweet and spicy notes.
Halloween Zombie Guts
Pairings/Storage
For pairings, consider serving Halloween Zombie Guts alongside other themed treats, such as candy apples or pumpkin pie, for a festive dessert spread. If you have leftovers, store them in an airtight container at room temperature for up to two days. This will keep them fresh and ready for enjoyment beyond the Halloween festivities.
To reheat, simply place them in a preheated oven at a low temperature until warm. The reheating process will revive their soft texture and enhance the flavors, making them as delightful as when freshly baked.
Conclusion
Crafting Halloween Zombie Guts is an exciting culinary adventure that brings creativity to the forefront. The combination of red velvet cake mix, beetroot juice, and cinnamon creates a treat that is as visually striking as it is delicious. With the right techniques and a bit of patience, you can produce a dish that is sure to impress and entertain.
Whether you’re hosting a Halloween bash or simply want to indulge in the festive spirit, this recipe offers both flavor and fun. The detailed process ensures that each step is manageable, even for novice cooks, making it a versatile addition to any Halloween menu. Embrace the spooky season with these Halloween Zombie Guts, and enjoy the blend of nostalgia and novelty they bring to your table.
