📑 Table of Contents ▶
- Green Chile Enchiladas
- Mastering Green Chile Enchiladas
- Fundamentals
- Preparation/setup
- Crafting the Perfect Green Chile Sauce
- Technique
- Tips/tricks
- Refining Your Green Chile Enchiladas
- Perfecting results
- Troubleshooting/variations
- Serving and Storing Your Green Chile Enchiladas
- Serving/presentation
- Pairings/storage
- Conclusion
- FAQs – Green Chile Enchiladas
I’m Laloti Karla, and my culinary journey is deeply rooted in the joy of crafting simple yet flavorful dishes that bring people together. One of my fondest memories involves the comforting aroma of cooking in my grandmother’s kitchen. It was there that I first encountered the magic of turning humble ingredients into something extraordinary. Her meals were always a testament to the power of simplicity and love. Inspired by these cherished experiences, I created Yumoti.com to share recipes that echo this philosophy.
Green Chile Enchiladas hold a special place in my heart, reminiscent of those family gatherings where laughter and good food intertwined seamlessly. The vibrant flavors of roasted green chiles and the tangy tomatillo sauce in this dish are a perfect representation of my culinary roots. I’m excited to guide you through this recipe, ensuring that your enchiladas are as delightful and memorable as those from my childhood.
At Yumoti, I strive to make cooking accessible and enjoyable. Whether you’re a beginner or a seasoned home chef, these Green Chile Enchiladas promise to be a delightful addition to your culinary repertoire. Let’s dive into the fundamentals of creating this flavorful dish, exploring each step to guarantee a delicious outcome. Remember, the key is in the details and the love you infuse into each ingredient.

Green Chile Enchiladas
- Prep Time: 15 minutes
- Cook Time: 45 minutes
- Total Time: 60 minutes
- Yield: 6
- Category: Main Course
- Method: Baking
- Cuisine: Mexican
Description
Discover how to make delicious green chile enchiladas with this easy recipe. Learn how to prepare the perfect spicy and flavorful Mexican dish at home!
Ingredients
- 1 1/2 pounds (680 g) tomatillos
- 3 cloves garlic, still in their peels
- 2 jalapeño peppers
- 1/2 cup (120 ml) chopped fresh cilantro, leaves and stems
- Salt
- 4 large Anaheim or Hatch green chiles (can sub with poblanos, if you want spicier)
- Vegetable oil
- 12 yellow corn tortillas (look for sturdy corn tortillas)
- 1/2 to 1 pound (225–450 g) Monterey Jack cheese, grated (quantity depends on how cheesy you want the enchiladas to be)
- Sour cream
- Cilantro
Instructions
- Peel the outer layer off the tomatillos and rinse them clean. Halve the tomatillos and arrange them cut-side down on a foil-lined baking tray. Add the garlic cloves, still in their skins, and jalapeños to the tray. Broil on the oven’s top rack for 5 to 10 minutes until the tomatillos acquire a light char. Take them out and let them cool until they can be handled. Remove the garlic cloves from their skins and discard the skins. Cut the jalapeños open, remove the seeds and stems, and discard them. Blend the tomatillos, roasted garlic, jalapeños, cilantro, and a teaspoon of salt until smooth. Set aside; this can be prepared ahead and refrigerated.
- If using a gas stove, roast the chiles over the flame until charred, or alternatively, place them under the broiler, turning until fully blackened.
- After roasting, place the chiles in a bowl, covering them with a plate to trap the steam for 5 minutes. Peel off and discard the charred skin. Open the chiles to remove and discard the seeds and stems. Slice the chiles into strips.
- Heat some vegetable oil in a skillet over medium-high heat. Once the oil is hot, place a corn tortilla in the pan. It should sizzle upon contact. Flip it over and cook until air pockets form. Remove and drain on paper towels, repeating the process with the rest of the tortillas, adding more oil as needed. Use paper towels to separate them as they cool.
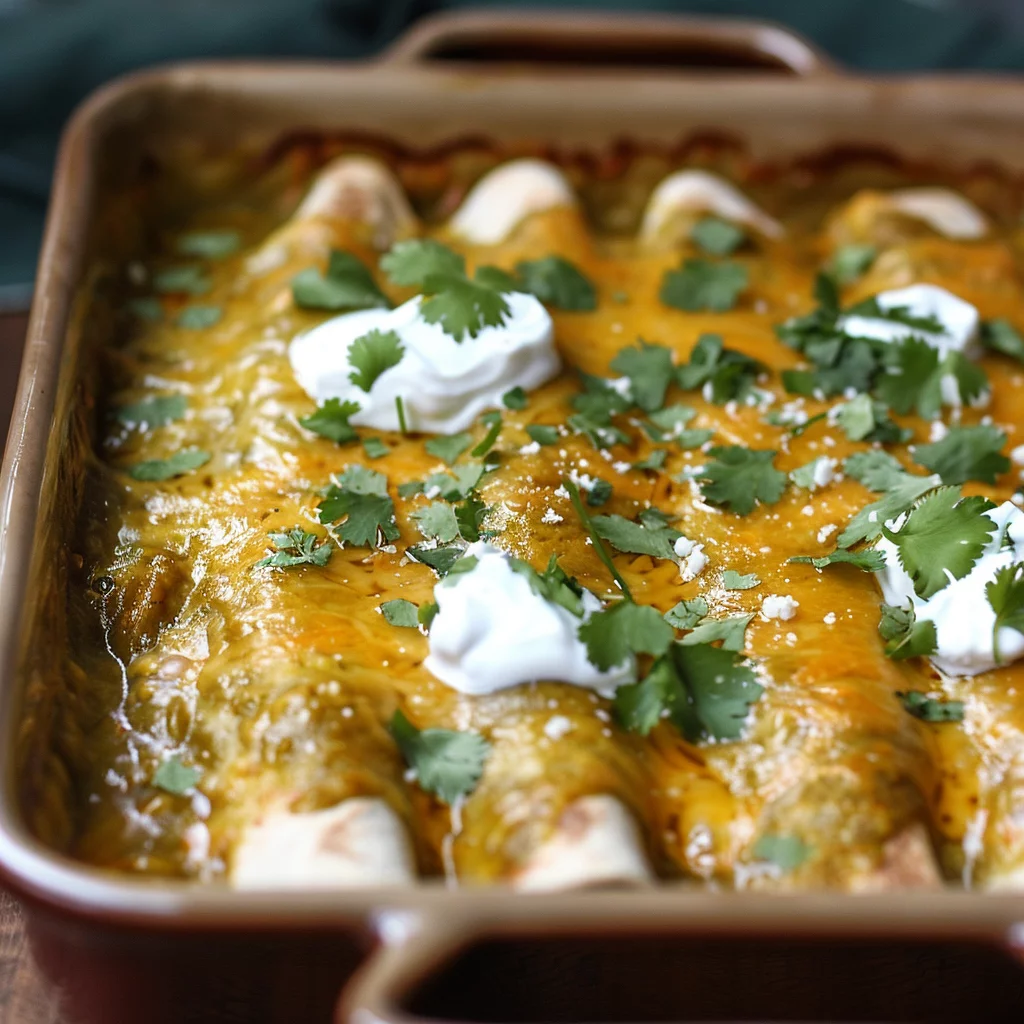
- Coat the base of a 9×13 baking dish with a bit of the tomatillo sauce. Fill each tortilla with grated cheese and a couple of chile strips, roll them up, and lay them seam side down in the dish. After filling the dish, cover the tortillas with the rest of the tomatillo sauce and sprinkle with the remaining cheese.
- Bake at 350°F for 15 minutes, until the cheese is melted.
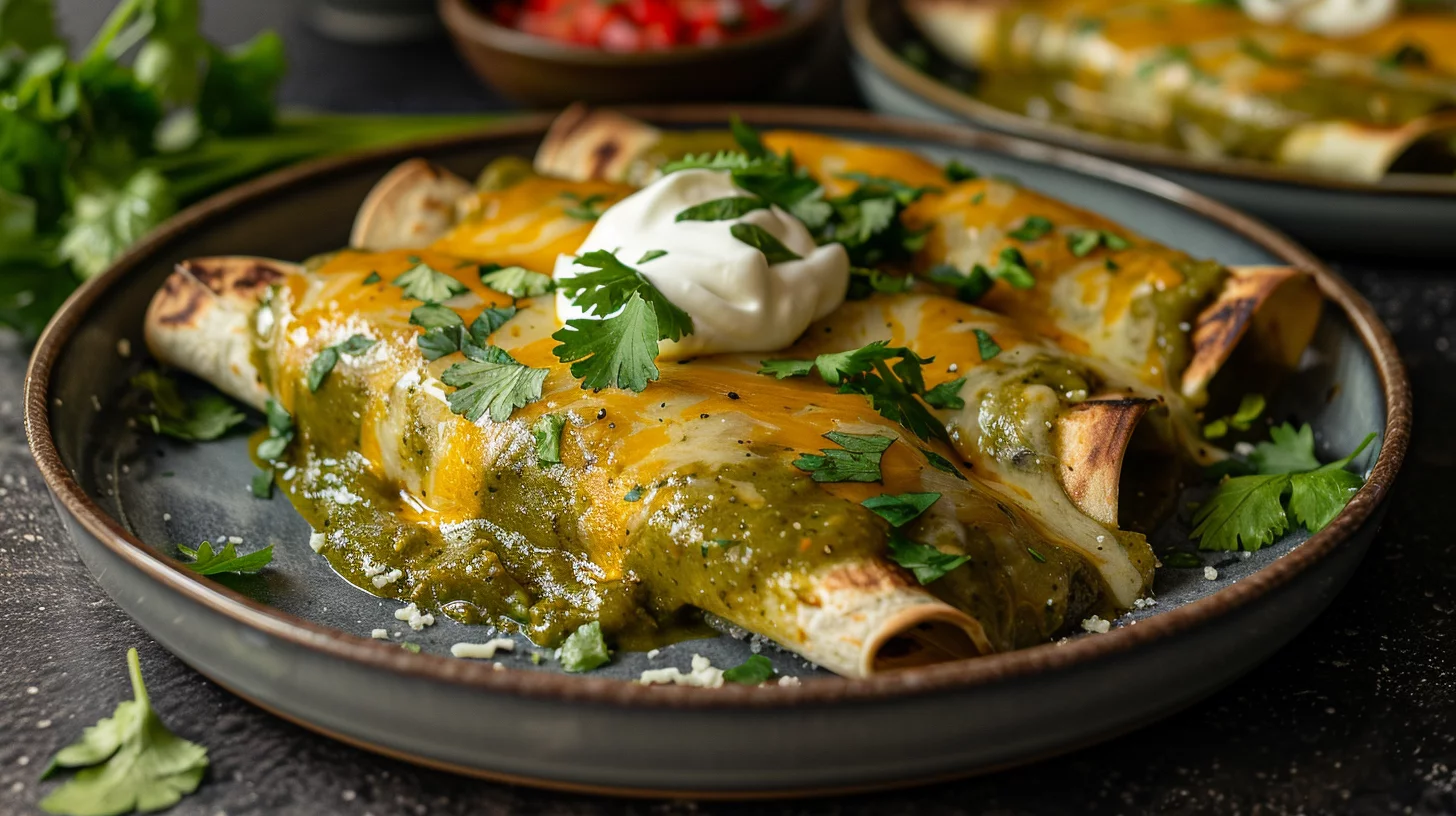
- Serve with a drizzle of thinned sour cream and a sprinkle of chopped cilantro. A side of thinly sliced iceberg lettuce dressed with vinegar and salt complements the dish well. These enchiladas make great leftovers and can be stored in the fridge for several days.
Notes
- For a spicier flavor, try using poblano peppers instead of Anaheim or Hatch green chiles.
- Make sure to drain the tortillas on paper towels to remove excess oil before filling.
- Prepare the tomatillo sauce in advance and refrigerate until ready to use for a time-saving option.
Mastering Green Chile Enchiladas
Fundamentals
Green Chile Enchiladas are a beloved staple, celebrated for their robust flavors and comforting nature. The heart of this dish lies in the perfect balance of roasted chiles, tangy tomatillo sauce, and creamy cheese. Understanding these components is crucial for achieving that authentic taste.
The tomatillo sauce serves as the zesty foundation, bringing a refreshing contrast to the rich cheese filling. Roasting the tomatillos and garlic enhances their natural sweetness, while jalapeños add a hint of spice. Incorporating fresh cilantro infuses the sauce with a herbal note, rounding out the flavor profile beautifully.
Preparation/setup
Begin by preparing your ingredients. Peel and rinse the tomatillos, ensuring they are clean before halving them. Arrange them cut-side down on a foil-lined baking tray, accompanied by garlic cloves and jalapeños. Broil until lightly charred. This step intensifies the flavors, making the sauce more aromatic and rich.
While the vegetables cool, roast the green chiles over a gas flame or under the broiler. This process imparts a smoky depth to the dish. Once blackened, let them steam in a covered bowl for easy peeling. Remove the seeds and slice the chiles into strips, readying them for the enchilada filling.
Crafting the Perfect Green Chile Sauce
Technique
The key to a well-balanced Green Chile Enchilada lies in the sauce. Blend the roasted tomatillos, garlic, jalapeños, and cilantro until smooth, adding a teaspoon of salt to taste. This vibrant green sauce should be vibrant and flavorful, providing a fresh complement to the cheesy filling.
Ensure your sauce is smooth and well-blended. You can adjust the consistency by adding a bit of water or broth if needed. This sauce can be made ahead of time and refrigerated, allowing the flavors to meld further.
Green Chile Enchiladas
Tips/tricks
To enhance the flavor of your enchiladas, consider using a mix of chiles. Anaheim or Hatch chiles offer a milder taste, while poblanos provide a spicier kick. Customize the heat level according to your preference, ensuring a dish that suits your taste.
When preparing the tortillas, quickly frying them in oil not only adds flavor but also prevents them from becoming soggy. This step is crucial for achieving that perfect texture, ensuring the tortillas hold their shape once baked.
Refining Your Green Chile Enchiladas
Perfecting results
Assemble your enchiladas by filling each tortilla with grated Monterey Jack cheese and the prepared chile strips. Roll them tightly and place seam-side down in a 9×13 baking dish coated with a thin layer of tomatillo sauce. Pour the remaining sauce over the enchiladas, ensuring they are well-covered.
Bake the enchiladas at 350°F until the cheese is melted and bubbly. This step is where the flavors meld together, creating a cohesive and delicious dish. The melted cheese should be golden and inviting, signaling the enchiladas are ready to enjoy.
Troubleshooting/variations
If your enchiladas turn out too spicy, serve them with a dollop of sour cream to balance the heat. For a creamier texture, consider adding more cheese to the filling or topping. Alternatively, experiment with different cheese varieties like cheddar or queso fresco for a unique twist.
For those seeking a vegetarian option, replace the cheese with plant-based alternatives. This ensures everyone can enjoy the delightful flavors of Green Chile Enchiladas without compromising dietary preferences.
Serving and Storing Your Green Chile Enchiladas
Serving/presentation
Present your Green Chile Enchiladas with a drizzle of thinned sour cream and a sprinkle of chopped cilantro. This not only enhances the visual appeal but also adds a layer of flavor to each bite. Pairing the enchiladas with a side of thinly sliced iceberg lettuce dressed with vinegar and salt complements the dish beautifully.
For a creative twist, consider serving these enchiladas with a side of Japanese Matcha Green Tea Ice Cream. The refreshing dessert provides a delightful contrast to the savory meal.

Green Chile Enchiladas
Pairings/storage
Green Chile Enchiladas pair well with a variety of side dishes, such as Witches Brew Green Pea Soup. The light and earthy flavors of the soup complement the richness of the enchiladas, creating a balanced meal.
Store leftover enchiladas in an airtight container in the refrigerator for several days. Reheat them in the oven to maintain their texture and flavor, making them a convenient option for quick meals. If you’re looking for more enchilada inspiration, check out these Easy Cheesy Ground Beef Enchiladas for a hearty alternative.
Conclusion
Green Chile Enchiladas are a delightful dish that combines the bold flavors of roasted chiles and tangy tomatillo sauce with creamy cheese. By following this guide, you can master the art of preparing these enchiladas, ensuring a satisfying and flavorful meal every time. The recipe’s versatility allows for customization, whether adjusting the spice level or exploring vegetarian options, to cater to different preferences.
The simplicity and depth of flavor in Green Chile Enchiladas make them a standout addition to any meal rotation. Their ability to bring people together over a shared love of good food is a testament to their enduring appeal. Enjoy experimenting with this recipe, and let it become a cherished part of your culinary tradition.
