
📑 Table of Contents ▶
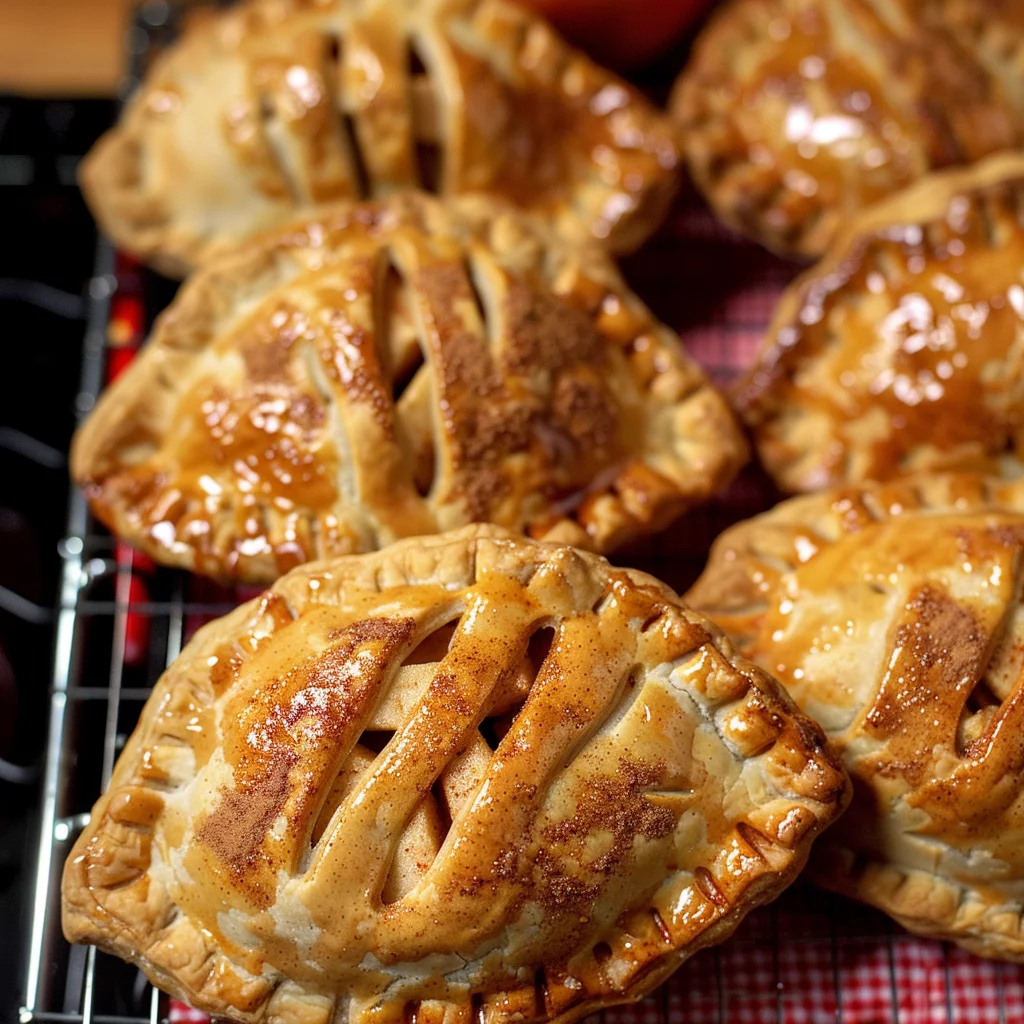
- Easy Apple Hand Pies
- The Magic of Easy Apple Hand Pies
- Fundamentals
- Preparation/setup
- Crafting Your Delicious Pies
- Technique
- Tips/tricks
- Achieving Perfection
- Perfecting results
- Troubleshooting/variations
- Serving and Storing Your Creations
- Serving/presentation
- Pairings/storage
- Conclusion
- FAQs – Easy Apple Hand Pies
I remember the first time I tried my hand at making Easy Apple Hand Pies. I had watched my grandmother effortlessly craft the most delightful pies using simple ingredients she had on hand. Her kitchen was always filled with the comforting aroma of cinnamon and apples, a scent that instantly takes me back to those cherished days.
Creating these pies became a way for me to connect with my roots, blending the simplicity of my grandmother’s techniques with a modern touch. The result? A batch of delightful hand pies that are not only easy to make but irresistibly delicious. The keyword here is “easy,” and trust me, these pies truly live up to that promise.
These Easy Apple Hand Pies are perfect for any occasion, whether you’re hosting a gathering or simply craving a sweet treat. The combination of tender homemade pie crust and a spiced apple filling is simply magical. With just a few steps, you’ll have a kitchen filled with the irresistible scent of baking pies, evoking a sense of warmth and nostalgia.

Easy Apple Hand Pies
- Prep Time: 30 minutes
- Cook Time: 28-32 minutes
- Total Time: 58-62 minutes
- Yield: Makes 12 pies
- Category: Dessert
- Method: Baking
- Cuisine: American
Description
Learn how to make delicious and convenient Easy Apple Hand Pies with this step-by-step recipe. Perfect for a sweet treat on the go!
Ingredients
- Homemade Pie Crust (makes 2 crusts, use both)
- 3 medium apples, peeled and diced into small bite-size pieces (about 2 and 1/2 cups, or 300g, diced)
- 1/3 cup (70g) granulated sugar
- 2 Tablespoons (28g) vegetable oil
- 1 teaspoon (5 ml) ground cinnamon
- 1/4 teaspoon (1 ml) ground nutmeg
- 1/4 teaspoon (1 ml) ground allspice
- egg wash: 1 large egg beaten with 1 Tablespoon (15ml) milk
- optional: homemade salted caramel for topping
Instructions
- Prepare the crust by following my pie crust recipe until step 5, ensuring the dough rests in the fridge for a couple of hours. You can prepare this dough in advance; further instructions are below.
- For the filling, mix the chopped apples, sugar, oil, cinnamon, nutmeg, and allspice in a medium saucepan or frying pan on low to medium heat. Stir occasionally as you bring the mixture to a gentle boil. Let it simmer for two minutes, then remove it from the heat and let it cool at room temperature for half an hour. You can also prepare the filling beforehand; see additional instructions below.
- To roll out the pie dough, refer to my video tutorial for guidance on the following steps. On a surface lightly dusted with flour, roll out one of the chilled dough discs (keep the other in the fridge). After every few rolls, rotate the dough about a quarter turn. If it starts to stick, dust some flour underneath and continue rolling. Roll until it reaches about 12 inches across and 1/8–1/4-inch in thickness. Use your cookie cutter to cut out circles. Re-roll leftover dough and cut additional circles. Chill the cut circles in the refrigerator to maintain their firmness. Repeat the process with the second dough disc and cool the cut circles for at least 15 minutes before filling the pies.
- During this time, preheat your oven to 375°F (191°C) and prepare two large baking trays with parchment paper or silicone mats.
- To assemble the pies, space half of the dough circles about 3 inches apart on the prepared trays. These will be the base layers. Use a sharp knife to cut slits in the remaining circles, which will serve as the top layers and allow steam to escape during baking. Place roughly 2 tablespoons of the filling in the middle of each base layer, leaving the edges clear. Place a top layer circle over each filled base. Pinch the edges together with your fingers, then use a fork to crimp the edges. If any pies lose their form, reshape them into circles with your hands. It’s fine if some filling seeps out. Brush the tops with the egg wash and sprinkle with coarse sugar if desired.
- If the pies no longer feel cool, freeze them for 10 minutes before baking. They maintain their shape better when they enter the oven cold.
- Bake for approximately 28–32 minutes until the tops and edges are golden brown, rotating the pans halfway through. Once baked, let the pies cool on the trays for 5 minutes, then transfer them to a wire rack to cool further. Serve warm or at room temperature, and if you like, drizzle with warm salted caramel.
- Store any leftovers in the refrigerator for up to 5 days, covered.
Notes
- For a sweeter filling, consider adding an additional tablespoon of sugar to the apple mixture.
- Ensure the pie crust is rolled out to the recommended thickness for a flaky and delicious crust.
- To prevent sogginess, let the pies cool on a wire rack after baking before serving.
The Magic of Easy Apple Hand Pies
Fundamentals
Easy Apple Hand Pies begin with a simple homemade pie crust. The crust is the foundation, offering a flaky and buttery base that complements the sweet and spiced apple filling perfectly. Ensuring you follow the steps to let the dough rest in the fridge is crucial. This resting period allows the gluten to relax, resulting in a tender crust that bakes beautifully.
The filling is where the magic happens. Using fresh apples combined with a mix of spices like cinnamon, nutmeg, and allspice creates a rich, aromatic filling. These spices enhance the natural sweetness of the apples, making every bite a delightful experience. The vegetable oil adds a subtle richness, ensuring the filling remains moist and flavorful.
Preparation/setup
Begin by preparing the homemade pie crust. Follow the recipe instructions carefully, allowing time for the dough to rest. While the dough chills, focus on creating the apple filling. Combine the diced apples, sugar, oil, and spices in a saucepan over low to medium heat. Stir occasionally as the mixture simmers, then allow it to cool at room temperature.
Rolling out the dough is the next step. Use a floured surface and roll the dough into circles, ensuring they reach the desired thickness. Chill the dough circles to maintain their firmness before filling. This preparation phase is crucial for achieving the perfect texture and flavor in your Easy Apple Hand Pies.
Crafting Your Delicious Pies
Technique
The technique for making Easy Apple Hand Pies involves assembling the pies with care. Start by placing the dough circles on a prepared baking tray. Add the apple filling, then cover with another dough circle. Pinch the edges to seal, then use a fork to crimp them. This crimping not only seals the pies but also adds a decorative touch.
The egg wash is a key step in achieving a golden, shiny crust. Brush the tops of the pies with the egg wash, and for an extra touch, sprinkle coarse sugar. This step enhances both the appearance and texture of the pies, ensuring they bake to a beautiful golden brown.
Easy Apple Hand Pies
Tips/tricks
For the best results, ensure the pies are chilled before baking. A quick 10-minute freeze helps maintain their shape during the baking process. Additionally, rotating the baking trays halfway through ensures even baking, resulting in uniformly golden pies.
Experiment with variations by adding a drizzle of homemade salted caramel on top of the baked pies. This adds a delightful contrast of sweet and salty flavors, elevating your Easy Apple Hand Pies to a new level of deliciousness.
Achieving Perfection
Perfecting results
Perfecting your Easy Apple Hand Pies requires attention to detail. Ensure your pie crust is rolled out evenly, and the filling is adequately distributed. This balance ensures each pie is filled with just the right amount of spiced apple goodness.
Monitor the baking time closely. The pies should bake for 28–32 minutes, achieving a golden brown crust without overbaking. Let the pies cool slightly before serving to allow the flavors to meld together, enhancing the overall taste experience.
Troubleshooting/variations
If the pies are not holding their shape, ensure they are chilled adequately before baking. If the filling seems too runny, allow it to simmer for a bit longer to reduce excess moisture. For a creative twist, try adding nuts or raisins to the filling for added texture and flavor.
Explore other delicious recipes like Easy Healing Chicken Soup or Quick and Easy Chicken Potato Soup for more comforting meal ideas.
Serving and Storing Your Creations
Serving/presentation
Serve your Easy Apple Hand Pies warm or at room temperature. Present them on a platter, garnished with a drizzle of salted caramel for an elegant touch. The golden, flaky crust and the inviting aroma make these pies a show-stopping dessert for any gathering.
Pair your pies with a scoop of vanilla ice cream or a dollop of whipped cream for a classic combination. These accompaniments enhance the flavor and add a creamy contrast to the spiced apple filling.

Easy Apple Hand Pies
Pairings/storage
Store leftover pies in the refrigerator for up to five days, ensuring they remain covered to maintain freshness. Reheat them briefly before serving to revive the flavors and texture. These pies also make a delightful addition to a brunch spread or as a sweet ending to a meal.
For more culinary inspiration, check out recipes like Maple Apple Cider Venison Jerky or explore breakfast options like Sous Vide Style Breakfast Egg Bites.
Conclusion
Easy Apple Hand Pies are a delightful treat that combines simplicity with rich flavors. The homemade pie crust and spiced apple filling create a delicious harmony that will impress any dessert lover. With careful preparation and attention to technique, these pies are sure to become a favorite in your kitchen.
The versatility and ease of this recipe make it a go-to option for both novice and experienced bakers. Whether served at a family gathering or enjoyed as a cozy treat, these hand pies bring joy and comfort to any occasion. Let the aroma and taste of these delightful pies transport you to a place of warmth and nostalgia.
