
📑 Table of Contents ▶
Crusty Italian Bread
Creating crusty Italian bread brings back fond memories of bustling kitchens filled with laughter and the comforting aroma of freshly baked goods. The act of kneading dough, watching it rise, and finally pulling a golden loaf from the oven encapsulates the joy and warmth of home cooking.
Every time I bake this crusty Italian bread, I feel a connection to my roots and the traditions that surround bread-making. The satisfying crunch of the crust paired with the soft, airy interior creates an experience that’s simply unforgettable. Each bite reminds me of gatherings with family and friends, where the bread takes center stage at the table.
Getting the texture just right is essential, and that’s why following the proper steps makes all the difference. With wholesome ingredients and a little patience, anyone can create their own version of crusty Italian bread. This process instills a sense of pride and accomplishment, transforming simple ingredients into something magical.
As you embark on this journey of baking, remember to relish each step—from mixing the dough to the moment it graces your table. This recipe for crusty Italian bread invites everyone into the heart of the kitchen, encouraging exploration and creativity through cooking.
Crusty Italian Bread Essentials
Fundamentals
Baking crusty Italian bread is more than just mixing flour, water, and yeast. It’s a balance of science and art that results in a delectable loaf. Understanding the fundamentals of bread-making helps ensure success each time you step into the kitchen.
Active dry yeast plays a crucial role in achieving a perfectly risen dough. It’s the leavening agent that allows the dough to expand and develop flavor. Each ingredient contributes to the final product—every handful of flour, pinch of salt, and splash of olive oil adds to the characteristics of the bread.
These basics also include knowing how to create the ideal environment for your dough. The warmth and humidity of the space affect yeast activity, making it essential to find the right spot for your dough to rise. This knowledge not only boosts your confidence but also elevates the overall quality of your crusty Italian bread.
Preparation/Setup
Preparation sets the stage for successful baking. Gather all your ingredients, ensuring they are fresh and ready to use. Start by measuring 3 1/2 cups of all-purpose flour, 1 1/2 teaspoons of salt, and 1 teaspoon of sugar. Have your active dry yeast ready with 1 packet (2 1/4 teaspoons) set aside.
The next essential item is 1 1/4 cups of warm water. You want it to be around 110°F to activate the yeast effectively. Have 2 tablespoons of olive oil on hand to enrich the dough. Once organized, find a large mixing bowl for the initial combination. This preparation allows for an efficient baking experience without interruptions.
With your workspace clear, the next step is to combine ingredients systematically. This methodical setup fosters a smooth workflow and guarantees that your focus remains on creating a crusty Italian bread that you’ll be proud to share.
Ingredients
To create your crusty Italian bread, assemble the following ingredients:
- 3 1/2 cups all-purpose flour
- 1 1/2 teaspoons salt
- 1 teaspoon sugar
- 1 packet (2 1/4 teaspoons) active dry yeast
- 1 1/4 cups warm water (about 110°F)
- 2 tablespoons olive oil
These simple ingredients work together to form a loaf that is both delicious and satisfying. The simplicity of this recipe highlights the beauty of bread-making. Each ingredient plays a vital role in cultivating flavor and texture; they harmonize to yield a delightful result.
When choosing flour, opt for high-quality all-purpose flour, as this will yield the best texture. Pay attention to the freshness of your yeast, as stale yeast can hinder the rising process. With quality ingredients in hand, you’re one step closer to mastering the art of crusty Italian bread.
Directions
- In a large mixing bowl, combine warm water, sugar, and yeast; let sit for about 5 minutes until frothy.
- Add flour, salt, and olive oil; stir until a rough dough forms.
- Turn dough onto a floured surface; knead for 8-10 minutes until smooth and elastic.
- Place dough in a greased bowl; cover and let rise in a warm place for 1 to 1.5 hours, until doubled.
- Preheat oven to 450°F; place a baking stone or inverted baking sheet in the oven to heat.
- Punch down the risen dough; shape it into a round loaf; place on parchment paper.
- Cover and let rise for another 30 minutes.
- Score the top with a sharp knife; transfer the loaf (on parchment) to the hot stone or sheet; bake for 25-30 minutes until golden brown and sounds hollow when tapped.
- Cool on a wire rack before slicing.
Creating crusty Italian bread involves both patience and practice. As you follow these steps, you’ll cultivate an understanding of how each element comes together to form a perfect loaf.
Enhancing Your Crusty Italian Bread
Technique
Perfecting the technique of bread-making significantly enhances your baking skills. One essential technique is kneading. Proper kneading activates the gluten in the dough, which contributes to the bread’s structure. Take your time with this process, as the goal is a smooth and elastic dough.
Another classic technique to learn is shaping. After the first rise, when shaping the dough, ensure you create tension in the surface. This encourages the dough to rise properly during the second proofing stage. Each fold and tuck contributes to a beautifully rounded loaf.
Temperature control is also vital. The ideal warmth for rising dough accelerates fermentation, resulting in a better texture. Monitor the temperature of your kitchen, as fluctuations may impact your bread.
Tips/Tricks
Here are some tips to refine your crusty Italian bread further:
-
Use a Baking Stone: If you have one, a baking stone captures heat more effectively than a regular baking sheet, leading to a crust that’s crispier.
-
Steam the Oven: Introducing steam at the beginning of the baking process can enhance the crust’s quality. A simple trick is to place a pan of water in the oven while it preheats.
-
Let It Rest: After shaping your loaf, let it rest covered. This short period allows the gluten to relax, making it easier to shape.
-
Quality Ingredients Matter: Opt for high-quality flour and fresh yeast to ensure the best outcome. Small details can make a noticeable difference.
By implementing these tips, you’ll gain confidence in your bread-making abilities and wrap each loaf in a touch of creativity.
Perfecting Your Crusty Italian Bread
Perfecting Results
Achieving the perfect crusty Italian bread lies in fine-tuning various aspects of the process. Each step involves attention to detail, from the temperature of the water to the consistency of the dough after kneading.
Monitoring the rising period is crucial, as a dough that hasn’t doubled in size will not develop the desired air pockets. Keep a close eye on the texture and act on it. Bread-making requires a bit of intuition, so trust your instincts guided by experience.
You can also adjust the baking time based on your oven’s characteristics. Test for doneness by tapping the bottom of the loaf; it should sound hollow. With practice, you will learn what works best for your specific set-up.
Troubleshooting/Variations
When things don’t go according to plan, it’s helpful to have troubleshooting strategies in mind. Should your loaf not rise, ensure your yeast is fresh and activated properly. If it over-rises, it might be too warm or need adjusting.
Texture may vary based on flour types, so feel free to experiment. For whole wheat bread, substitute a portion of the white flour. This adds depth and nuttiness to the flavor. You can also incorporate herbs or spices for unique variations.
Every loaf presents an opportunity to learn. Don’t hesitate to document your observations during each baking session to refine your skills.
Serving and Storing Crusty Italian Bread
Serving/Presentation
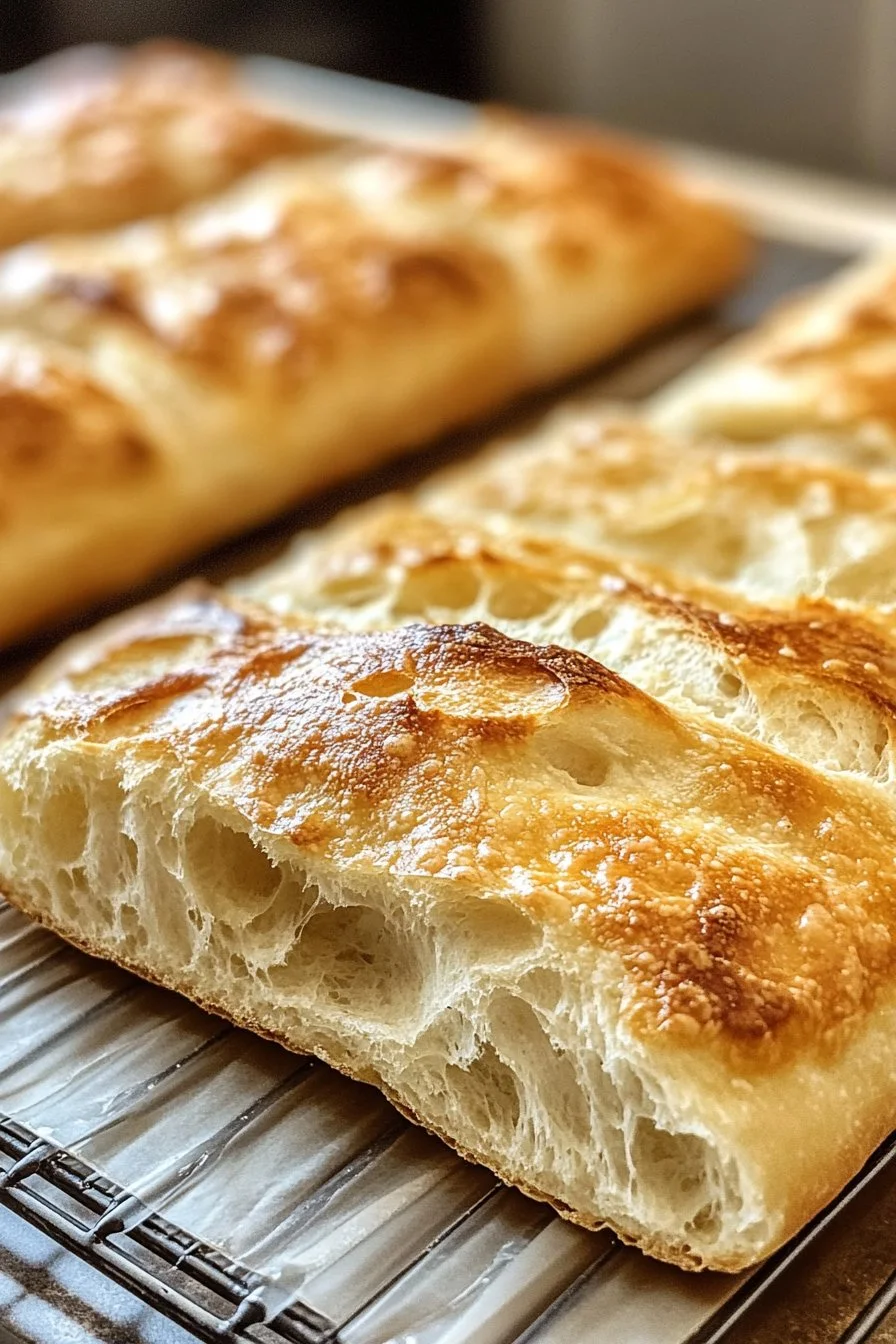
When serving your crusty Italian bread, presentation matters. Slicing into the loaf reveals the beautiful texture and airy holes inside. Arrange the bread on a rustic wooden board for an inviting display.
Pair your crusty bread with a variety of options. Spread fresh butter, pesto, or olive tapenade on individual slices for delightful serving ideas.
Consider making small gatherings more special by combining slices with simple toppings. The beauty of crusty Italian bread is its versatility, complementing virtually any dish.
Pairings/Storage
Crusty Italian bread pairs well with multiple accompaniments. Serve it alongside fresh salads, roasted vegetables, or hearty soups for a satisfying meal. The crusty exterior contrasts beautifully with soft interiors.
For storage, keep your bread wrapped in a clean kitchen towel to maintain its crust. It’s best enjoyed fresh within a couple of days. If you find yourself with leftover bread, consider slicing it, placing it in an airtight bag, and freezing it. This extends its shelf life while preserving its flavor.
With these tips, crusty Italian bread becomes a staple in your kitchen. Your experience will evolve with every batch, fueling your passion for baking.
In the end, crusty Italian bread not only satisfies your hunger; it nourishes the spirit. Each step of the process encourages connection, creativity, and the joy of sharing delicious food.
Print
Crusty Italian Bread
- Prep Time: 15 minutes
- Cook Time: 30 minutes
- Total Time: 45 minutes
- Yield: 1 loaf
- Category: Bread
- Method: Baking
- Cuisine: Italian
- Diet: Vegetarian
Description
A delightful recipe for crusty Italian bread that combines simple ingredients to create a satisfying loaf with a crunchy crust and soft interior.
Ingredients
- 3 1/2 cups all-purpose flour
- 1 1/2 teaspoons salt
- 1 teaspoon sugar
- 1 packet (2 1/4 teaspoons) active dry yeast
- 1 1/4 cups warm water (about 110°F)
- 2 tablespoons olive oil
Instructions
- In a large mixing bowl, combine warm water, sugar, and yeast; let sit for about 5 minutes until frothy.
- Add flour, salt, and olive oil; stir until a rough dough forms.
- Turn dough onto a floured surface; knead for 8-10 minutes until smooth and elastic.
- Place dough in a greased bowl; cover and let rise in a warm place for 1 to 1.5 hours, until doubled.
- Preheat oven to 450°F; place a baking stone or inverted baking sheet in the oven to heat.
- Punch down the risen dough; shape it into a round loaf; place on parchment paper.
- Cover and let rise for another 30 minutes.
- Score the top with a sharp knife; transfer the loaf (on parchment) to the hot stone or sheet; bake for 25-30 minutes until golden brown and sounds hollow when tapped.
- Cool on a wire rack before slicing.
Notes
Use a baking stone for a crispier crust and introduce steam in the oven for enhanced quality.
