📑 Table of Contents ▶
Classic Cannoli Squares That Will Wow Your Taste Buds
Making classic cannoli squares feels like a delightful challenge, but the outcome is always worth it. Growing up, I remember visiting Italian bakeries and being mesmerized by the beautifully crafted cannoli on display. The crispy shells filled with rich, creamy ricotta, dotted with chocolate chips, always drew me in. It was a sensory experience that sparked excitement for every sweet-toothed visitor.
Those memories inspired me to recreate this traditional treat in a more accessible form. While individual cannoli are delightful, cannoli squares allow for easier serving and sharing. This recipe brings that beloved flavor to your home kitchen, packing all the joy of classic cannoli into a simple square dessert.
Picture it: a creamy, decadent filling paired with a crispy crust, topped with a sprinkle of sugar and a pop of color from bright maraschino cherries. These classic cannoli squares will wow your taste buds just as those bakery delights once wowed mine. Dive into this recipe and capture the essence of those cherished moments.
Classic Cannoli Squares
Fundamentals
Classic cannoli squares have become a favorite treat, merging simplicity with the traditional elements of cannoli. The creamy filling features ricotta cheese, which gives the dessert its signature richness. Using whole milk ricotta elevates the texture, providing a delightful creaminess that complements the other ingredients beautifully.
To enhance the flavor, we whip in powdered sugar, which adds just the right amount of sweetness. Opting for pure vanilla extract instead of imitation provides a depth of flavor that truly makes a difference in any dessert. Although cinnamon adds warmth, you can skip it if you want a more traditional cannoli taste.
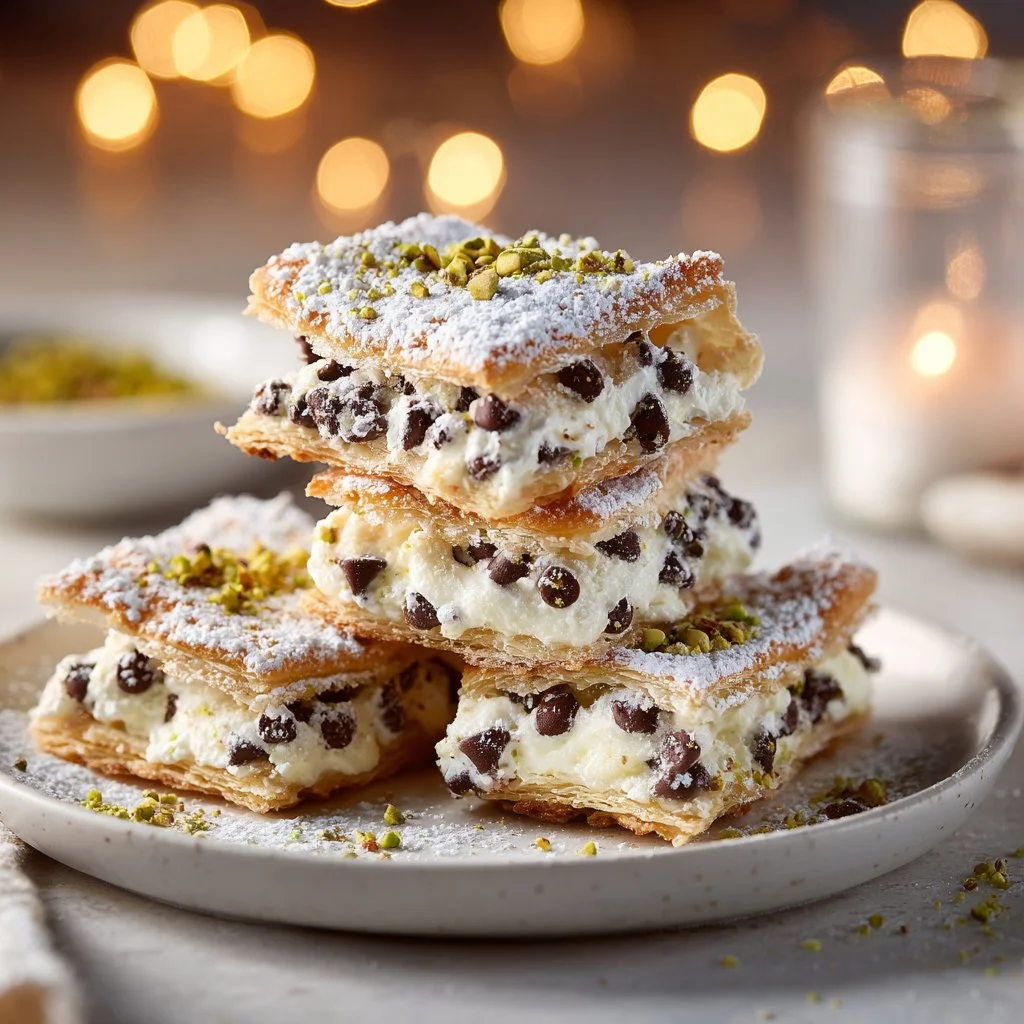
Incorporating mini chocolate chips offers a burst of flavor and texture, enhancing the overall experience. This dessert is a visual feast, especially when you add bright maraschino cherries and vibrant chopped pistachios as toppings. Unlike traditional cannoli, which can be messy, these squares are easier to slice and serve, making them perfect for gatherings and parties.
Preparation/Setup
Setting up for cannoli squares is straightforward and ensures a smooth baking experience. Gather all your ingredients and necessary tools, like a mixing bowl, measuring cups, a spatula, and a baking dish. Preheat your oven to 350°F (175°C) to ensure it’s ready when you finish preparing your creation.
For a lovely golden finish, you need to prepare the pie crusts. While pre-made ones are convenient, making your crust can yield a fresher flavor. If you decide to go the pre-made route, ensure they fit your baking dish perfectly. The crust acts as a sturdy base for the creamy filling, so it needs to be ready to hold everything deliciously together.
Once you have everything prepped, you’ll be amazed at how quickly these cannoli squares come together. Just follow the simple steps, and soon, your kitchen will be filled with sweet aromas that transport you back to that Italian bakery you once adored.
Ingredients
- 2 cups Ricotta Cheese (choose whole milk for a richer texture)
- 1 cup Powdered Sugar (or use coconut sugar for a healthier option)
- 1 teaspoon Vanilla Extract (opt for pure vanilla for the best taste)
- 1/2 teaspoon Cinnamon (omit for a classic flavor)
- 1/2 cup Mini Chocolate Chips (dark chocolate enhances richness)
- 2 Pre-made Pie Crusts (homemade crusts work beautifully too)
- 1 large Egg (for an egg wash that gives a glossy finish)
- Sugar (for sprinkling, adds a sweet crunch)
- 1/4 cup Chopped Pistachios (offers delightful crunch and color)
- 3 pieces Maraschino Cherries (adds a pop of sweetness and decoration)
- 1/4 cup Extra Chocolate Chips (for those who crave chocolate)
Directions
- Preheat the oven to 350°F (175°C).
- In a large mixing bowl, combine the ricotta cheese, powdered sugar, vanilla extract, and cinnamon (if using). Blend everything until the mixture becomes smooth and creamy.
- Gently fold in the mini chocolate chips, allowing them to distribute throughout the filling.
- Place one pie crust in the bottom of a greased baking dish. Pour the smooth ricotta mixture over the first pie crust, spreading it evenly.
- Cover the filling with the second pie crust, pressing down gently to secure it in place. Brush the top generously with the egg wash to achieve a glossy finish.
- Sprinkle a little sugar over the top for an added sweet crunch.
- Bake for approximately 30-35 minutes or until the top turns a lovely golden brown.
- Once cooled, slice into squares, and serve topped with chopped pistachios and maraschino cherries.
- Enjoy the sweet nostalgia and share these treats with loved ones.
Creative Techniques for Cannoli Squares
Technique
When preparing these classic cannoli squares, attention to detail enhances the final product. Start by softening the ricotta cheese, ensuring it blends nicely with the other ingredients. Take your time mixing; a well-mixed filling avoids clumps and promotes a smooth texture.
Using mini chocolate chips can create delightful surprises with every bite. If you’re a chocolate lover, add those extra chocolate chips to intensify the chocolate experience. This customization allows you to cater the sweetness and richness to your personal preference.
Don’t hesitate to experiment with different toppings. Chopped nuts, such as almonds or hazelnuts, can also add texture and flavor, giving a whole new twist to these squares.
Tips/Tricks
To ensure the best flavor, always opt for high-quality ingredients. Pure vanilla extract elevates the creaminess of the filling, making a noticeable difference in flavor. If you go for a healthier option and choose coconut sugar instead of powdered sugar, be prepared for a different taste profile, but it can still be delicious.
Make sure your pie crust is fresh and pliable for the best results. If using pre-made crusts, ensure they thaw adequately to avoid cracking. For homemade crusts, let the dough rest after preparation, which improves its texture.
Have fun with the presentation! A sprinkle of colorful toppings can make your cannoli squares visually striking, appealing to the eyes and the palate.
Perfecting Classic Cannoli Squares
Perfecting Results
Perfecting your cannoli squares is all about balance. The goal is to achieve a soft, creamy filling and a crispy shell. Pay attention to the baking time; overbaking can turn the crust excessively brown and hard.
When you take them out of the oven, let them cool completely. This cooling period helps the flavors meld together and the filling set just right. You’ll find that letting them chill in the refrigerator for a couple of hours enhances the overall experience, especially when served cold.
Customize the toppings based on your personal preference or what’s available. Cinnamon and sugar can be a delightful sprinkle if you want to play with flavors, or go all out with more chocolate chips or nuts.
Troubleshooting/Variations
If your filling feels too runny, consider straining the ricotta cheese before mixing to remove excess moisture. A thicker filling leads to a more satisfying texture in the final product. On the other hand, if your filling seems too stiff, gently fold in a splash of cream or milk to loosen it without compromising the texture.
For varied flavors, consider infusing fruit purees or extracts into your filling. Depending on the season, fresh berries can be a delightful addition, presenting a fresh and fruity flavor that pairs wonderfully with the rich ricotta base.
If you ever find yourself in a pinch, using other types of crusts, such as graham cracker or shortbread, can offer a unique spin on the classic recipe. These variations keep the excitement alive and allow for creativity in your baking.
Serving and Storing Classic Cannoli Squares
Serving / Presentation
Serve your classic cannoli squares on a decorative platter for added flair. The colorful toppings, like cherries and pistachios, create a beautiful contrast against the creamy filling, making the dessert irresistible. Consider adding a dusting of powdered sugar for a sophisticated look, or garnish with chocolate drizzles for extra indulgence.
These squares can be enjoyed anytime: as an after-dinner treat, a dessert for special occasions, or simply when you want to bring a little joy to your day. Slice them into smaller squares for easy serving, or allow guests to help themselves from a larger, decorated dish.
Pairings / Storage
While enjoying your cannoli squares, try pairing them with a cup of espresso or a glass of cold milk for a delightful combination. The rich, creamy filling contrasts beautifully with the bold flavor of coffee, while the milk balances the sweetness.
Store any leftover squares in an airtight container in the refrigerator. They will hold up for up to five days, making them perfect for meal prep or afternoon snacks. Enjoy them cold or let them sit at room temperature for a bit before indulging to bring out that delicious cannoli flavor.
The joy of classic cannoli squares lies in their ability to create memories around the dining table. Share this love for tasty treats and make new traditions with your loved ones.
Print
Classic Cannoli Squares
- Prep Time: 15 minutes
- Cook Time: 30 minutes
- Total Time: 45 minutes
- Yield: 12 servings
- Category: Dessert
- Method: Baking
- Cuisine: Italian
- Diet: Vegetarian
Description
Delightful and easy-to-serve cannoli squares that blend creamy ricotta filling with a crispy crust, perfect for gatherings.
Ingredients
- 2 cups Ricotta Cheese (whole milk for richer texture)
- 1 cup Powdered Sugar (or coconut sugar for a healthier option)
- 1 teaspoon Vanilla Extract (preferably pure)
- 1/2 teaspoon Cinnamon (optional)
- 1/2 cup Mini Chocolate Chips (dark chocolate recommended)
- 2 Pre-made Pie Crusts (homemade works well too)
- 1 large Egg (for egg wash)
- Sugar (for sprinkling)
- 1/4 cup Chopped Pistachios
- 3 pieces Maraschino Cherries
- 1/4 cup Extra Chocolate Chips (optional)
Instructions
- Preheat the oven to 350°F (175°C).
- In a large mixing bowl, combine ricotta cheese, powdered sugar, vanilla extract, and cinnamon (if using) until smooth and creamy.
- Gently fold in the mini chocolate chips.
- Place one pie crust in a greased baking dish and pour the ricotta mixture over it, spreading evenly.
- Cover with the second pie crust, pressing down gently and brushing with egg wash.
- Sprinkle sugar over the top.
- Bake for 30-35 minutes until golden brown.
- Once cooled, slice into squares and serve topped with chopped pistachios and maraschino cherries.
Notes
Let the squares cool completely before slicing for best results. Store leftovers in an airtight container in the refrigerator for up to five days.
