📑 Table of Contents ▶
Cakepops
Cakepops bring a smile to everyone’s face. Their joyful appearance and delightful taste make these treats perfect for any occasion. Whenever I see a cakepop, I recall a vibrant birthday party filled with laughter and sweetness. That day, I crafted a vibrant assortment of cakepops, each decorated with colorful sprinkles and swirls of frosting. Friends and family couldn’t resist these irresistible confections, and the joy they brought was unforgettable.
As I rolled each cakepop, I embraced the creativity involved in decorating them. From bright colors to intricate designs, these little treats transformed our gathering into a festive celebration. Watching everyone indulge in these delightful bites fueled my passion for baking. Cakepops united us, creating lasting memories and igniting sparks of joy in the kitchen.
Creating cakepops offers an opportunity to blend flavors and artistic expression. Whether it’s a simple vanilla cakepop or a luxurious chocolate indulgence, the possibilities feel endless. Each cakepop represents more than just a dessert; it symbolizes togetherness, love, and creativity in the kitchen.
Part 1 — The Magic of Cakepops
Fundamentals
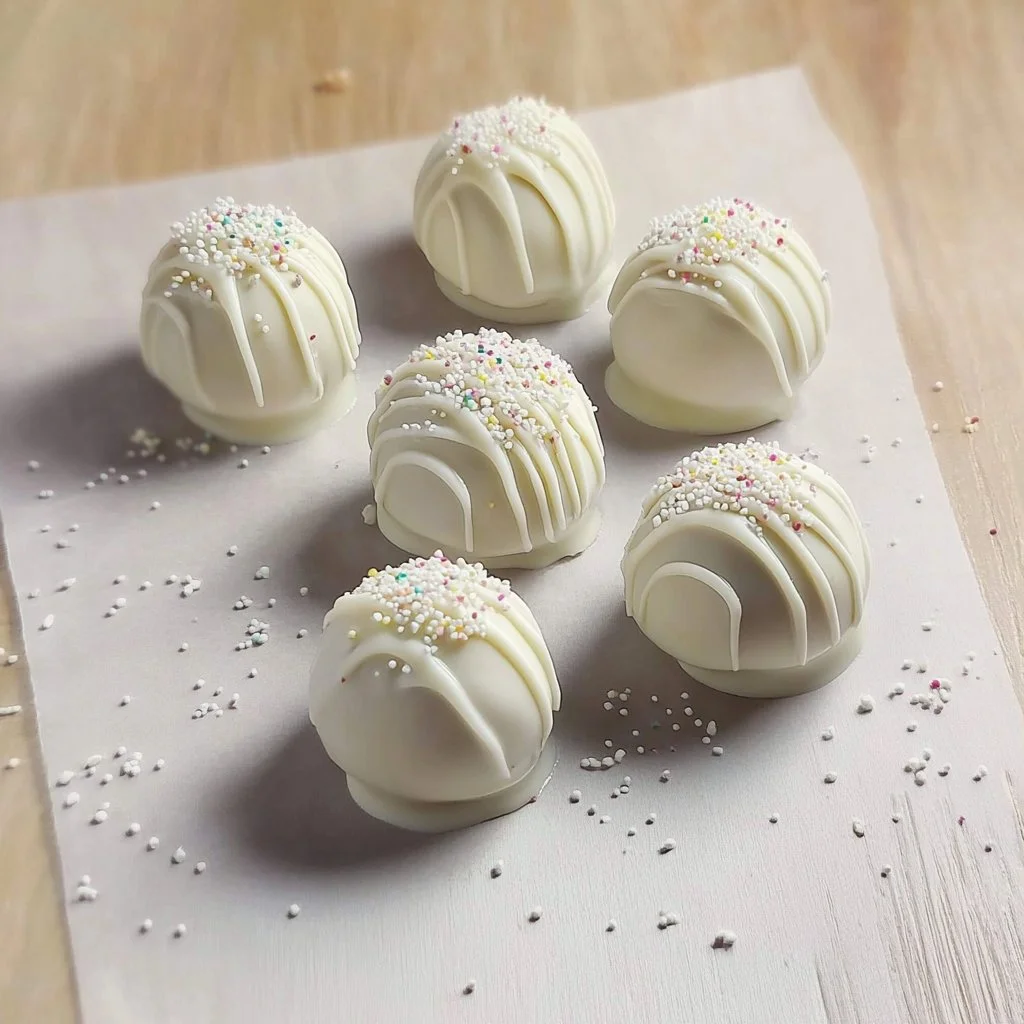
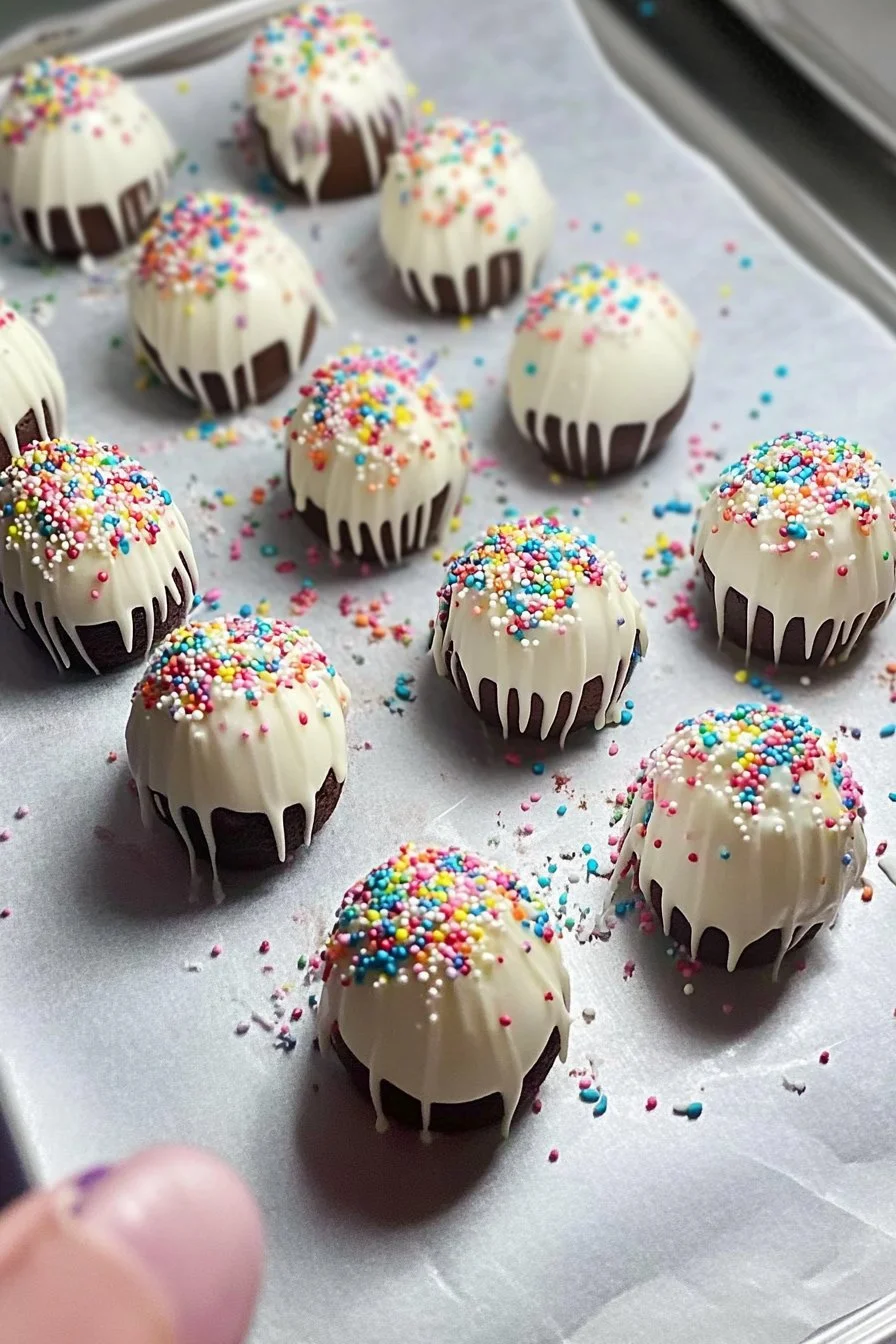
Cakepops provide a delightful twist on traditional cake. They combine rich cake and frosting into bite-sized creations on a stick. These mini confections emerge as perfect party favors or delightful snacks for any gathering. The balance of cake and frosting results in a moist, flavorful treat that captivates taste buds. The excitement of crafting these treats lies in the endless combinations of flavors and decorations, allowing your imagination to soar while creating something delicious.
To master the art of cakepops, understanding the components is crucial. The base consists of cake crumbs, which serve as the foundation for the sweet treat. Some prefer vanilla while others enjoy chocolate or red velvet. Once you have your cake base, mixing it with frosting binds everything together. This mixture forms spheres that you can dip into chocolate or candy melts, transforming them into eye-catching delights.
Preparation/setup
Preparation sets the stage for a successful cakepop experience. Start by gathering all necessary materials and ingredients. The kitchen should feel welcoming and organized to inspire creativity. You need a cake of your choice, frosting, sticks for holding the pops, and chocolate or candy melts for dipping. A cooling rack or baking sheet lined with parchment paper will also help in the process.
Once you decide on your flavor, bake the cake according to the instructions. Ensure it cools completely before proceeding. The cooling step prevents melting the frosting when combining the two. Prepare your frosting while the cake cools, achieving a smooth, easy-to-mix consistency. Once ready, crumble the cooled cake into a large bowl, adding a small amount of frosting—a little goes a long way. Mix until the cake and frosting blend seamlessly.
Ingredients
Here’s a general list of ingredients to create cakepops:
- One cake of your choice (vanilla, chocolate, or red velvet)
- ½ cup of frosting (store-bought or homemade)
- Chocolate or candy melts for dipping
- Sprinkles or other decorative toppings
- Lollipop sticks
Directions
- Prepare the cake according to instructions, and allow it to cool completely.
- Crumble the cooled cake into a large bowl.
- Add frosting gradually, mixing until the texture is damp but not sticky.
- Roll small amounts of the mixture into balls about one inch in diameter. Place them on a parchment-lined baking sheet.
- Melt a small amount of chocolate or candy melts, then dip the end of each lollipop stick into the melted chocolate.
- Insert the stick into the cake balls, allowing them to set.
- Refrigerate the cake pops for at least 30 minutes to firm up.
- Dip each pop into the melted chocolate or candy melts, ensuring they are fully coated. Use a spoon or spatula for even coverage.
- Decorate immediately with sprinkles or toppings before the chocolate hardens.
- Allow the pops to sit upright in a stand or foam block until set.
Part 2 — Creating Cakepop Wonders
Technique
Perfecting cakepops requires a few essential techniques. Rolling the balls consistently helps maintain an appealing size and shape. A uniform size also ensures even coating and drying. When it comes to dipping, a deep enough container of melted chocolate facilitates complete coverage. Gently tap the stick to remove excess chocolate for a smooth finish. Use a spatula to help glide off any drips.
Frequent practice enhances technique and builds confidence. Experiment with various flavors or decorations to discover what you love most. Each batch presents a chance to refine skills and develop signature styles.
Tips/tricks
A few tips simplify the cakepop-making process. First, always ensure the cake cools completely before crumbling, as warm cake can lead to a messy mixture. Second, adhere to the recommended chilling time after forming the balls. This step ensures the pops hold their shape during dipping.
For a unique twist, consider different flavor combinations. Instead of traditional frosting, try adding flavored extracts or colored chocolate. Additionally, use colorful cake pops to match themes or holidays, creating eye-catching treats.
Part 3 — Perfecting Cakepops
Perfecting results
Achieving perfect cakepops lies in mastering the details. Pay attention to the temperature of the melted chocolate; too hot can result in a runny coating, while too cool can lead to difficulty in dipping. Additionally, keep the pops refrigerated until you are ready to decorate, preserving their structure.
Consistent dipping technique further enhances results. Practice maintaining an even coating while avoiding air bubbles, which appear unsightly on finished cakes. Let creativity shine through by trying various shapes and designs for each pop.
Troubleshooting/variations
Even experienced bakers encounter challenges. If cakepops fall off the stick, ensure the mixture is firm enough before dipping. Adjust the ratio of cake to frosting as needed. For pops that feel crumbly, a bit more frosting may help bind them together.
Variations abound within the cakepop realm. Explore different fillings or add flavor extracts to the dough. Consider using flavored chocolate for dipping or drizzling, giving your cakepops a distinct twist.
Part 4 — Presenting Cakepops
Serving/presentation
Presentation transforms cakepops from simple treats into impressive confections. Utilize stands or decorative arrangements to display them at parties or gatherings. Arrange pops in a block of floral foam, inserting sticks into place for stability. A cheerful, colorful backdrop will draw the eye and enhance the festive atmosphere.
Incorporate various heights or designs to make the display visually exciting. Using themed decorations like edible glitter, confetti, or fresh fruit can elevate the appeal of each pop. The careful presentation is sure to delight guests, making each bite memorable.
Pairings/storage
Cakepops pair beautifully with a variety of beverages. They complement coffee, milk, or juices perfectly, offering sweet bites alongside drinks. Stack them on platters or in jars for quick snacking on busy days.
To store cakepops, keep them in a cool, dry place. Properly sealed, they last for several days while maintaining flavor and texture. Refrigeration may be necessary in warmer climates, but avoid prolonged exposure to moisture to retain the integrity of the pops.
Conclusion
Cakepops represent the joy of baking and creating. They encourage fun in the kitchen, spark creativity, and foster connections among family and friends. From the satisfying mixture to the artful presentation, these treats inspire memories worth celebrating. Embrace the adventure of crafting the perfect cakepop, and let each bite carry a piece of joy.
Print
Cakepops
- Prep Time: 15 minutes
- Cook Time: 30 minutes
- Total Time: 45 minutes
- Yield: 24 cakepops
- Category: Dessert
- Method: Cooling, Dipping
- Cuisine: American
- Diet: Vegetarian
Description
Delightful bite-sized creations made from cake crumbs and frosting, perfect for any occasion.
Ingredients
- One cake of your choice (vanilla, chocolate, or red velvet)
- ½ cup of frosting (store-bought or homemade)
- Chocolate or candy melts for dipping
- Sprinkles or other decorative toppings
- Lollipop sticks
Instructions
- Prepare the cake according to instructions, and allow it to cool completely.
- Crumble the cooled cake into a large bowl.
- Add frosting gradually, mixing until the texture is damp but not sticky.
- Roll small amounts of the mixture into balls about one inch in diameter. Place them on a parchment-lined baking sheet.
- Melt a small amount of chocolate or candy melts, then dip the end of each lollipop stick into the melted chocolate.
- Insert the stick into the cake balls, allowing them to set.
- Refrigerate the cake pops for at least 30 minutes to firm up.
- Dip each pop into the melted chocolate or candy melts, ensuring they are fully coated. Use a spoon or spatula for even coverage.
- Decorate immediately with sprinkles or toppings before the chocolate hardens.
- Allow the pops to sit upright in a stand or foam block until set.
Notes
Ensure the cake cools completely before mixing with frosting to prevent a messy mixture.
