➤ Table of Contents
I believe that food is a language of love, and my journey with Bloody Red Velvet Truffles is a testament to that belief. Growing up, my grandmother’s kitchen was a realm of endless possibilities. The aromas of her creations would drift through the house, drawing everyone together. One of her specialties was red velvet cake, a recipe she passed down to me.
The first time I tried making Bloody Red Velvet Truffles, I was nervous. I wanted to honor my grandmother’s memory by creating something both delectable and inviting. The result was a delightful treat that brought joy to everyone who tasted it. These truffles are more than just a dessert; they’re a bridge to my past, a way to keep family traditions alive.
These Bloody Red Velvet Truffles are perfect for sharing with loved ones. Whether it’s a family gathering or a cozy night in, they add a touch of sweetness to any occasion. The process of making them is simple, and the ingredients are easy to find, making it an accessible recipe for any home cook.
In this article, I’ll guide you through the steps to create these delightful truffles, ensuring your success at every stage. From the fundamentals of preparation to the intricacies of technique, you’ll find everything you need to bring these tasty treats to life.
Print
Bloody Red Velvet Truffles
- Prep Time: 60 minutes
- Cook Time: 30 minutes
- Total Time: 60 minutes
- Yield: About 36 truffles
- Category: Dessert
- Method: Baking, Melting, Dipping
- Cuisine: American
Description
Indulge in decadence with our irresistible Bloody Red Velvet Truffles recipe. Learn how to create these rich and velvety treats at home today!
Ingredients
- 1 box red velvet cake mix (and ingredients to make the cake)
- 1 can (450g) prepared cream cheese frosting OR homemade cream cheese frosting
- 1 pound (454g) candy coating, white or dark chocolate
- Optional: Sprinkles or small candies to decorate
Instructions
- Bake the red velvet cake mix following the package instructions for a 9×13-inch cake pan.
- Once the cake is baked, let it cool down completely.
- Break the cake into a large bowl, crumbling it into fine pieces with your hands.
- Optionally, set aside a few spoonfuls of crumbs for garnishing the truffles later.
- Add three-quarters of the frosting to the bowl and mix thoroughly with a rubber spatula.
- The mixture should be moist enough to hold together when pressed into a ball, but not overly wet or oily.
- If the mix seems too dry, incorporate additional frosting to achieve the right consistency.
- Use a small cookie or candy scoop to portion out small amounts of the cake mixture, then roll them into balls with your hands.
- Arrange the cake balls on a foil-lined baking sheet and place them in the fridge to chill while you prepare the candy coating.
- In a microwave-safe bowl, melt the candy coating by microwaving and stirring every 45 seconds to avoid burning.
- Dip each cake ball into the melted candy coating using dipping tools or a fork.
- Slide the bottom of the dipped ball against the bowl’s edge to remove any excess coating.
- Put the coated truffle back onto the foil-lined sheet.
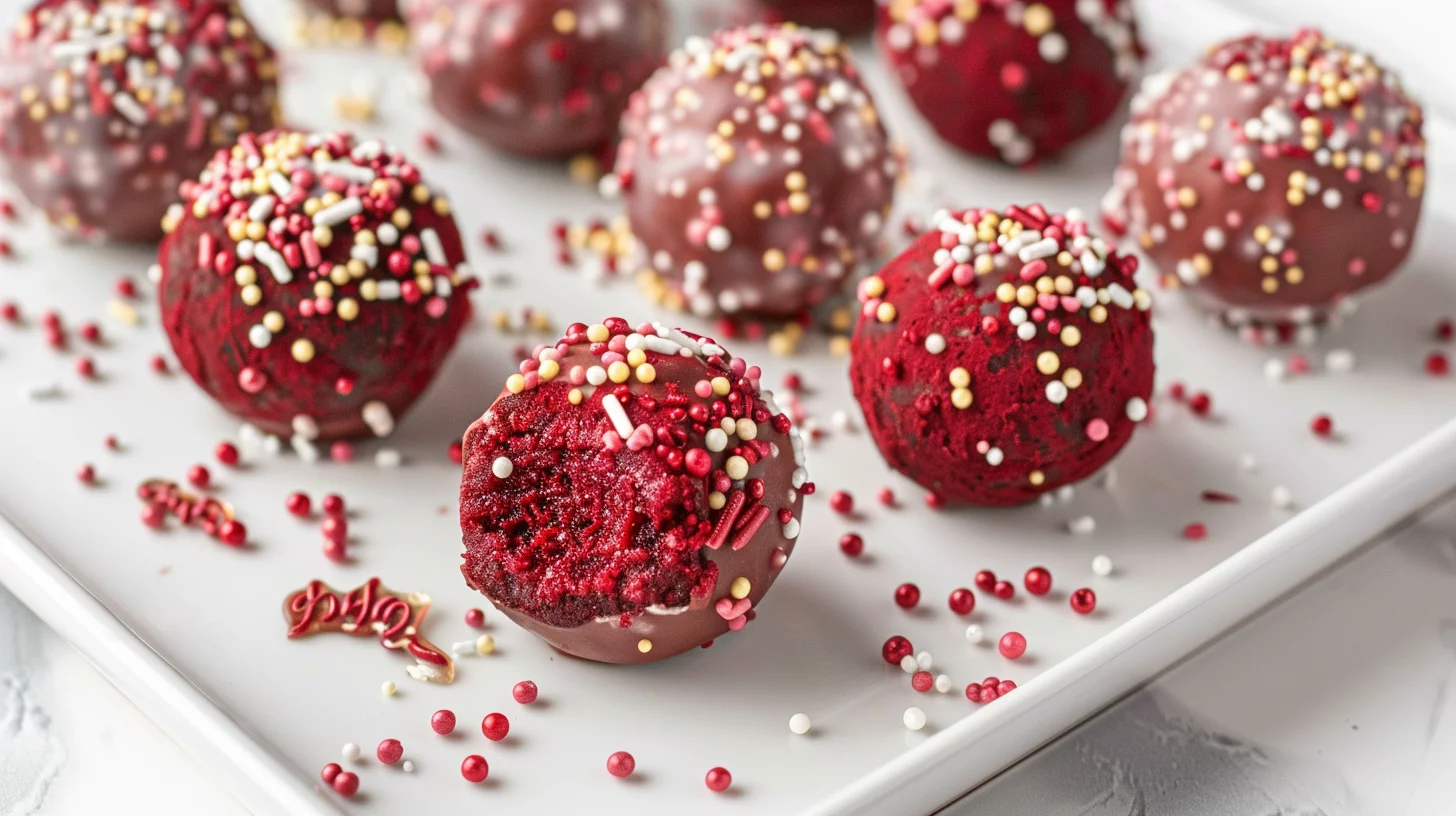
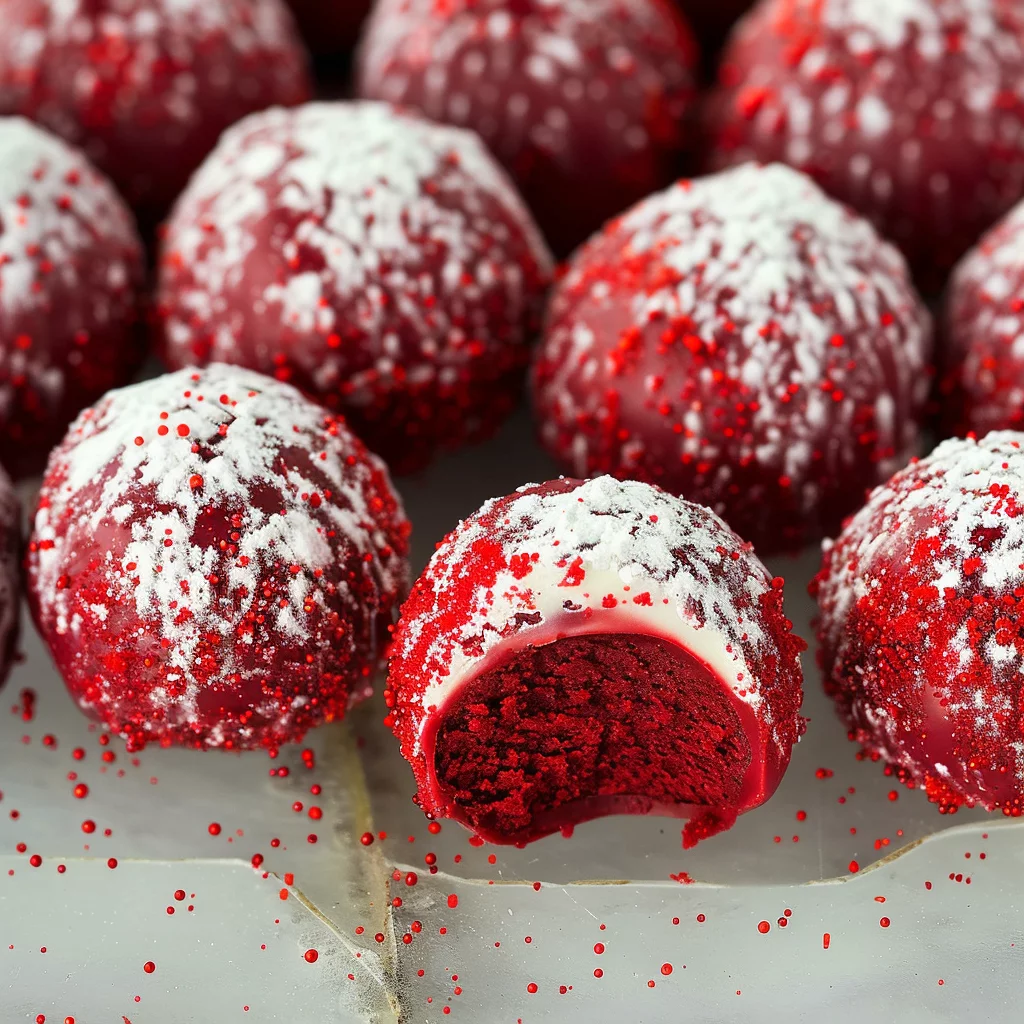
- While the coating is still wet, sprinkle it with cake crumbs, small candies, or decorative toppings if desired. Repeat for all cake balls.
- Chill the truffles in the refrigerator for about 20 minutes to allow the coating to fully set.
- These truffles are best enjoyed at room temperature and can be kept in an airtight container in the fridge for up to one week.
Notes
- Consider using homemade cream cheese frosting for a more decadent flavor.
- Experiment with various candy coatings like white or dark chocolate to personalize the truffles.
- Get creative with decorations using sprinkles, crushed candies, or other toppings for a visually appealing touch.
Creating Bloody Red Velvet Truffles: A Sweet Tradition
Fundamentals
To start your journey with Bloody Red Velvet Truffles, gather your ingredients: a box of red velvet cake mix, a can of cream cheese frosting, and candy coating. These form the foundation of your truffles. The red velvet cake mix will bring the signature color and flavor, while the cream cheese frosting adds richness. The candy coating completes the experience with a satisfying crunch.
Follow the package instructions to bake the red velvet cake in a 9×13-inch pan. This size ensures you have the right amount of cake to work with. Let the cake cool completely before moving on to the next step. Cooling prevents the frosting from melting and keeps the texture of the truffles just right.
Preparation/Setup
Once your cake is cool, crumble it into fine pieces in a large bowl. This process is therapeutic, allowing you to connect with the ingredients. If you’d like, set aside a few spoonfuls for garnishing later. This adds a decorative touch to your truffles, enhancing their visual appeal.
Mix in three-quarters of the cream cheese frosting, combining thoroughly with a spatula. The mixture should be moist enough to form balls but not overly wet. Adjust with more frosting if necessary. This step is crucial to ensure your truffles hold their shape.
Crafting the Perfect Truffle
Technique
Use a small cookie or candy scoop to portion the cake mixture, then roll it into balls with your hands. This uniformity ensures even coating and a consistent appearance. Arrange the balls on a foil-lined baking sheet, preparing them for the candy coating. Refrigerate to firm up the truffles while you work on melting the candy coating.
Bloody Red Velvet Truffles
Melt the candy coating in a microwave-safe bowl, stirring every 45 seconds to avoid burning. This step requires patience and attention, as the coating should be smooth and lump-free. Consider using dipping tools for ease when coating the truffles.
Tips/Tricks
While dipping the truffles, slide the bottom against the bowl’s edge to remove excess coating. This prevents pooling and gives your truffles a clean finish. If you want to add a decorative touch, sprinkle the truffles with reserved cake crumbs or small candies before the coating sets.
For those who enjoy experimenting, consider trying different candy coatings, such as white or dark chocolate, to create a variety of flavors. This flexibility allows you to tailor the truffles to your personal preferences.
Perfecting Your Bloody Red Velvet Truffles
Perfecting Results
After coating the truffles, chill them in the refrigerator for about 20 minutes. This step allows the candy coating to set fully, ensuring a delightful crunch with every bite. Check each truffle for any imperfections and touch up as needed.
If you’re aiming for a polished presentation, consider using decorative toppings. Sprinkles, edible glitter, or small candies can add a festive touch, making these truffles ideal for special occasions.
Troubleshooting/Variations
If your truffles feel too soft or difficult to handle, return them to the fridge for additional chilling. This step firms the mixture and makes it easier to work with. For variations, you can experiment with different types of cake mix or frosting flavors to create unique combinations.
For more inspiration, consider checking out these Red Velvet Tree Cake Recipe and Red Velvet Cinnamon Rolls.
Serving and Storing Your Truffles
Serving/Presentation
To serve your Bloody Red Velvet Truffles, arrange them on a platter or in decorative boxes. Their vibrant red color and smooth coating make them visually striking. These treats are perfect for gifting, parties, or simply enjoying at home.
Consider pairing these truffles with a warm cup of coffee or tea for a delightful indulgence. The combination of flavors will satisfy any sweet tooth and make for a memorable dessert experience.

Bloody Red Velvet Truffles
Pairings/Storage
Store your truffles in an airtight container in the fridge, where they will stay fresh for up to a week. This makes them an excellent make-ahead dessert option. When ready to enjoy, allow the truffles to come to room temperature for the best flavor and texture.
For more dessert ideas, explore our other recipes like Bloody Red Velvet Popcorn and Incredible Apple Bread. These options provide a perfect array of treats for any occasion.
Conclusion
Bloody Red Velvet Truffles are a delightful blend of tradition and taste. Their rich flavor and beautiful presentation make them a standout dessert. Whether you’re honoring family traditions or simply indulging your sweet tooth, these truffles are sure to please. With careful preparation and attention to detail, you’ll create a dessert that is both delicious and memorable.
The simplicity of this recipe makes it accessible to anyone, regardless of their culinary skills. By following these steps, you’ll master the art of making truffles and enjoy the satisfaction of sharing them with loved ones. For more culinary inspiration, check out our other recipes such as Savory Stuffed Chicken with Roasted Red Peppers, Spinach, and Mozzarella or Pan-Seared Salmon with Chunky Olive Sauce. These dishes offer a variety of flavors and experiences to explore.
