📑 Table of Contents ▶
- Apple Pie Bars
- Mastering Apple Pie Bars
- Fundamentals
- Preparation/Setup
- Crafting the Perfect Apple Filling
- Technique
- Tips/Tricks
- Achieving the Perfect Streusel Topping
- Perfecting Results
- Troubleshooting/Variations
- Serving and Storing Your Apple Pie Bars
- Serving/Presentation
- Pairings/Storage
- Conclusion
- FAQs – Apple Pie Bars
My love for apple pie bars began in my grandmother’s cozy kitchen. The aroma of apples and cinnamon filled the air, creating a comforting atmosphere that I cherished. Each bite of those apple pie bars was a taste of nostalgia, reminding me of the warmth and love that surrounded every family gathering.
Growing up, I eagerly anticipated the moments when my grandmother would make her famous apple pie bars. She had a way of transforming simple ingredients into something magical. Her apple pie bars were more than just a dessert; they were a symbol of tradition and the joy of sharing good food with loved ones.
As I grew older, I inherited her passion for baking. I realized that creating delicious apple pie bars was not just about following a recipe—it was about infusing a piece of my heart into every batch. Now, I carry on her legacy by sharing my own take on apple pie bars, bringing a touch of that magic to every occasion.
In this recipe, you’ll learn how to make apple pie bars that are both simple and delightful. We’ll explore the essentials of crafting a delicious crust, a flavorful apple filling, and a delectable streusel topping, all highlighted by the rich taste of caramel sauce.
Print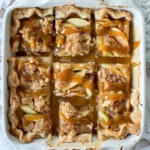
Apple Pie Bars
- Prep Time: 20 minutes
- Cook Time: 50 minutes
- Total Time: 1 hour 10 minutes
- Yield: 16 bars
- Category: Dessert
- Method: Baking
- Cuisine: American
Description
Learn how to make delicious Apple Pie Bars with this easy recipe! Perfect for any occasion, these bars are a crowd-pleaser that will leave everyone wanting more.
Ingredients
- 1/2 cup (8 Tbsp; 113g) unsalted butter, melted
- 1/4 cup (50g) granulated sugar
- 1 teaspoon (5 ml) pure vanilla extract
- 1/4 teaspoon (1 ml) salt
- 1 cup (125g) all-purpose flour (spooned & leveled)
- 2 large apples, peeled and thinly sliced (1/4 inch thick)*
- 2 Tablespoons (30 ml) all-purpose flour
- 2 Tablespoons (30 ml) granulated sugar
- 1 teaspoon (5 ml) ground cinnamon
- 1/8 teaspoon (1 ml) ground nutmeg
- 1/2 cup (43g) old-fashioned whole rolled oats
- 1/3 cup (70g) packed light or dark brown sugar
- 1/4 teaspoon (1 ml) ground cinnamon
- 1/4 cup (31g) all-purpose flour (spooned & leveled)
- 1/4 cup (4 Tbsp; 56g) unsalted butter, cold and cubed
- homemade caramel sauce or store-bought caramel sauce
Instructions
- Heat the oven to 300°F (149°C). Line an 8-inch square baking dish with parchment paper, ensuring there’s enough excess on all sides. Set it aside.
- For the crust, blend the melted butter, granulated sugar, vanilla, and salt in a medium-sized bowl. Incorporate the flour until the mixture is uniform. Spread this mixture evenly in the lined baking dish. Bake for 15 minutes, then take it out of the oven. (While the crust is baking, you can prepare the filling and topping.)
- To make the apple filling, toss the apple slices with flour, granulated sugar, cinnamon, and nutmeg in a large bowl until they are well-coated. Set this mixture aside.
- For the streusel topping, combine oats, brown sugar, cinnamon, and flour in a medium bowl. Work the cold butter into this mixture using a pastry cutter, forks, or your hands until it forms coarse crumbs. Set aside.
- Increase the oven temperature to 350°F (177°C). Arrange the apple mixture evenly over the warm crust. It may seem like too many apples, so pack them tightly and press down to fit. Sprinkle the streusel evenly over the apple layer and bake for 30-35 minutes, or until the topping is golden brown.
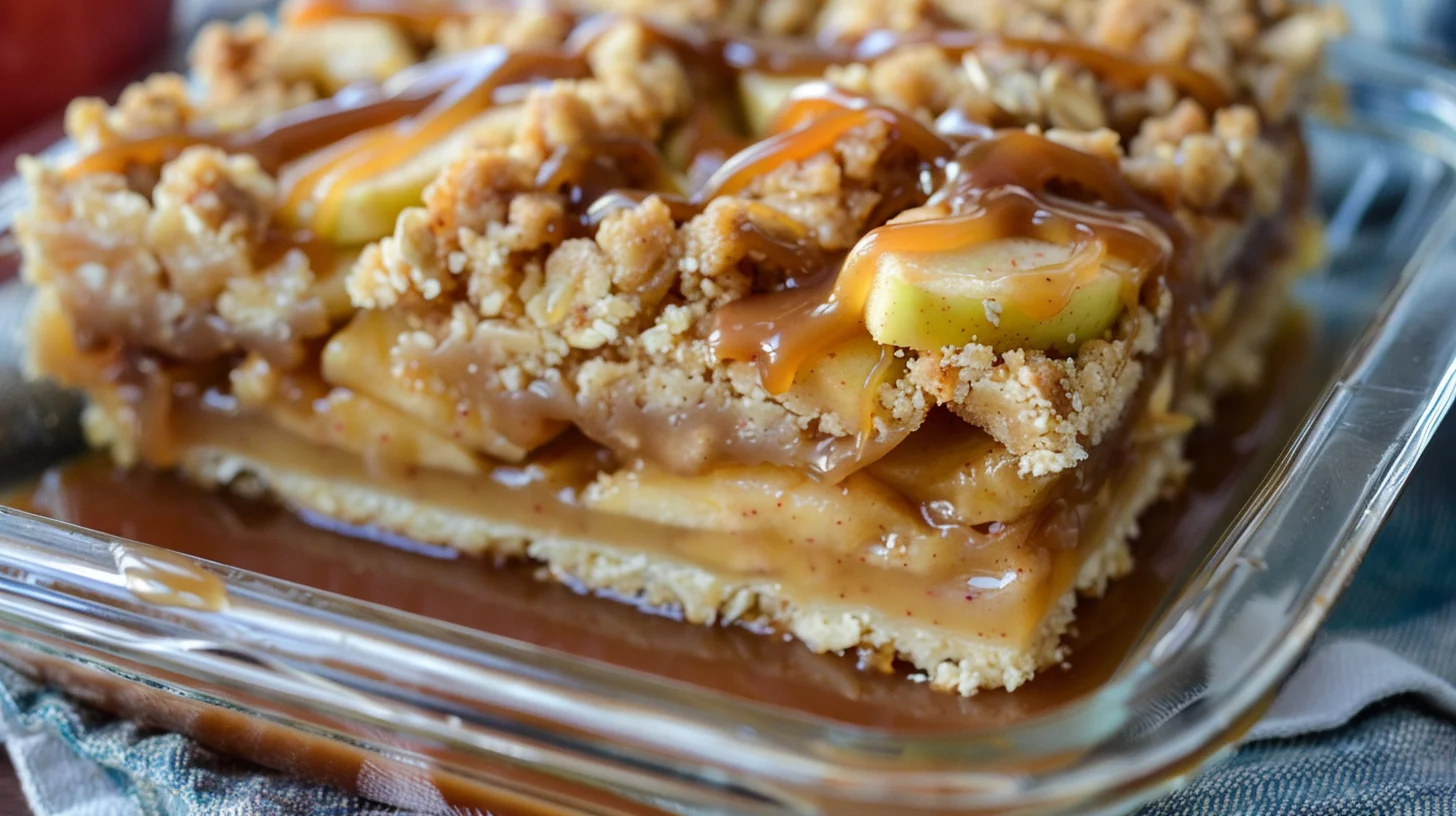
- Take it out of the oven and let it cool for at least 20 minutes at room temperature. Then, refrigerate for a minimum of 2 hours, or overnight. Use the parchment overhang to lift the dessert out of the pan and slice it into bars. I typically cut them into 16 smaller bars, but you can opt for 12 larger ones. Once sliced, drizzle each with caramel sauce. These apple pie bars are delightful whether served warm, at room temperature, or cold.
Notes
- Pack the apple slices tightly on the crust for a compact filling. Press down firmly to fit them all in.
- To achieve a crunchy streusel topping, work the cold butter into the oats, sugar, cinnamon, and flour mixture until it forms coarse crumbs.
- Refrigerate the baked bars for at least 2 hours or overnight to allow the flavors to meld. Serve with a drizzle of caramel sauce for added sweetness.
Mastering Apple Pie Bars
Fundamentals
The foundation of any great apple pie bar lies in its crust. A perfect crust provides the necessary support for the apple filling while offering a satisfying crunch. For this recipe, we create a buttery crust with a blend of melted butter, sugar, vanilla, and flour. The secret to achieving the right texture is to mix these ingredients until they’re well-combined and then bake the crust until it’s just set.
The apple filling is the heart of the apple pie bar. Use fresh, thinly sliced apples coated in a mixture of flour, sugar, cinnamon, and nutmeg. This combination ensures that each apple slice is flavorful and perfectly tender. By layering the apples tightly on the crust, you create a rich and satisfying filling that complements the buttery base.
Preparation/Setup
Before diving into the preparation, ensure you have all ingredients ready and the oven preheated to 300°F (149°C). Line an 8-inch square baking dish with parchment paper, allowing enough overhang to easily lift the bars out after baking. This step is crucial for easy removal and clean slicing.
As you prepare the crust, focus on achieving a uniform mixture. Spread it evenly in the baking dish and bake for 15 minutes. Use this time to prepare the apple filling and streusel topping. The apple filling should have a balanced coating of spices, while the streusel topping needs to be crumbly with a good mix of oats, sugar, and butter.
Crafting the Perfect Apple Filling
Technique
To achieve the perfect apple filling, choose apples that hold their shape well during baking. Granny Smith or Honeycrisp apples are excellent choices. Peel and slice the apples thinly, ensuring uniform thickness for even baking. Toss them with flour, sugar, cinnamon, and nutmeg in a large bowl until well-coated, which helps in flavoring and thickening the filling.
When arranging the apple mixture over the crust, pack them tightly to prevent any gaps. Press down gently to ensure the apples are compact, which leads to a more cohesive bar. The even distribution of the apple filling is key to a balanced flavor in every bite.

Apple Pie Bars
Tips/Tricks
For an extra depth of flavor, consider adding a sprinkle of lemon juice to the apple mixture. This not only enhances the apple’s natural acidity but also prevents browning. Additionally, allow the apple filling to rest for a few minutes after mixing to let the flavors meld together.
To ensure your apple pie bars have a crisp topping, use cold butter in the streusel. The cold butter helps create a crumbly texture that contrasts beautifully with the tender apples. Work the butter into the topping mixture using a pastry cutter or your hands for the best results.
Achieving the Perfect Streusel Topping
Perfecting Results
The streusel topping is what gives apple pie bars their signature crunch. Combining oats, brown sugar, cinnamon, and flour with cold butter creates a rich, crumbly topping that enhances the overall texture. The key is to work the cold butter into the dry ingredients until coarse crumbs form.
After spreading the streusel over the apples, increase the oven temperature to 350°F (177°C). Bake until the topping is golden brown. This step ensures that the topping is crispy and complements the soft apple filling. For an added touch, you can sprinkle a bit of extra cinnamon on top before baking.
Troubleshooting/Variations
If your streusel topping isn’t as crisp as you’d like, try using a higher oven temperature for the final few minutes of baking. This will help achieve that perfect golden brown color. Additionally, you can experiment with different spices in the streusel, such as cardamom or cloves, for a unique twist.
For those looking for a gluten-free option, consider using a gluten-free flour blend in place of the all-purpose flour. This simple substitution allows everyone to enjoy these delicious apple pie bars without compromising on taste or texture.
Serving and Storing Your Apple Pie Bars
Serving/Presentation
Once the apple pie bars have cooled, use the parchment paper overhang to lift them out of the baking dish. Slice them into bars; I usually go for 16 smaller bars, but you can opt for 12 larger ones if preferred. Drizzle each bar with caramel sauce for an indulgent finish that enhances the apple and cinnamon flavors.
These apple pie bars can be served warm, at room temperature, or cold. For an elegant presentation, place them on a decorative tray and sprinkle a dusting of powdered sugar over the top. The contrast of the white sugar against the golden streusel is visually appealing and adds a hint of sweetness.
Pairings/Storage
For a delightful pairing, consider serving these apple pie bars with a scoop of vanilla ice cream or a dollop of whipped cream. The creamy textures complement the crisp topping and tender apple filling beautifully. If you’re looking for more dessert inspiration, check out these pumpkin pie bars or these caramel apple pie cinnamon rolls for a seasonal twist.

Apple Pie Bars
To store your apple pie bars, keep them in an airtight container in the refrigerator for up to five days. They can also be frozen for longer storage. Simply wrap each bar individually in plastic wrap and place them in a freezer-safe container. When ready to enjoy, thaw them in the refrigerator overnight and reheat in the oven for a few minutes for that freshly-baked taste.
Conclusion
Creating apple pie bars that capture the essence of a classic pie while being easy to serve is a delightful culinary experience. By focusing on a buttery crust, a spiced apple filling, and a crunchy streusel topping, you can craft a dessert that is sure to impress. Whether enjoyed at family gatherings or as a personal treat, these apple pie bars bring a touch of nostalgia and warmth to any occasion.
The versatility of apple pie bars allows for endless customization, from experimenting with different spices to trying out gluten-free alternatives. With simple preparation and a rewarding outcome, these bars are a testament to how a few quality ingredients can come together to create something truly special. Embrace the joy of baking and share these delightful bars with those you love.
For more scrumptious recipes, explore these berry crumble bars, an easy chicken pot pie recipe, or a crustless chicken pot pie for a comforting meal. Discover the joy of cooking with Yumoti and transform your kitchen into a place of inspiration and flavor.
