📑 Table of Contents ▶
- Creating the Ultimate Cheesy Ground Beef Melt
- Fundamentals
- Preparation/setup
- Directions
- Mastering Cheesy Ground Beef Melts
- Technique
- Tips/tricks
- Perfecting Cheesy Ground Beef Melts
- Perfecting results
- Troubleshooting/variations
- Serving and Storing Your Cheesy Ground Beef Melts
- Serving/presentation
- Pairings/storage
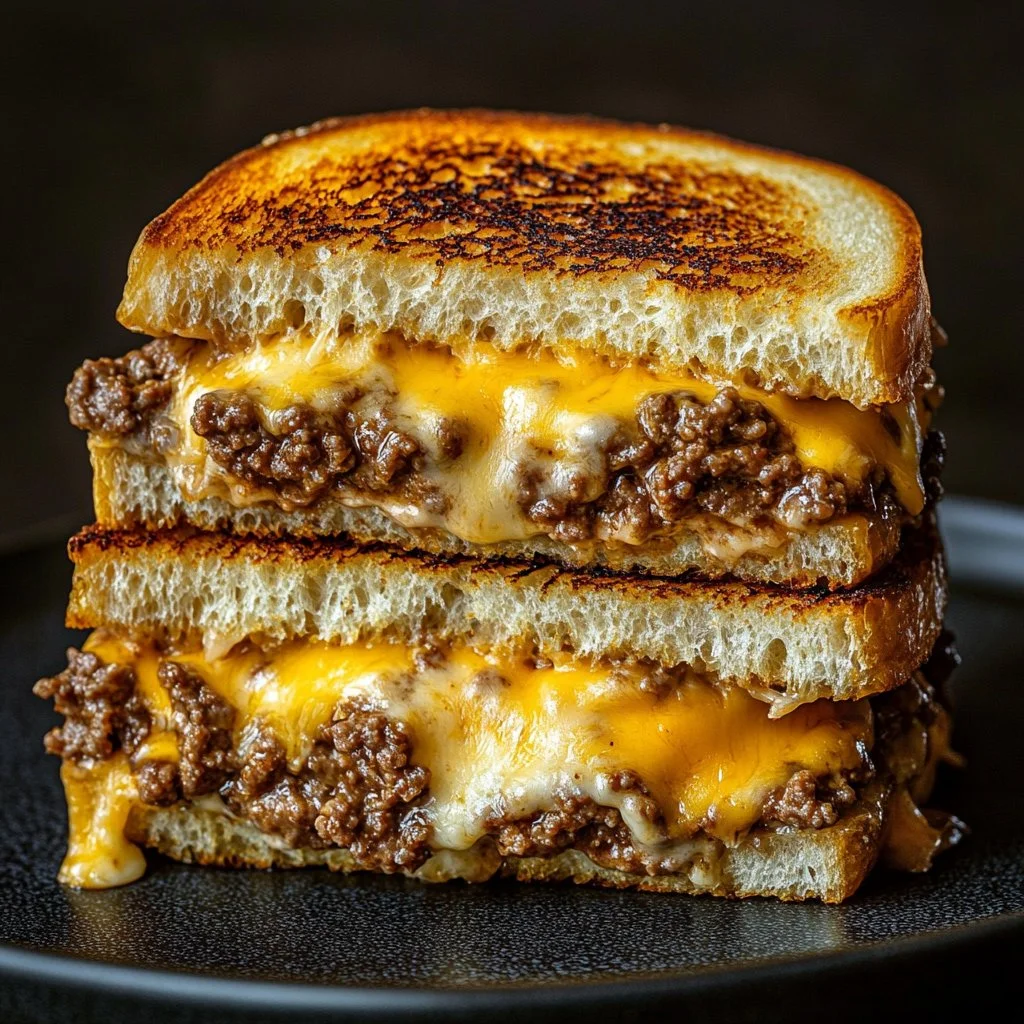
Ultimate Cheesy Ground Beef Melt
Creating something delicious that brings everyone together is truly special. One of my fondest memories involves a hearty meal that not only satisfied hunger but also brought smiles to the table. The recipe for the Ultimate Cheesy Ground Beef Melt takes center stage on those busy evenings when a comforting dish is just what is needed.
The warmth and richness of melted cheese combined with seasoned ground beef evoke feelings of home and comfort. This delightful melt transforms simple ingredients into a dish that pleases the entire family. The beauty lies in how easy it is to whip up, making it a great choice for both novice and seasoned cooks alike.
Cooking the ultimate cheesy ground beef melt is more than just a recipe; it’s a chance to connect. Each layer of flavor adds depth, from the savory beef and onions to the ooey-gooey cheese that draws everyone in. This is a meal that turns ordinary moments into cherished memories around the dinner table. It stands as a food-loving testament to how cooking can be both a joy and an expression of love.
Creating the Ultimate Cheesy Ground Beef Melt
Fundamentals
The Ultimate Cheesy Ground Beef Melt relies on a few key fundamentals that make it not just delicious, but easy to execute. First and foremost, selecting good quality ground beef is crucial. It forms the base of the dish, so ensure it’s fresh and flavorful. The combination of ground beef with aromatic onion and garlic sets the stage for mouthwatering deliciousness.
Seasoning plays a pivotal role in this recipe. Salt and pepper enhance the beef’s natural flavor, while Worcestershire sauce adds a delightful depth. On top of that, beef broth provides moisture and richness, preventing the mixture from becoming dry during cooking.
Cheddar and mozzarella cheeses bring that irresistible gooeyness. Each cheese contributes its unique flavor profile, ensuring that every bite melts in the mouth. Choosing a robust sourdough or white bread guarantees that the sandwiches hold up well against the hearty fillings, allowing for an easy grilling experience.
Preparation/setup
Preparation begins by gathering all necessary ingredients: 1 lb of ground beef, a finely chopped small onion, two cloves of minced garlic, salt and pepper to taste, 1 teaspoon of Worcestershire sauce, 1/2 cup of beef broth, and 1 cup each of shredded cheddar and mozzarella cheese. Additionally, grab 4 slices of sourdough or white bread and 2 tablespoons of softened unsalted butter for grilling.
Set your workspace to ensure everything flows smoothly. Preheat your skillet or griddle over medium heat as you get the remaining ingredients ready. This will allow for even cooking and a perfectly golden crust on the sandwiches.
Ingredients
- 1 lb ground beef
- 1 small onion, finely chopped
- 2 cloves garlic, minced
- Salt and pepper to taste
- 1 tsp Worcestershire sauce
- 1/2 cup beef broth
- 1 cup shredded cheddar cheese
- 1 cup shredded mozzarella cheese
- 4 slices sourdough or white bread
- 2 tbsp unsalted butter, softened
- Fresh parsley, chopped (optional)
Directions
- In a skillet over medium-high heat, cook the ground beef.
- Add the chopped onion and minced garlic, sautéing until the onion turns translucent.
- Season with salt and pepper to taste.
- Stir in Worcestershire sauce and beef broth, allowing the mixture to simmer until the liquid reduces.
- While this simmers, butter one side of each slice of bread.
- Once the mixture is ready, place two slices of bread butter side down on the skillet or griddle.
- Layer the cheddar cheese, followed by the beef mixture, and then add mozzarella.
- Top with the remaining slices of bread, ensuring the butter side is facing up.
- Grill each side for 3–4 minutes, or until golden brown and the cheese melts. Flip carefully to preserve the layers.
- Slice the sandwiches in half and serve warm, garnished with fresh parsley if desired.
Mastering Cheesy Ground Beef Melts
Technique
Mastering the technique behind the Ultimate Cheesy Ground Beef Melt involves not just following the recipe, but understanding the process. Utilize medium-high heat while cooking the beef to achieve a great sear without overcooking.
The layering of the ingredients plays an essential role too. Make sure the cheese layers act as binding agents, holding the beef mixture together and preventing the filling from spilling out when you slice the sandwich. Maximizing cheese exposure ensures a delightful melt in every bite.
Experimenting with your grilling technique can also yield delicious results. If you find that the bread is browning too quickly while the cheese hasn’t melted, reduce the heat. A lower temperature for a longer time allows for even melting and a well-cooked filling.
Tips/tricks
A few handy tips can elevate the experience of making this cheesy delight. First, always allow the beef mixture to simmer until the broth reduces significantly. This concentration intensifies the flavor and ensures that the filling doesn’t make the bread soggy.
Consider using a lid while grilling. This traps heat and moisture, melting the cheese evenly and helping the bread to toast to a perfect golden brown.
If you have time, prepare the beef mixture ahead and store it. This allows for quick assembly and grilling later. The flavors deepen with time, making it even tastier when reheated. Adding fresh herbs like oregano or thyme can introduce new flavor notes as well.
Perfecting Cheesy Ground Beef Melts
Perfecting results
Perfecting the Ultimate Cheesy Ground Beef Melt’s outcome lies in attention to detail. Ensure the skillet or griddle gets hot before grilling; a low-temperature surface can lead to uneven cooking.
Using a spatula, apply gentle pressure on the top slice of bread while grilling. This promotes better contact between the ingredients and ensures everything melds beautifully.
Be patient when cooking the beef. Rushing this stage can lead to a greasy filling. Additionally, letting the sandwiches rest for a minute after flipping them allows for a crisp exterior while keeping the inside warm.
Troubleshooting/variations
Should your melts not turn out as you hoped, a few adjustments can help. If the cheese isn’t melting adequately, check your heat level. Too low won’t produce the bubbly effect, while too high risks burning the bread.
For variations, try using different bread types like ciabatta or even a gluten-free option. Customize the blend of cheeses to explore different flavors. For a tangy twist, incorporate some pepper jack or gouda to mix things up.
If you prefer a veggie boost, add sautéed bell peppers or mushrooms alongside the beef mixture. This not only enhances texture but also adds a nutritional punch to the dish.
Serving and Storing Your Cheesy Ground Beef Melts
Serving/presentation
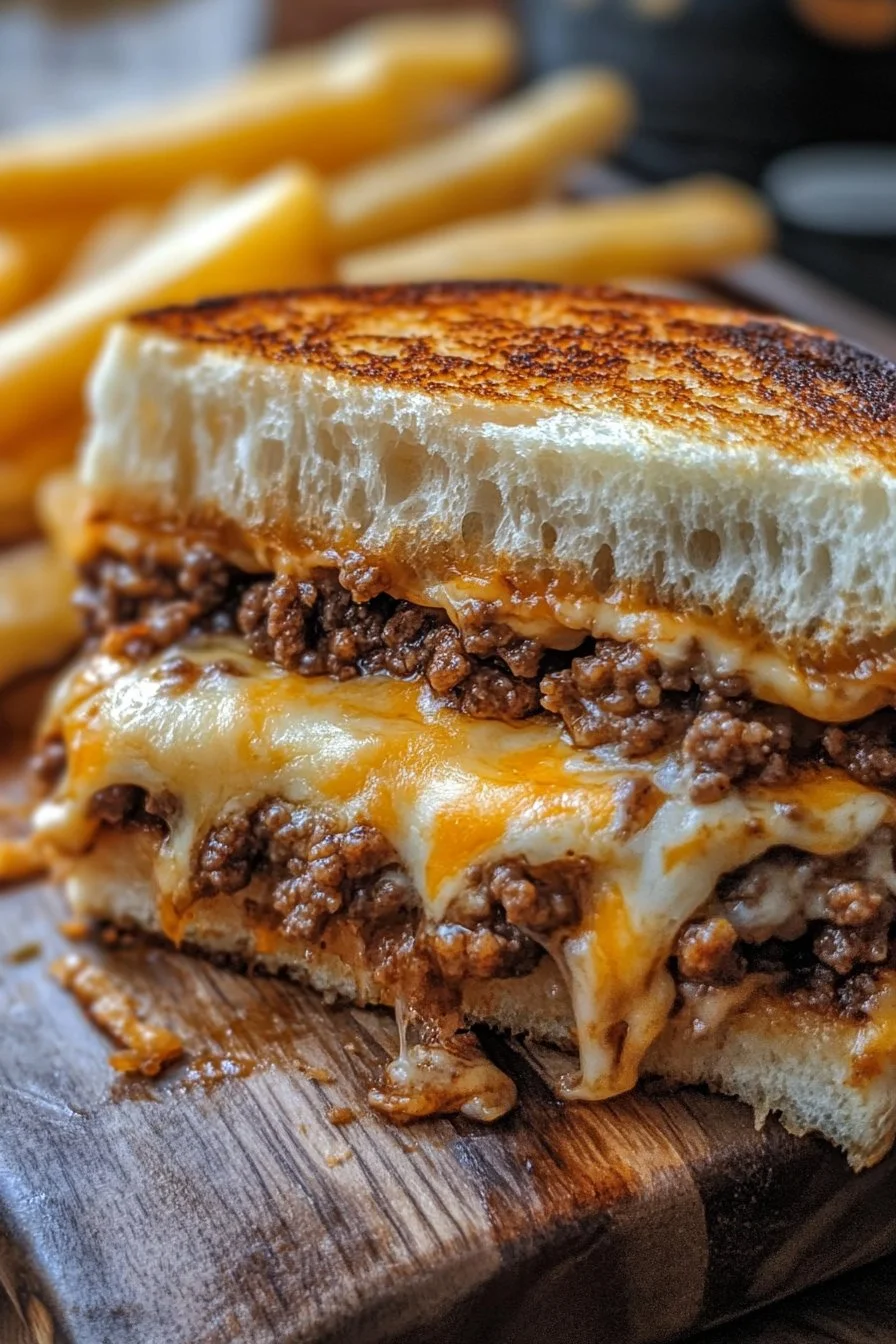
Presenting the Ultimate Cheesy Ground Beef Melt can elevate the meal experience. Slice the sandwiches diagonally to create inviting shapes that showcase the beautiful, melted interiors. Arrange them on a platter, ideally with a sprinkle of fresh parsley for an appealing touch.
Consider serving with a side of homemade fries or a simple salad. These pairings make the meal complete and add a fresh touch to the hearty melt.
Pairings/storage
Pair your cheesy ground beef melts with complementary side dishes. A zesty coleslaw adds crunch, while a light garden salad reinforces the comforting nature of the meal. Dipping sauces like a spicy ketchup or a creamy garlic aioli can enhance the flavor experience even further.
When it comes to storing leftovers, wrap them tightly in foil or plastic wrap. Refrigerate for up to three days. To reheat, use an oven or skillet for the best results, ensuring the bread maintains its delightful crispness.
Creating the Ultimate Cheesy Ground Beef Melt not only showcases the warmth of home cooking but also brings a sense of togetherness. Each bite embodies comfort, making it a cherished recipe for cozy family nights. Enjoy the melt, knowing it transforms simple ingredients into something truly special.
Print
Ultimate Cheesy Ground Beef Melt
- Prep Time: 15 minutes
- Cook Time: 20 minutes
- Total Time: 35 minutes
- Yield: 2 servings
- Category: Main Course
- Method: Grilling
- Cuisine: American
- Diet: None
Description
A comforting and delicious sandwich featuring seasoned ground beef and gooey melted cheese, perfect for family gatherings.
Ingredients
- 1 lb ground beef
- 1 small onion, finely chopped
- 2 cloves garlic, minced
- Salt and pepper to taste
- 1 tsp Worcestershire sauce
- 1/2 cup beef broth
- 1 cup shredded cheddar cheese
- 1 cup shredded mozzarella cheese
- 4 slices sourdough or white bread
- 2 tbsp unsalted butter, softened
- Fresh parsley, chopped (optional)
Instructions
- In a skillet over medium-high heat, cook the ground beef.
- Add the chopped onion and minced garlic, sautéing until the onion turns translucent.
- Season with salt and pepper to taste.
- Stir in Worcestershire sauce and beef broth, allowing the mixture to simmer until the liquid reduces.
- While this simmers, butter one side of each slice of bread.
- Once the mixture is ready, place two slices of bread butter side down on the skillet or griddle.
- Layer the cheddar cheese, followed by the beef mixture, and then add mozzarella.
- Top with the remaining slices of bread, ensuring the butter side is facing up.
- Grill each side for 3–4 minutes, or until golden brown and the cheese melts. Flip carefully to preserve the layers.
- Slice the sandwiches in half and serve warm, garnished with fresh parsley if desired.
Notes
For added flavor, experiment with different cheeses or add sautéed vegetables to the beef mixture.
