Description
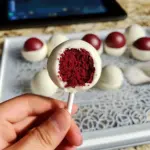
Delightful red velvet cake pops that combine the classic allure of red velvet cake into a fun, bite-sized treat, perfect for gatherings or a personal indulgence.
Ingredients
- 1 ½ cups all-purpose flour
- 1 cup granulated sugar
- ½ cup unsweetened cocoa powder
- 1 teaspoon baking soda
- 1 teaspoon salt
- 1 cup vegetable oil
- 1 cup buttermilk
- 2 large eggs
- 2 tablespoons red food coloring
- 1 teaspoon vanilla extract
- 1 cup cream cheese frosting
- 12 ounces chocolate melts
Instructions
- Preheat the oven to 350°F (175°C). Grease and flour a 9×13 inch baking pan.
- In a mixing bowl, blend together flour, sugar, cocoa powder, baking soda, and salt until combined.
- Pour in the oil, buttermilk, eggs, food coloring, and vanilla extract. Mix until the batter appears smooth.
- Pour the batter into the prepared pan and bake for 30-35 minutes or until a toothpick comes out clean from the center.
- Allow the cake to cool completely before crumbling it into a large bowl.
- Mix in the cream cheese frosting until the mixture holds together.
- Scoop out the mixture and roll it into balls, then place them on a tray.
- Freeze the balls for about 30 minutes to help them firm up.
- Meanwhile, melt the chocolate melts in a microwave-safe bowl, stirring every 30 seconds until smooth.
- Dip the tip of each lollipop stick into melted chocolate, insert it into a cake ball, and let it set for a few minutes.
- Once set, dip the cake pops into the chocolate until fully coated, then place them back on the tray.
- Allow them to set completely before serving.
Notes
Use gel food coloring for a vibrant hue and consider experimenting with different types of chocolate for new flavors.
