
📑 Table of Contents ▶
Ice Cream Cone Cake Pops
Creating delightful desserts fuses joy and creativity. One of the sweetest ways to indulge that creativity is through ice cream cone cake pops. The process brings back memories of childhood—those carefree days filled with sticky fingers and big smiles. Whenever I infused simple ingredients like donut holes and candy melts, I felt the thrill of crafting something delightful.
Ice cream cone cake pops embody that childlike wonder. They’re not just visually appealing; they possess the ability to make anyone feel nostalgic. Each bite takes you on a sweet journey, where the flavors and textures come together harmoniously. Engaging with this recipe allows you to explore your creativity in the kitchen while enjoying a treat that excites your tastebuds.
These adorable desserts stand out in any gathering. Whether at a birthday party, family picnic, or simply marking a special occasion, ice cream cone cake pops bring people together. Diving into this delightful endeavor will surely transform an ordinary moment into a cherished memory.
Ice Cream Cone Cake Pops
Fundamentals
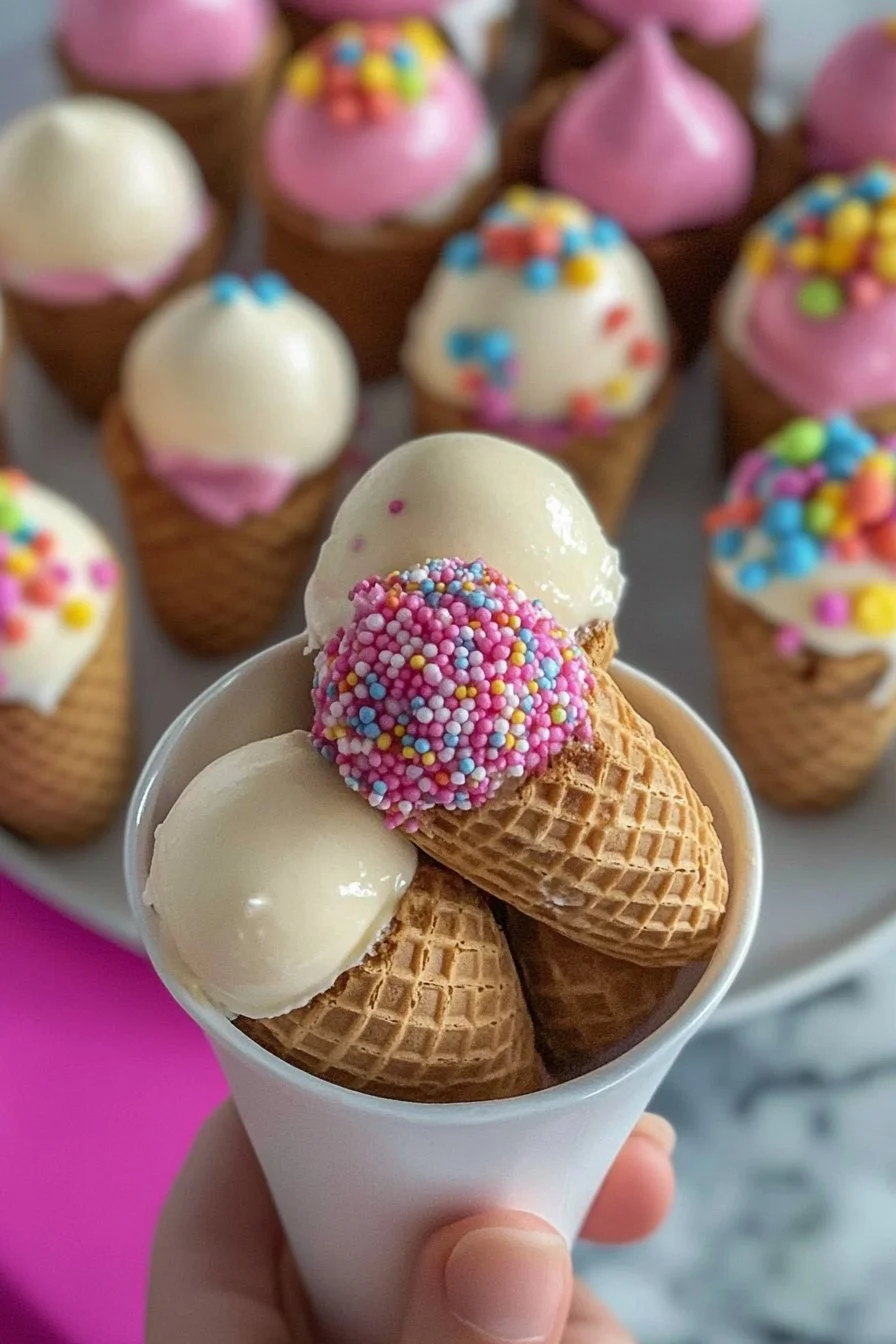
Understanding the fundamentals of making ice cream cone cake pops is essential for creating delightful treats. This dessert combines donut holes, colorful candy melts, and a whimsical presentation using ice cream cone molds. Each element contributes to texture and flavor, crafting a visually appealing and delicious treat.
The base, made from donut holes, provides a sweet and soft center. They are easy to work with and give the pops a satisfying bite. The candy melts, available in various colors, allow for creativity in presentation. Each coat adds not only flavor but also a striking visual appeal.
Preparation/setup
Preparation is key to mastering ice cream cone cake pops. Start by gathering all necessary ingredients—donut holes, candy melts in your favorite colors, ice cream cone molds, sprinkles, lollipop sticks, and white chocolate for drizzling. Ensuring everything is at hand makes the process smoother.
Melt the candy melts in separate bowls according to color. This step guarantees that you can dip the cake pops in vibrant candy that will impress any guest. Prepare your workspace by setting up the ice cream cone molds, allowing easy assembly as you work through the steps.
Ingredients
- Donut holes
- Candy melts (various colors)
- Ice cream cone molds
- Sprinkles
- Lollipop sticks
- White chocolate (for drizzling)
Directions
- Melt the candy melts in separate bowls for different colors.
- Dip the tips of the lollipop sticks into the melted candy and insert them into the donut holes.
- Let them set until firm.
- Dip each donut hole in the melted candy to coat completely, then place in ice cream cone molds.
- Add sprinkles while the candy is still wet.
- Once set, drizzle with melted white chocolate and allow to harden.
- Serve and enjoy your adorable ice cream cone cake pops!
Unique Techniques for Ice Cream Cone Cake Pops
Technique
Several techniques enhance the creation of ice cream cone cake pops. Properly melting the candy melts is important. Use a microwave or double boiler but ensure to stir frequently to avoid overheating. This ensures a smooth consistency for dipping.
Additionally, layering colors can create stunning visual effects. After dipping the donut hole once, let it set slightly, and then dip again into a different color to achieve a marbled look. Experimenting with different techniques brings a personal touch to your cake pops.
Tips/tricks
Use high-quality candy melts to achieve the best texture and flavor. They can make a difference in the overall taste and the ease of coating. Keeping the lollipop sticks chilled before use can help prevent unwanted melting and ensure a firmer hold when inserted into the donut holes.
If the melted candy is too thick, adding a teaspoon of vegetable oil can help achieve a smoother mixing consistency, making dipping easier. Finally, patience is crucial—allow each layer to set completely before moving on to the next step for a flawless finish.
Perfecting Your Ice Cream Cone Cake Pops
Perfecting results
Perfecting ice cream cone cake pops comes with practice and attention to detail. Baking or preparing fresh donut holes ensures they’ll hold their shape and flavor. If you’re using store-bought, allow them to rest at room temperature to avoid altering the candy coating.
Moreover, decorative touches matter. Whether adding sprinkles, edible glitter, or edible paint, these small details can elevate your pops into a gourmet treat. Take the time to experiment with presentation elements that suit your style.
Troubleshooting/variations
Sometimes, things don’t go as planned, and that’s okay. If the coating doesn’t stick, check the consistency of the melted candy. If it’s too hot, let it cool slightly before dipping. Practicing the dipping technique can also help. Try not to dip the donut hole too quickly—allow it to settle first.
If you wish to switch up flavors, consider adding flavored extracts to the donut holes before assembling. Variations can include chocolate, vanilla, or even powdered flavoring for a unique twist. The goal is to keep your pops exciting and tailored to your preferences.
Serving and Presenting Ice Cream Cone Cake Pops
Serving/presentation
Presenting ice cream cone cake pops creates a delightful visual display. Use colorful ice cream cone molds to enhance the overall appeal. Align them neatly on a serving tray or platter, making sure to display various colors and sprinkles. Wrapping them in cellophane bags can also add to the presentation, making them perfect for gifting.
Consider setting up a decoration station if serving at a party. Provide extra sprinkles, edible glitter, and toppings for guests to personalize their cake pops. This interactive element can make the experience even more fun.
Pairings/storage
Ice cream cone cake pops pair wonderfully with beverages like milk or flavored lemonades. They also complement other sweet treats at dessert tables. When storing, keep them in airtight containers at room temperature to maintain their freshness.
If you need to keep them for a longer duration, consider freezing them. Ensure the cake pops are completely set and wrapped individually. This method preserves texture and flavor, allowing you to enjoy a sweet treat for days.
Conclusion
Ice cream cone cake pops deliver sweetness and creativity in every delightful bite. Each stage, from preparation to presentation, sparks joy in crafting these colorful desserts. With simple ingredients and engaging methods, you can unleash your creativity while indulging in a nostalgic treat. Embrace the magic of baking and create delightful memories with every batch you produce.
Print
Ice Cream Cone Cake Pops
- Prep Time: 15 minutes
- Cook Time: 30 minutes
- Total Time: 45 minutes
- Yield: 12 servings
- Category: Dessert
- Method: No-bake
- Cuisine: American
- Diet: Vegetarian
Description
Delightful ice cream cone cake pops made with donut holes and candy melts, bringing joy and nostalgia with every bite.
Ingredients
- Donut holes
- Candy melts (various colors)
- Ice cream cone molds
- Sprinkles
- Lollipop sticks
- White chocolate (for drizzling)
Instructions
- Melt the candy melts in separate bowls for different colors.
- Dip the tips of the lollipop sticks into the melted candy and insert them into the donut holes.
- Let them set until firm.
- Dip each donut hole in the melted candy to coat completely, then place in ice cream cone molds.
- Add sprinkles while the candy is still wet.
- Once set, drizzle with melted white chocolate and allow to harden.
- Serve and enjoy your adorable ice cream cone cake pops!
Notes
Use high-quality candy melts for the best flavor and texture. Consider adding flavored extracts for variety.
