📑 Table of Contents ▶
Easy Homemade Pop Tarts with Pie Crust
Crafting the perfect pop tart evokes memories of childhood days, where sweet treats felt like a special treat. The aroma of baked pastries wafting through the air transports you back to simpler times. It’s the kind of nostalgia that makes you want to recreate those comfy, delicious joys in your own kitchen.
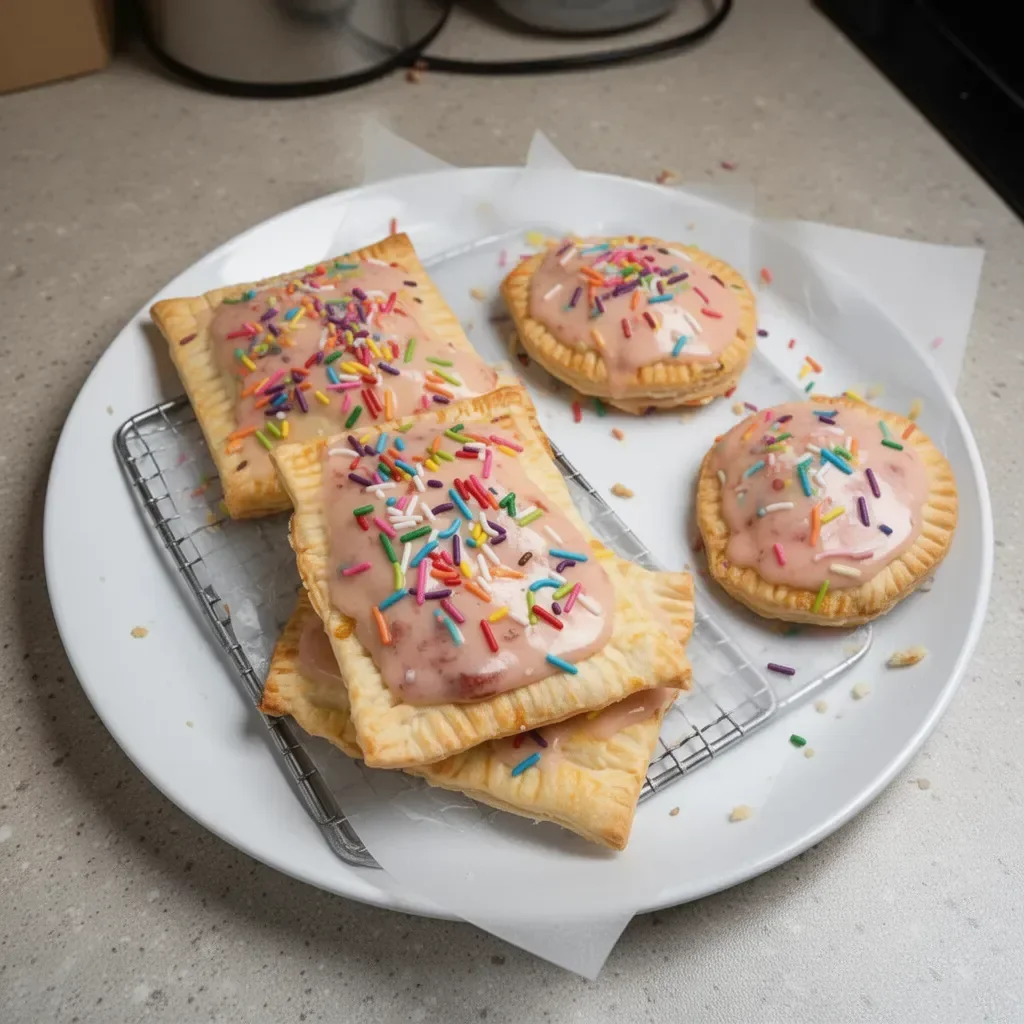
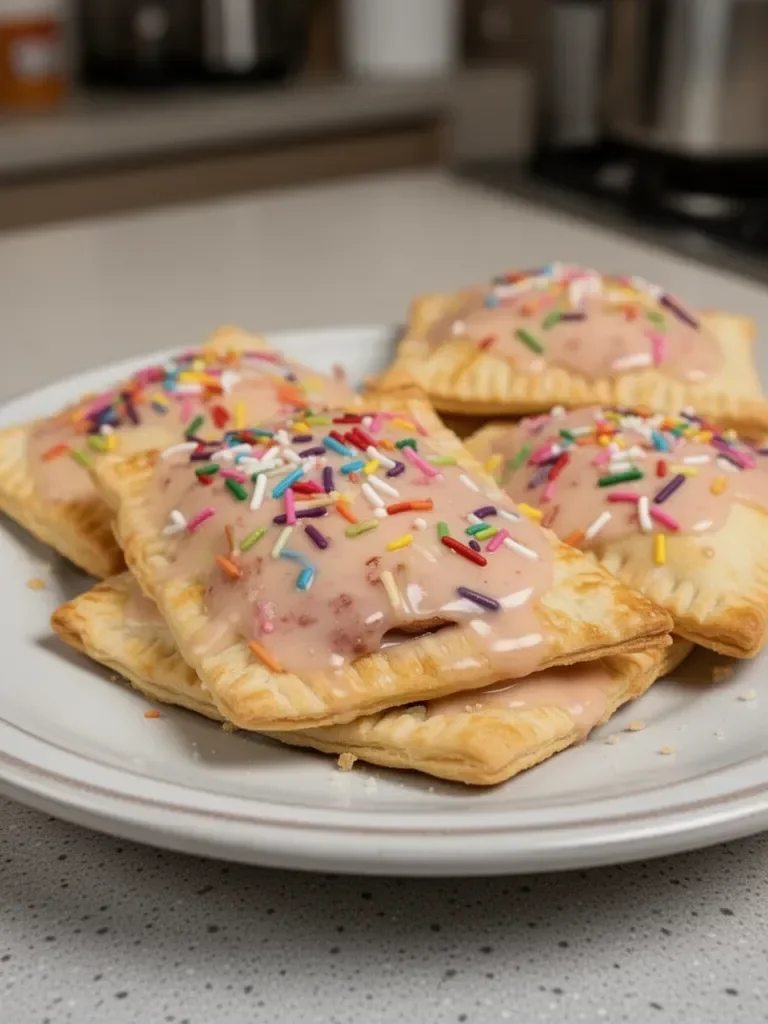
Making homemade pop tarts fills the space with joy and excitement. The flaky, buttery crust envelops a delightful filling, offering a personal touch unlike the store-bought versions. Each bite brings a perfect combination of sweetness and warmth that resonates with everyone. These easy homemade pop tarts with pie crust make excellent snacks or desserts, allowing you to play with various flavors based on what you love.
In the heart of every home, the kitchen thrives as the place where creativity flows and yummy memories are made. With just a few simple ingredients, you can whip up these scrumptious pastries that will surely delight family and friends. So roll up your sleeves, let your creativity shine, and embark on an adventure of flavor with homemade pop tarts that will leave hearts and taste buds craving more.
Understanding Easy Homemade Pop Tarts
Fundamentals
At the core of every great pop tart lies the pie crust. Using a package of rolled pie crust simplifies the process and ensures a flaky, buttery finish that melts in your mouth. This easy-to-handle crust forms the perfect base for adding a burst of fruity jam or preserves.
The choice of jam holds great importance. Whether you go with strawberry, apricot, or raspberry, each flavor adds a unique twist that suits different palates. Opt for something you love, as it’s the heart of each delightful pastry. Incorporating a simple egg wash seals the deal, giving these pop tarts a golden, shiny finish.
Preparation/Setup
Before getting started, preheat the oven to 400°F. It’s essential to prepare your workspace by laying down a sheet of parchment paper on the baking sheet. Then, unroll the pie crust onto another piece of parchment. This allows for easy manipulation, and clean-up is a breeze!
Using an index card as a guide, cut rectangles approximately 3 inches by 5 inches for consistent sizing. Once you’ve cut as many pieces as possible, gather the remaining crust, knead it, and roll it out again to create more rectangles.
Ingredients
To create these delightful pop tarts, gather the following ingredients:
- 1 package of rolled pie crust (a 2 ct. 7.5 oz pack works perfectly)
- 1 cup plus 2 tablespoons of jam or preserves of your choice
- 1 large egg for the egg wash
- 1 cup of powdered sugar for icing
- 2-3 tablespoons of milk or cream to thin the icing
- 2 tablespoons of your jam for filling
- 1/2 teaspoon of vanilla extract for added flavor
Directions
- Preheat your oven to 400°F.
- Lay a sheet of parchment on a baking sheet and unroll the pie crust onto a separate sheet of parchment.
- Cut as many 3 by 5-inch rectangles as possible from each crust.
- Knead any leftover crust together and roll it out to create more rectangles.
- In a small bowl, beat the egg to create the egg wash.
- Place 8 rectangles on the parchment-lined baking sheet. Add 1.5 tablespoons of jam on each.
- Brush the edges of the rectangles with the egg wash and place another rectangle on top.
- Gently pinch the edges and crimp with a fork to seal securely.
- Poke some holes in the tops of the pop tarts. Brush the tops and edges with more egg wash.
- Continue the process until all pastries are ready.
- Bake for 12-15 minutes, until golden brown.
- Once cooled, whisk together the icing ingredients and spread over each pop tart.
- Add sprinkles, freeze-dried berries, crushed rose petals, or enjoy them as-is!
Mastering Your Pop Tart Technique
Technique
Perfecting the art of homemade pop tarts involves a combination of technique and patience. After baking, let them cool to achieve the ideal texture. Patience pays off as this cooling time helps enhance the flavors as well.
When spreading the icing, aim for a thin layer that provides just the right amount of sweetness without overpowering the pop tart’s fruity filling. The beauty lies in the bite—crisp crust combined with sweet jam makes for a delightful experience.
Tips and Tricks
Here are some handy tips to elevate your pop tart game:
- Experiment with different jam flavors to cater to individual preferences.
- For a creative twist, consider adding spices like cinnamon or nutmeg to the icing.
- If using a flaky pie crust without alternate flavors, consider mixing in a hint of citrus zest for a refreshing taste.
- Always bake in batches to ensure even cooking.
Perfecting Your Homemade Pop Tarts
Perfecting Results
Achieving that golden brown finish means keeping an eye on your pop tarts while they bake. Each oven behaves differently, so your baking time might vary. Look for a golden hue to confirm they are ready to come out.
If you prefer a crunchier texture, extend the baking time by a minute or two, but avoid overbaking. The goal is that beautiful, flaky pastry surrounding a warm, gooey center.
Troubleshooting/Variations
Sometimes, things don’t go as planned. Should your edges leak, it may indicate that the filling overflowed during sealing. If you encounter this, ensure the edges are sealed tightly next time.
You can also customize the filling. Swap one jam for another, or combine two varieties for a fun twist! Fruit compote or chocolate spread also yields delicious results.
Serving and Storing Your Pop Tarts
Serving and Presentation
The presentation of your pop tarts can add an extra flair to your indulgent treat. Arrange the pop tarts on a beautiful platter and sprinkle with powdered sugar for an elegant touch.
For parties, serve them alongside an assortment of dipping sauces, such as whipped cream or chocolate drizzle. They make for a fabulous dessert or snack that will surely impress!
Pairings/Storage
Store your homemade pop tarts in an airtight container for up to two days. However, they are best enjoyed fresh for optimal taste and texture. Keep those warm flavors intact by allowing them to cool completely before sealing in a container.
If you have any leftovers, consider reheating in the oven or toaster for that delightful crunch and warm filling again. Whether enjoyed immediately or saved for later, these easy homemade pop tarts with pie crust promise to delight every time.
The joy of making easy homemade pop tarts lies not just in their deliciousness but also in the memories they create. Simple ingredients and cherished techniques come together to produce delightful treats, forging connections and reminding you that creating something special is always within reach.
Print
Easy Homemade Pop Tarts with Pie Crust
- Prep Time: 15 minutes
- Cook Time: 15 minutes
- Total Time: 30 minutes
- Yield: 8 servings
- Category: Dessert
- Method: Baking
- Cuisine: American
- Diet: Vegetarian
Description
Delightful and easy-to-make homemade pop tarts with a flaky pie crust and a fruity filling.
Ingredients
- 1 package of rolled pie crust (a 2 ct. 7.5 oz pack)
- 1 cup plus 2 tablespoons of jam or preserves of your choice
- 1 large egg for the egg wash
- 1 cup of powdered sugar for icing
- 2-3 tablespoons of milk or cream to thin the icing
- 2 tablespoons of your jam for filling
- 1/2 teaspoon of vanilla extract for added flavor
Instructions
- Preheat your oven to 400°F.
- Lay a sheet of parchment on a baking sheet and unroll the pie crust onto a separate sheet of parchment.
- Cut as many 3 by 5-inch rectangles as possible from each crust.
- Knead any leftover crust together and roll it out to create more rectangles.
- Beat the egg in a small bowl to create the egg wash.
- Place 8 rectangles on the parchment-lined baking sheet. Add 1.5 tablespoons of jam on each.
- Brush the edges of the rectangles with the egg wash and place another rectangle on top.
- Pinch the edges and crimp with a fork to seal securely.
- Poke some holes in the tops of the pop tarts. Brush the tops and edges with more egg wash.
- Bake for 12-15 minutes, until golden brown.
- Whisk together the icing ingredients and spread over each pop tart.
- Add sprinkles, freeze-dried berries, crushed rose petals, or enjoy them as-is!
Notes
Experiment with different jam flavors and consider adding spices for a creative twist.
